
Motor body
The compact motor carries the switch and speed control while the base determines how the tool meets the work.
Learn how a compact router holds the bit, rides on its base, controls depth, follows guides, and handles dust only when the base or accessory supports it.
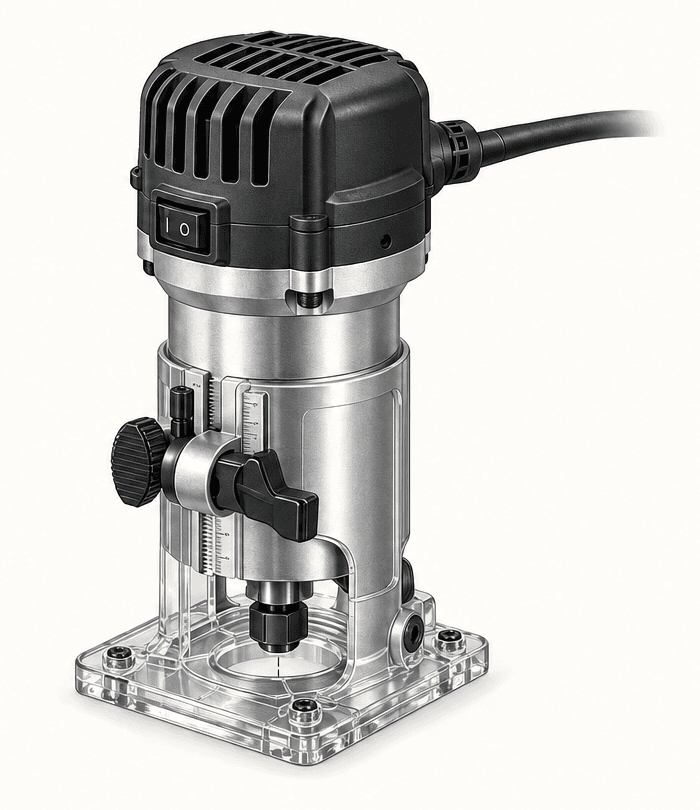
A substantial exploded study maps twelve parts and systems to their functions. The drawings use model-specific manufacturer sources, and the parts list remains readable below the artwork on small screens.
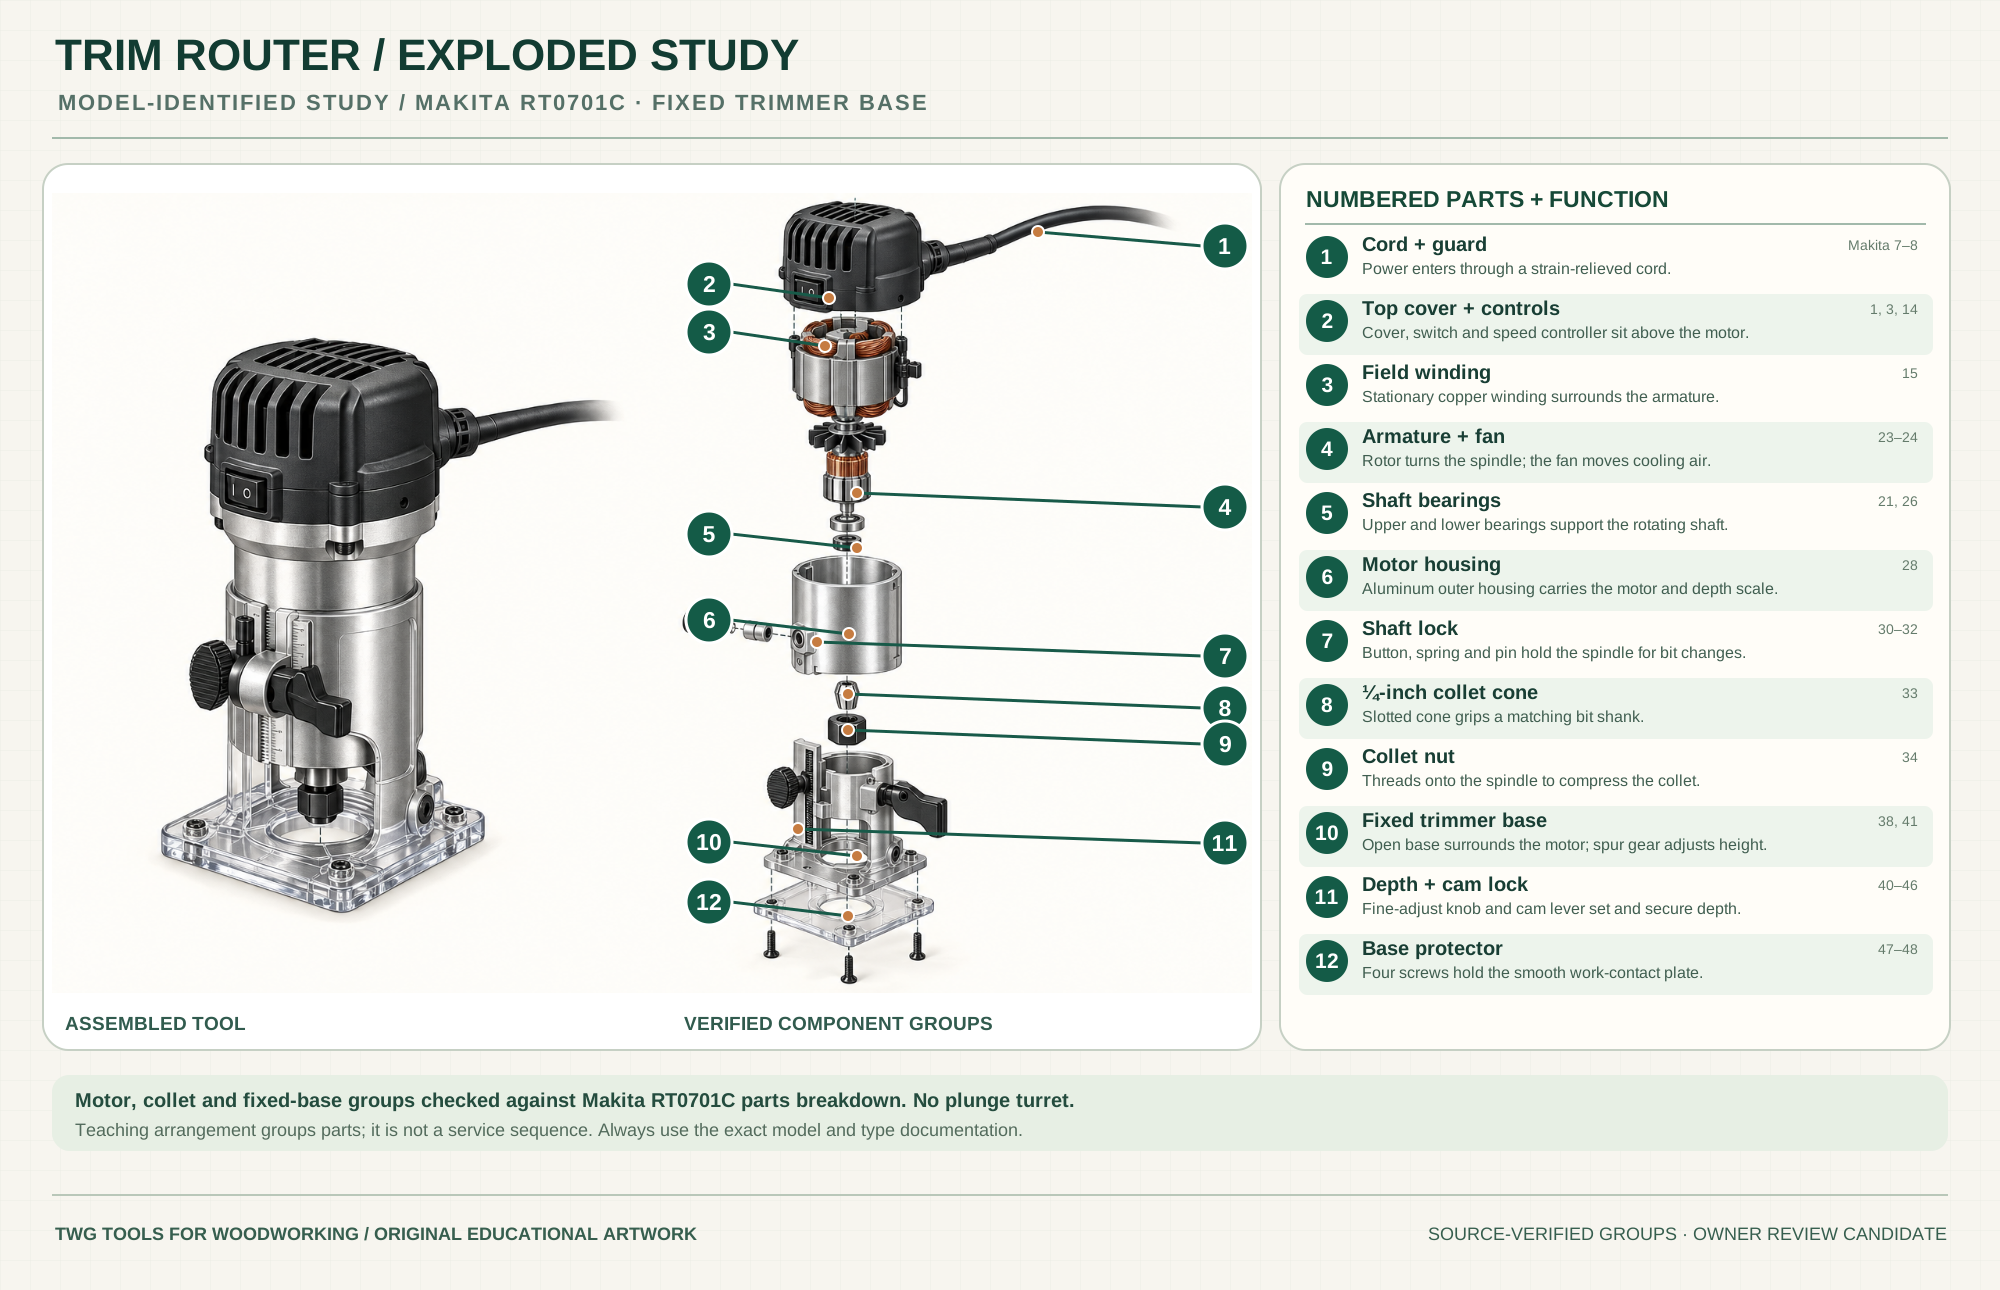
Bring power into the covered motor through a strain-relieved entry.
Parts 7–8Protect the top of the motor; the switch and controller set operation and speed.
Parts 1, 3, 14Stationary winding surrounds the rotating armature.
Part 15The rotating motor group carries the spindle and cooling fan.
Parts 23–24Support the armature at its upper and lower ends.
Parts 21, 26Encloses the motor group and carries the depth-scale reference.
Part 28Button, spring and pin hold the spindle while the bit is changed with power disconnected.
Parts 30–32Grips a matching clean bit shank when compressed.
Part 33Threads onto the spindle to tighten the collet.
Part 34Surrounds and supports the motor; its spur gear helps adjust depth.
Parts 38, 41Set cutting depth and secure the motor in the base.
Parts 40–46Provide the smooth work-contact surface beneath the fixed base.
Parts 47–48Technical references: Makita RT0701C official parts breakdown · Makita RT0701C instruction manual. Original educational artwork depicts verified component groups and their relationships; it is not a service sequence or a replacement for the exact model manual.
A trim router is a compact router for light edge, template and small joinery work. It is easier to handle on narrow stock than many full-size routers, but its smaller base and common 1/4-inch collet limit large bits and heavy cuts. A plunge base is an optional, model-specific accessory; the ordinary fixed base holds a depth set before the pass.
The motor turns a spindle. A correctly sized collet clamps the bit shank to that spindle; the cutter extends through the base opening while the subbase rides on the work. Set the bit projection with power disconnected, lock the base, and test the depth on scrap. A bearing, edge guide or template controls the path only when matched to that cut.
The compact motor carries the switch and speed control while the base determines how the tool meets the work.
The spindle turns the collet, and the collet grips the bit. Clean shanks and correct insertion depth are essential.
Roundover, chamfer, straight, flush-trim, rabbet, and pattern bits change the cut shape, guidance and depth plan; feed direction follows the workpiece and setup.
The base holds the motor height, the subbase rides on the work, and the lock keeps the bit depth from creeping during the pass.
Edge guides, template guides, offset bases, and plunge bases are system-specific, so fit matters before any accessory purchase.
Dust collection is usually an add-on path because compact routers often need a fixed-base adapter, plunge-base adapter, nozzle, hood, or vacuum fitting.
These decisions make the mechanism useful at the bench.
Profile choice changes both the shape of the cut and the setup risk.
Outside-edge routing usually moves against cutter rotation; inside openings reverse the walk around the work.
Lock the base after a shallow setting, then test in scrap before the visible work.
A bearing-guided flush-trim bit follows a sound template or finished edge while its cutters remove only the overhang. Confirm that the bearing actually rides the reference before starting.
A roundover or chamfer bit changes an exposed edge. Choose a bit within the router's rating, support the full base, and use shallow passes to avoid tearout and loss of control.
Use a straight or spiral bit with a secure straightedge or edge guide. Set depth in stages; for a stopped groove, use a compatible plunge base or another safe entry method specified by the bit and tool makers.
Use the steps for a first pass, then inspect the work before changing the setup.
A trim router is a compact router motor and base used for edge profiles, flush trimming, hinge work, light grooves, pattern work, and small joinery.
A roundover softens, a chamfer bevels, a flush-trim bit follows a bearing, and a straight bit cuts grooves or pockets.
Small changes matter. Set depth with the router off, lock the base, confirm bit exposure, and make test cuts in scrap.
Feed direction changes with outside edges, inside openings, handheld routing, and table setups. Confirm the cut before the bit meets the wood.
The router is only as stable as the base support under it. Narrow edges, small parts, and tipping cuts need extra support or a different setup.
Fixed bases, plunge bases, offset bases, tilt bases, guide subbases, and template-guide systems are not interchangeable across every router.
DeWalt and Makita show add-on adapters or nozzles for specific bases. Bosch lists product dust limits while also selling accessory dust paths.
Edge guides, roller guides, guide rods, and template guides depend on the manufacturer system and the exact base.
Small routers are easier to move, but the workpiece still needs strong support, especially with narrow stock and bearing-guided cuts.
Fixed-base adapters attach to specific router bases; they do not fit every compact router.
Plunge-base adapters are separate from fixed-base adapters and depend on the plunge base design.
Hoods, nozzles, and subbases work only when their shape lines up with the bit opening and hose path.
Vacuum adapters still need the right hose diameter, clearance, and workholding plan.
When no fitted accessory exists, use a broader shop dust plan and clean the work area between passes.
Stop the tool and disconnect power before investigating a fault or changing a part.
Check bit sharpness, resin, feed pace, cut depth and whether the base or workpiece can rock.
Stop and disconnect power. Inspect the fixed-base lock and fine adjuster; do not continue with a slipping motor.
Confirm a continuous bearing/template reference or a secure edge guide, full base support and the correct feed direction.
The manuals name specific models; compare their part numbers with the tool in your hand. Video lessons are linked to publisher pages with descriptions or transcripts.
Fixed trimmer base, collet, bit installation, depth setting, guides, feed direction and safety.
A cordless compact router's fixed base, collet, depth controls, guide and dust shroud.
Shows how a trimmer base and a separate plunge base use different depth controls.
WoodWorkers Guild of America: flush trimming, V-bit sign work and an edge profile. The publisher provides a lesson description and transcript.
WoodWorkers Guild of America: bit mounting, workholding, depth, feed direction and stopping the cut. Long-form lesson.
The Wood Whisperer video, hosted by Popular Woodworking: bearing-guided flush trimming and burn-free edges.
These links lead to maker-owned product pages or tool families. Accessory and abrasive suppliers are treated separately below.
Guides, bases and dust fittings must match the exact model and base. The recovered research includes examples from DeWalt, Bosch and Makita; use the manuals above before ordering.
Compare the Routing family →Continue through the Tools library