
Wheels and tires
Two enclosed wheels carry the continuous band on tires. Check tracking with the saw disconnected, as directed by the manual.
Follow the continuous blade around two wheels, then set its tracking, guides, table and fence for curves or resawing.
An original educational poster groups twelve model-grounded parts and systems. The numbered descriptions remain readable below the artwork on narrow screens.
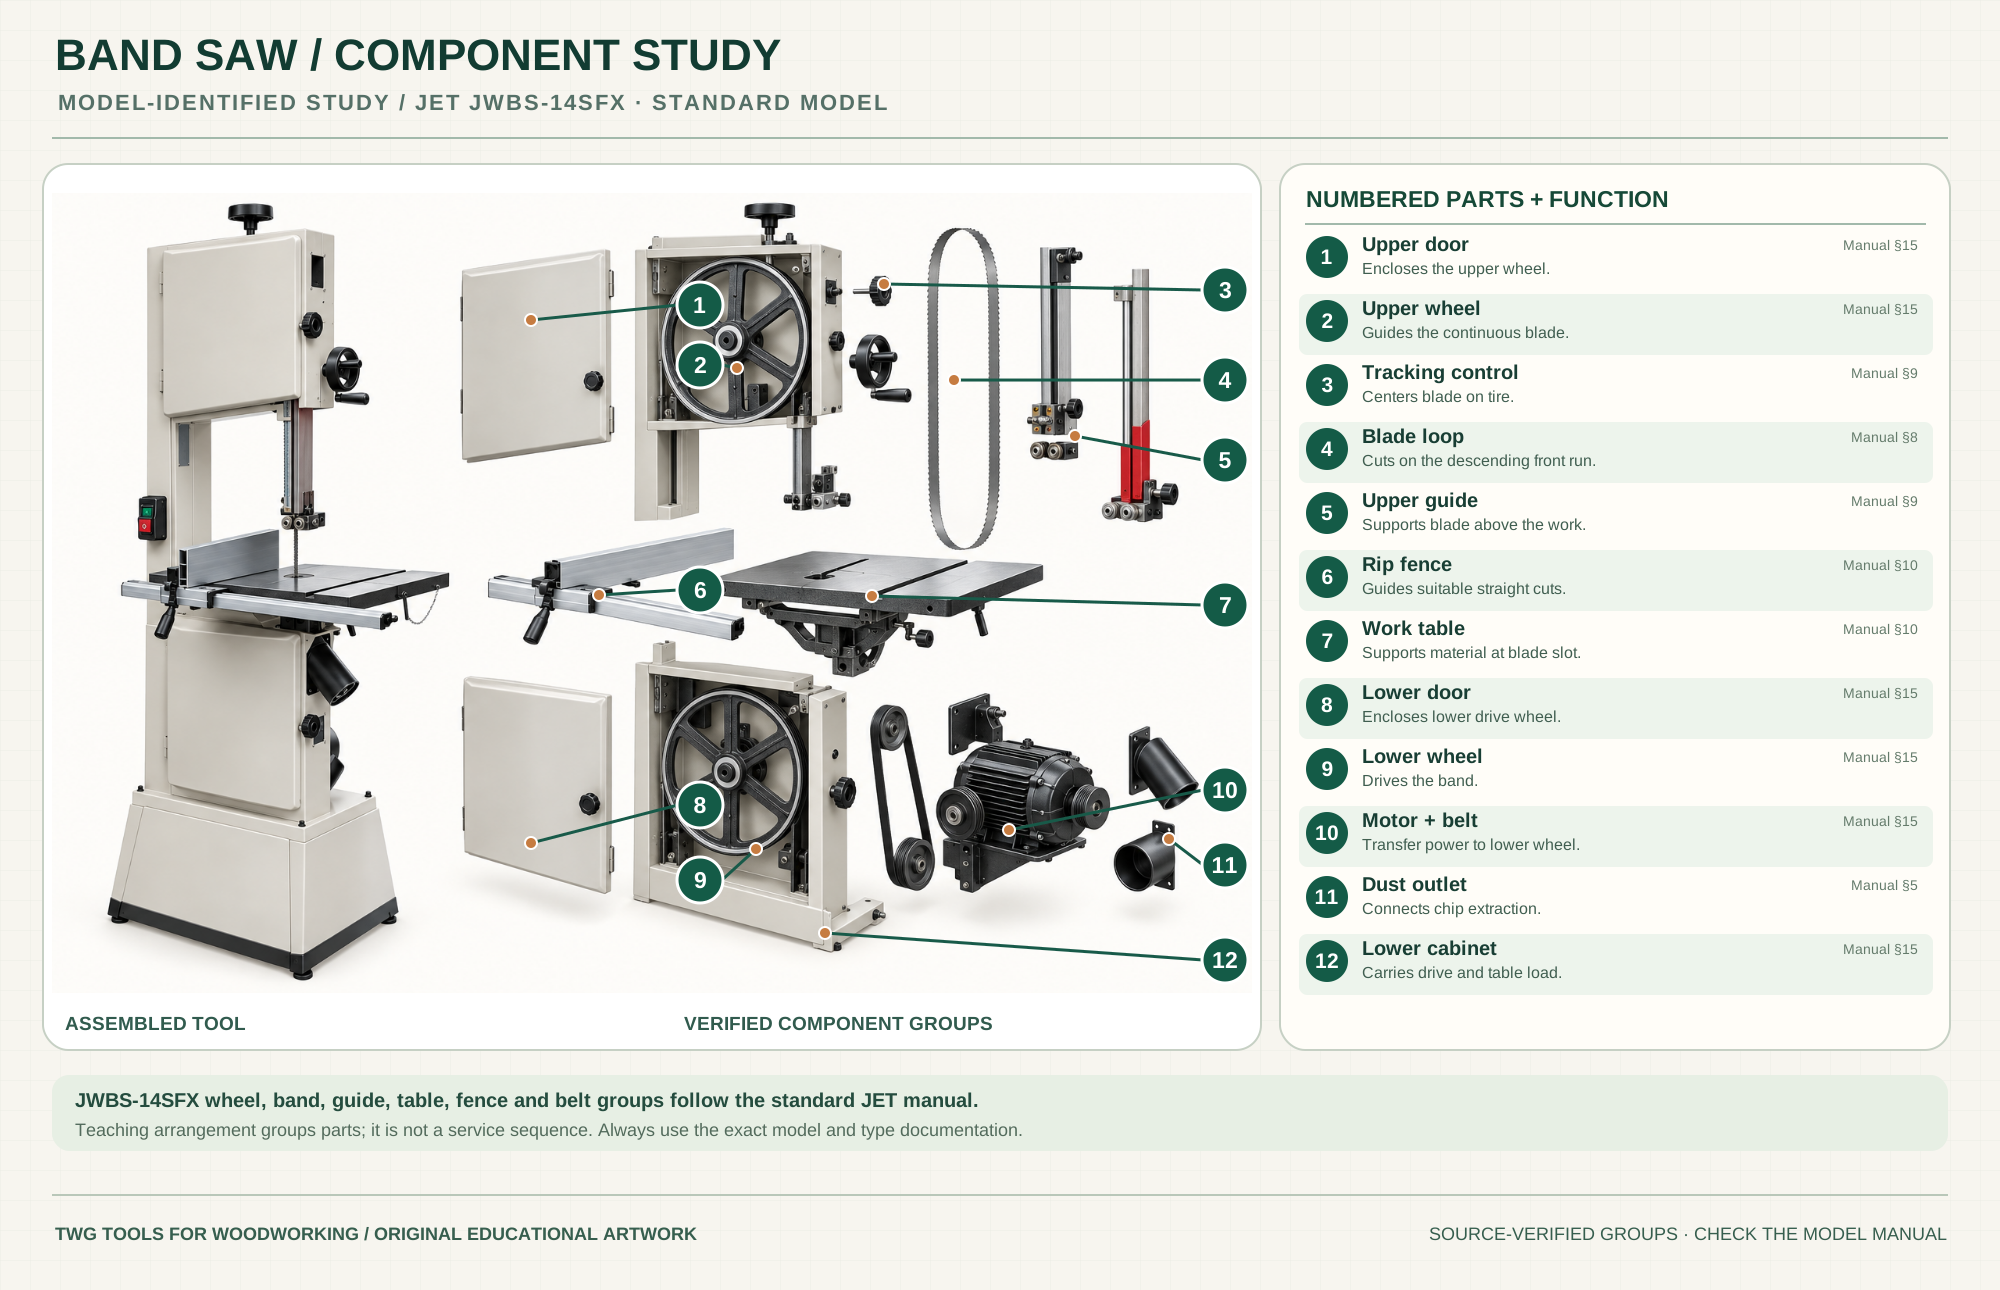
Encloses the upper wheel.
Manual §15Guides the continuous blade.
Manual §15Centers the blade on its tire.
Manual §9Cuts on the descending front run.
Manual §8Supports blade above the work.
Manual §9Guides suitable straight cuts.
Manual §10Supports stock at the blade slot.
Manual §10Encloses the lower drive wheel.
Manual §15Drives the band through its tire.
Manual §15Transfer power to lower wheel.
Manual §15Connects chip extraction.
Manual §5Carries drive and table load.
Manual §15Technical references: JET JWBS-14SFX standard-model manual, setup and illustrated parts. Original educational artwork depicts verified component groups and their relationships; it is not a service sequence or a replacement for the exact model manual.
A band saw carries a continuous toothed blade around upper and lower wheels; its cutting run descends through a table. It can cut curves, rip or resaw thick stock within rated capacity. It differs from a scroll saw's short reciprocating blade and a table saw's circular blade. The reference is the standard JET JWBS-14SFX, not the newer BLACK revision.
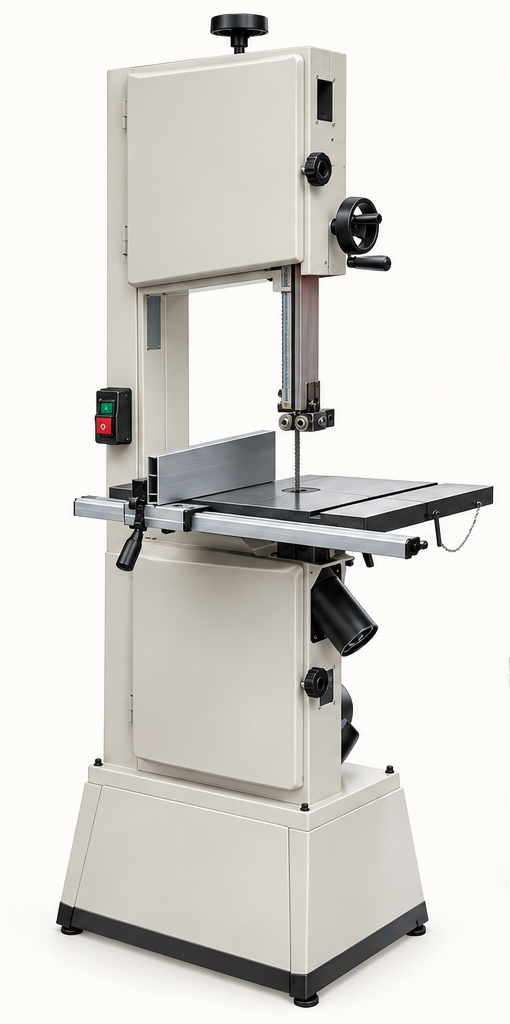
The motor drives a lower wheel through the documented belt drive. The upper wheel tensions and tracks the loop; upper and lower guides stabilize its cutting run without replacing correct blade choice and feed. A table and optional fence support work. The separated illustration groups documented assemblies for teaching and is not an exact service sequence.
Two enclosed wheels carry the continuous band on tires. Check tracking with the saw disconnected, as directed by the manual.
Blade width, tooth pitch and appropriate tension depend on the intended curve or resaw. The top adjustment changes tension.
Guide bearings or blocks control lateral movement near the cut; follow the model's adjustment sequence and clearance instructions.
The table supports stock at the blade slot. The fence provides a reference for suitable straight cuts; it does not make a wrong blade track straight.
A lower-cabinet motor and belt turn the driven wheel. Disconnect power before opening cabinets.
Cabinet doors shield moving wheels. Dust ports connect to appropriate collection; guards and doors stay closed during cutting.
These decisions make the mechanism useful at the bench.
Use a narrow blade for tighter curves and an appropriate wider blade for straight resaw work, within the JWBS-14SFX manual's width and length limits.
With power disconnected, tension and track the blade, then set guides and upper guide height to suit stock thickness.
Keep the work on the table, feed at a rate the teeth can clear, and use relief cuts for curves tighter than the chosen blade can turn.
Use a blade compatible with the curve radius, leave waste for final shaping and make relief cuts where useful.
Joint a reference face or edge, choose a suitable blade, set fence and guides, and test drift on scrap.
Cut turning or carving blanks with stable flat support; secure round stock in a suitable jig so it cannot roll.
Use the steps for a first pass, then inspect the work before changing the setup.
The upper and lower wheels keep one continuous band in motion. The front working run cuts downward into the table.
Tension keeps the band properly supported; tracking centers its path on the tires. Guide adjustment follows, not precedes, those checks.
A blade may favor an angle under load. Check actual test cuts, blade condition and fence alignment rather than forcing stock sideways.
A wide blade cannot turn as tightly as a narrow blade without binding. Relief cuts can release waste before a difficult curve.
Wheel size, throat, motor and resaw height vary; a small saw may suit curves but not large resaw stock.
Blade speed and construction differ. This guide describes the woodcutting JWBS-14SFX; do not assume metalcutting capability.
Bearings and blocks use different clearances. Follow the exact model's manual rather than a generic setting.
The pictured reference is the standard JWBS-14SFX. The later BLACK revision has different finish and documentation.
Stop the tool and disconnect power before investigating a fault or changing a part.
Inspect blade sharpness, tension, tracking, guides, feed pressure and resaw fence alignment.
Check dull teeth, excessive feed force, unsuitable tooth pitch and stock pinching.
Stop immediately; unplug and inspect tracking, tension, tires and blade condition.
Use the exact tool manual for setup, limits and replacement parts. These lessons, documents and model pages teach relevant techniques or help compare real variations.
Official standard-model configuration and documentation link.
WoodWorkers Guild of America demonstrates blade and fence choices for resawing.
Demonstrates releasing waste to reduce blade twisting around a curve.
Test-cut method for checking blade-to-table alignment.
These maker-owned links document relevant tools and tool brands. A product brand may use another company's factory; compare the exact model before choosing parts or accessories.
Cutters, abrasives, guards, guides, dust fittings and service parts vary by tool. Check the model plate and manufacturer manual before ordering or changing a component.
Compare the Saws family →Continue through the Tools library