
Motor and drive
The motor and gear housing turn rotation into blade travel. The exact mechanism and service parts are identified in the Makita drawing.
See how a clamped narrow blade reciprocates through the shoe, with controlled speed and orbital action for curves and openings.
An original educational poster groups twelve model-grounded parts and systems. The numbered descriptions remain readable below the artwork on narrow screens.
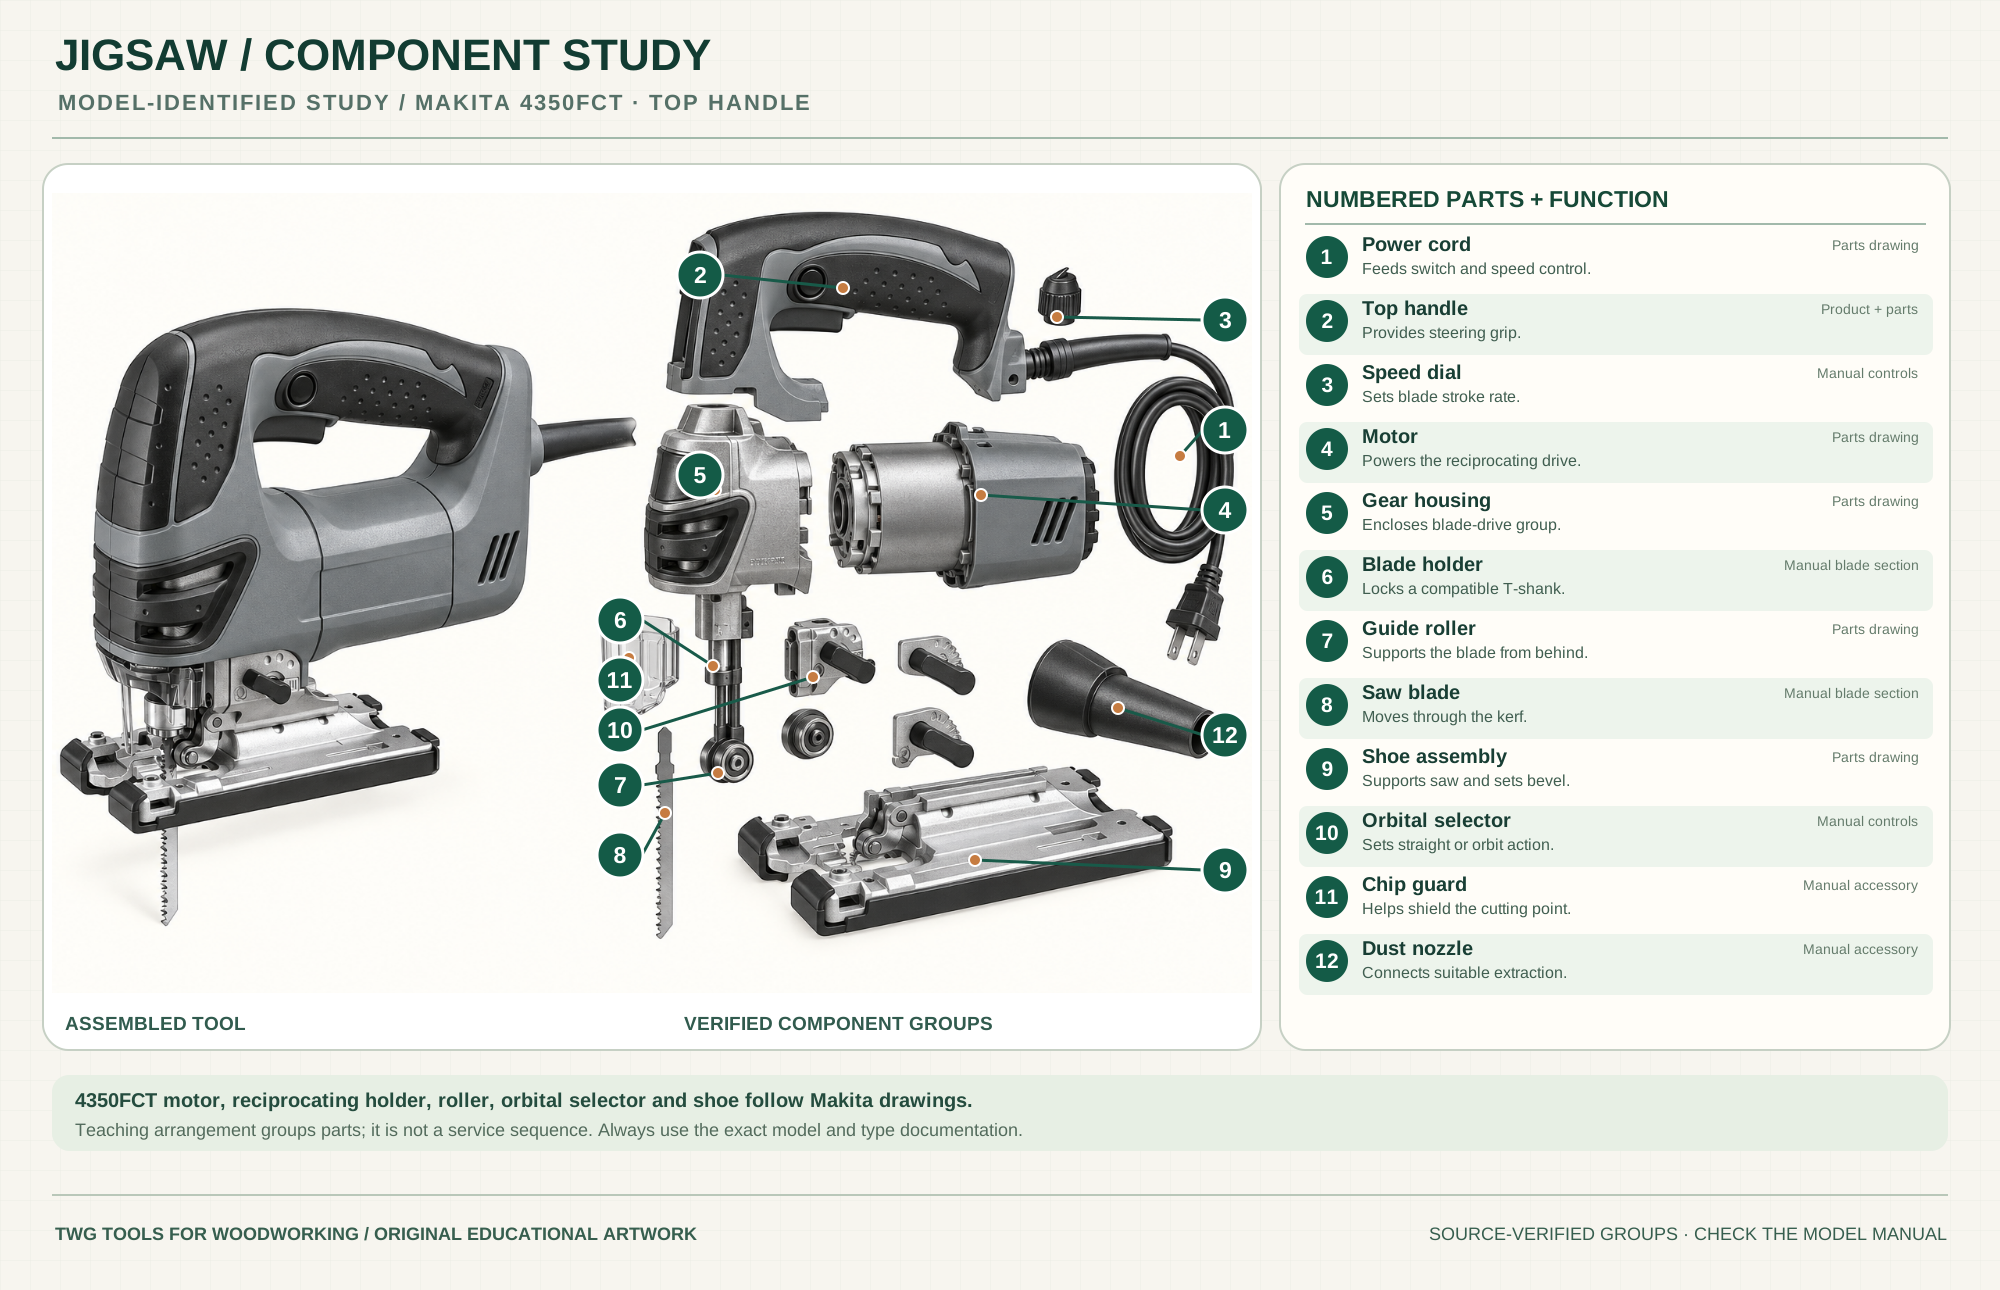
Feeds switch and speed control.
Parts drawingProvides steering grip.
Product and partsSets blade stroke rate.
Manual controlsPowers the reciprocating drive.
Parts drawingEncloses the blade-drive group.
Parts drawingLocks a compatible T-shank.
Manual blade sectionSupports blade from behind.
Parts drawingMoves up and down through kerf.
Manual blade sectionSupports saw and sets bevel.
Parts drawingSets straight or orbital action.
Manual controlsHelps shield the cutting point.
Manual accessoryConnects suitable extraction.
Manual accessoryTechnical references: Makita 4350FCT manual · Makita 4350FCT parts breakdown. Original educational artwork depicts verified component groups and their relationships; it is not a service sequence or a replacement for the exact model manual.
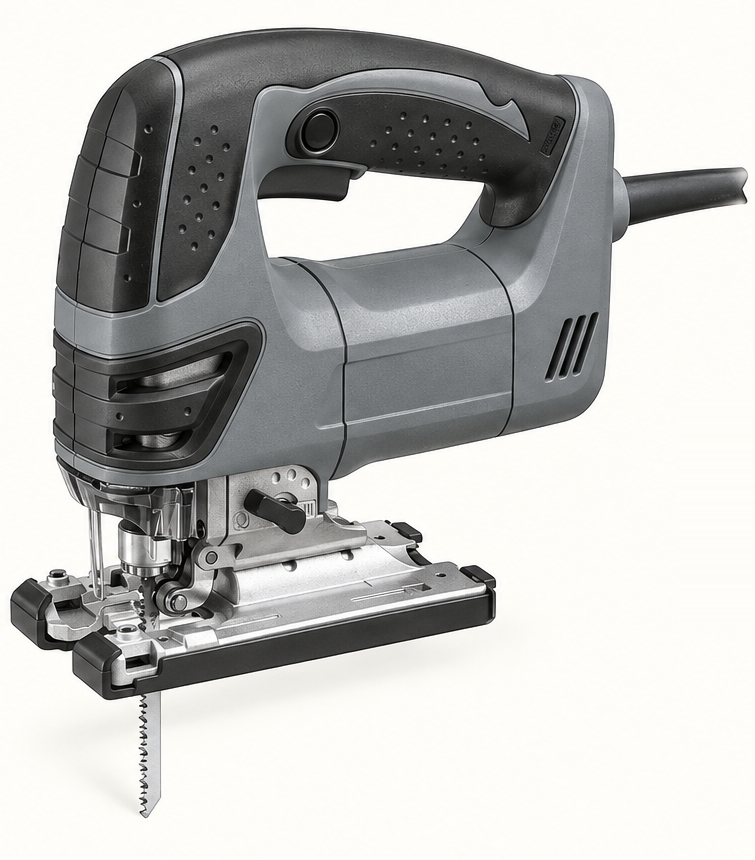
A jigsaw moves a narrow blade up and down through a supporting shoe, letting the user steer curves and internal openings. The Makita 4350FCT reference is a corded top-handle design with variable-speed control and selectable orbital action. It is not a band saw, whose continuous blade is supported by two wheels, and it does not promise table-saw straightness in thick stock.
The motor drives a gear and reciprocating blade holder. The tool-free clamp secures a compatible T-shank blade; a guide roller supports it behind the cutting edge. The 4350FCT has three orbital settings plus straight cutting, and a tilting shoe. The component poster shows documented groups for teaching rather than exact hidden geometry or service order.
The motor and gear housing turn rotation into blade travel. The exact mechanism and service parts are identified in the Makita drawing.
The model accepts T-shank blades in a tool-free holder. Confirm full seating and tooth direction with power disconnected.
The roller supports the blade behind the cut; it cannot prevent all wandering when the blade is bent or overfed.
The model offers straight action and three orbital stages. More orbit can increase cut speed but may worsen edge finish.
The shoe supports the saw on stock and tilts for bevel cuts; keep its face firmly on the work.
The top handle carries the switch and speed control. The cord and dust nozzle should not interfere with steering.
These decisions make the mechanism useful at the bench.
Use a suitable T-shank wood blade for material thickness and turn radius; fine teeth and less orbit favor cleaner edges.
Select straight or orbital action using the 4350FCT guidance, then set speed for the blade and material.
Clamp and support the work, guide the saw without twisting the blade, and leave space below for blade travel.
Cut outside the line for final shaping and choose a blade narrow enough for the curve radius.
Drill an entry hole where appropriate; insert the stationary blade before starting. Use model-specific plunge directions only where the manual permits.
Tilt and lock the shoe, verify blade clearance and test the line offset on scrap.
Use the steps for a first pass, then inspect the work before changing the setup.
Straight mode moves the blade up and down. Orbital stages add forward motion on a cutting stroke; choose them for the material and finish, not by habit.
A narrow blade can bend through thick wood, leaving a beveled edge despite a square shoe. Slow the feed, use a suitable blade and check both faces.
A jigsaw cannot cut a zero-radius internal corner. Plan a relief hole or finish the corner with another tool.
Blade tooth direction, support and face orientation affect chips. Test in scrap before cutting a visible surface.
The 4350FCT uses a top handle. Barrel-grip versions place the hand closer to the work but differ in control layout.
Orbital action helps some woodcuts clear chips faster; straight mode can improve control or finish in sensitive work.
Battery models differ in controls and mass. Check the exact model's blade and shoe instructions.
Narrow scroll, clean-cut, reverse-tooth and thicker straight-cut blades serve different edges and radii; verify compatibility.
Stop the tool and disconnect power before investigating a fault or changing a part.
Check blade bend, feed force, blade choice, guide roller and shoe lock.
Try a suitable clean-cut blade, reduced orbit, backing and a scrap test.
Stop, unplug and check exact T-shank seating and the clamp's condition.
Use the exact tool manual for setup, limits and replacement parts. These lessons, documents and model pages teach relevant techniques or help compare real variations.
Official blade installation, speed, orbital action, bevel and safety directions.
Official numbered component drawing for this top-handle model.
Official T-shank, orbital-setting and shoe features.
WoodWorkers Guild of America demonstrates a model-dependent method for internal cut entry; check your manual first.
Explains blade and material matching, speed and orbital cutting.
These maker-owned links document relevant tools and tool brands. A product brand may use another company's factory; compare the exact model before choosing parts or accessories.
Cutters, abrasives, guards, guides, dust fittings and service parts vary by tool. Check the model plate and manufacturer manual before ordering or changing a component.
Compare the Saws family →Continue through the Tools library