
Blade and flanges
The blade seats on the spindle between inner and outer flanges under the specified bolt. Check diameter, arbor, tooth direction and speed rating.
Guide a portable rotating blade with a stable shoe, working guard and supported workpiece.
An original educational poster groups twelve model-grounded parts and systems. The numbered descriptions remain readable below the artwork on narrow screens.
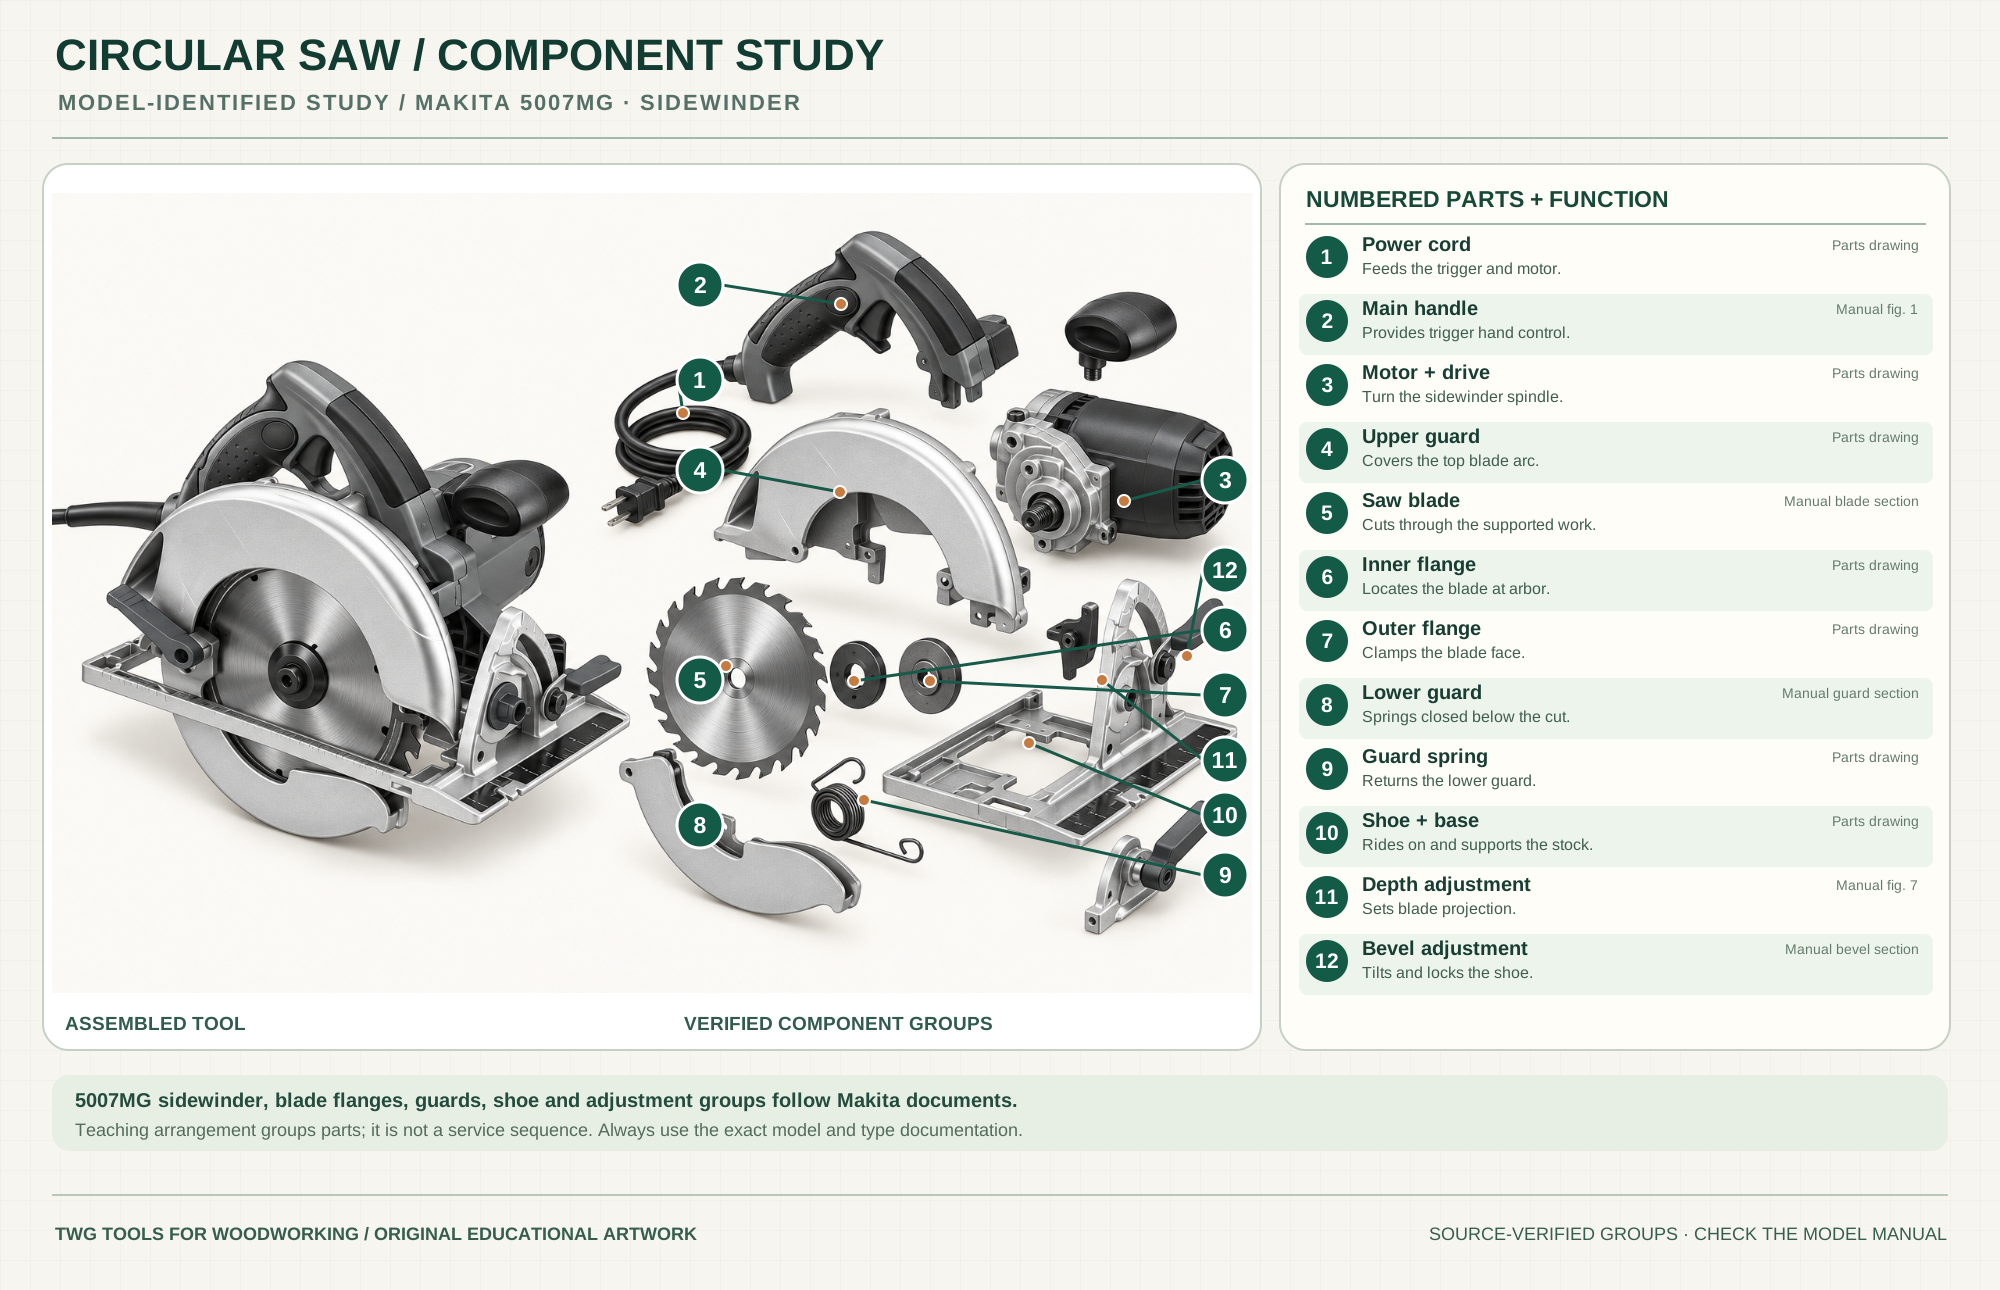
Supplies the switch and motor.
Parts drawingProvides trigger-hand control.
Manual fig. 1Turn the sidewinder spindle.
Parts drawingCovers the upper blade arc.
Parts drawingCuts through supported stock.
Manual blade sectionLocates blade on arbor.
Parts drawingClamps blade face.
Parts drawingCloses over teeth below the cut.
Manual guard sectionReturns the lower guard.
Parts drawingRides on and supports the work.
Parts drawingSets and locks blade projection.
Manual fig. 7Tilts and locks the shoe.
Manual bevel sectionTechnical references: Makita 5007MG manual · Makita 5007MG parts breakdown. Original educational artwork depicts verified component groups and their relationships; it is not a service sequence or a replacement for the exact model manual.
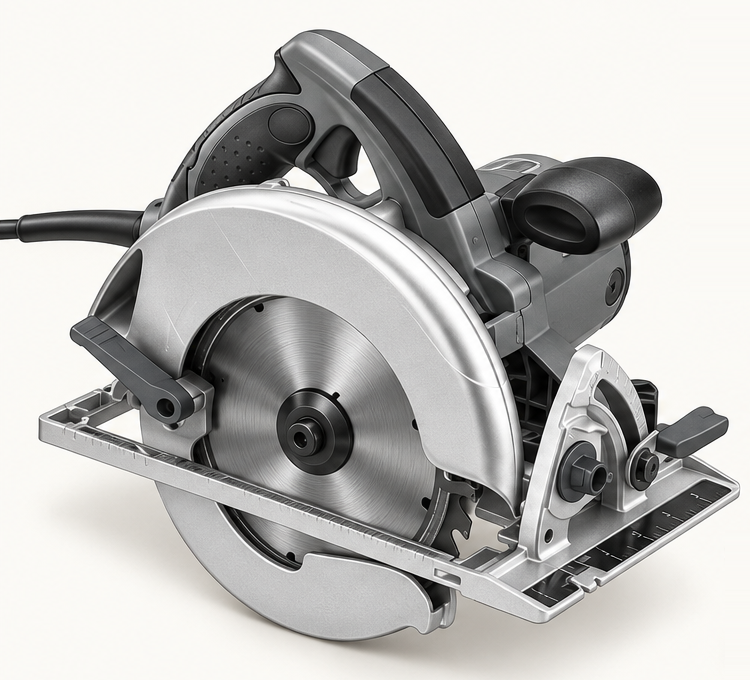
A handheld circular saw moves through stationary, supported wood while its shoe rides the surface. The Makita 5007MG is a corded sidewinder with a 7¼-inch blade; its motor lies across the blade drive, unlike a worm-drive configuration. A track saw has a dedicated rail and plunge system, so a straightedge-guided circular saw should not be described as one.
The motor turns a spindle and arbor, which hold the blade between flanges. A fixed upper guard covers the top; a spring-return lower guard exposes the teeth only as the cut advances. The shoe establishes depth and bevel, and remains supported on the work. The poster separates documented groups for education, not service order.
The blade seats on the spindle between inner and outer flanges under the specified bolt. Check diameter, arbor, tooth direction and speed rating.
The upper guard is fixed. The lower guard retracts during the cut and must spring closed freely when the saw leaves the work.
The 5007MG is a sidewinder. Its field, armature and spindle drive are identified in the official parts breakdown.
The base rides on stock; depth and bevel levers lock its position relative to the blade.
Two-hand control helps keep the saw aligned while the blade enters and exits. Keep the cord behind the cut.
The model's cut-line features help alignment, but test the true blade offset. Manage dust without blocking the lower guard.
These decisions make the mechanism useful at the bench.
Support the panel so neither kerf nor offcut binds the blade. Keep the section under the shoe stable throughout the cut.
With power disconnected, set the model's depth lever so the blade projects only as the manual directs below the work, then lock it.
Keep the broad shoe flat on the material. Check straightedge offset and blade clearance before starting.
Use a stable sacrificial support or equivalent arrangement that keeps the whole sheet from sagging into the kerf.
Mark the waste side, clamp or otherwise secure the board, and use a square or guide where needed.
Set and lock bevel angle, check shoe support and test the changed blade-to-guide offset in scrap.
Use the steps for a first pass, then inspect the work before changing the setup.
The blade removes material on one side of a line. The shoe edge is offset from the tooth path; measure that offset with the actual blade and bevel.
A pinched, twisted or misaligned blade can drive the saw back. Support stock and stand clear of the blade line.
Never tie open the lower guard. If it binds, stop and repair the guard before use.
Tooth count and grind affect chip clearance and edge finish. Use wood blades matching the model's diameter, bore and rating.
They package the motor and drive differently. Do not infer 5007MG parts or service steps for a worm-drive saw.
Battery models differ in weight, runtime and braking; exact manual and battery system govern.
Blade placement changes sightline and where most of the shoe supports the cut. Check each model.
A track saw's dedicated rail and plunge action form a different guided system.
Stop the tool and disconnect power before investigating a fault or changing a part.
Check straightedge security, shoe contact, blade condition and feed force.
Stop immediately; check stock support, kerf closure, blade sharpness and alignment.
Unplug and inspect the guard path and spring; do not operate until repaired.
Use the exact tool manual for setup, limits and replacement parts. These lessons, documents and model pages teach relevant techniques or help compare real variations.
Official depth, bevel, guard, blade-change and kickback directions.
Official numbered component drawing for this sidewinder reference.
Blade size and model-specific magnesium saw configuration.
WoodWorkers Guild of America demonstrates planning and using a straightedge guide on sheet stock.
Shows guided crosscuts and a visible cut indicator.
These maker-owned links document relevant tools and tool brands. A product brand may use another company's factory; compare the exact model before choosing parts or accessories.
Cutters, abrasives, guards, guides, dust fittings and service parts vary by tool. Check the model plate and manufacturer manual before ordering or changing a component.
Compare the Saws family →Continue through the Tools library