
Blade and arbor
The specified blade sits between arbor flanges beneath a tightened nut. Use the exact diameter, arbor and speed limits in the Type 2 manual.
Understand the blade, arbor, guarding, riving knife, fence, height and bevel controls that make a table saw a precise but demanding cutting station.
An original educational poster groups twelve model-grounded parts and systems. The numbered descriptions remain readable below the artwork on narrow screens.
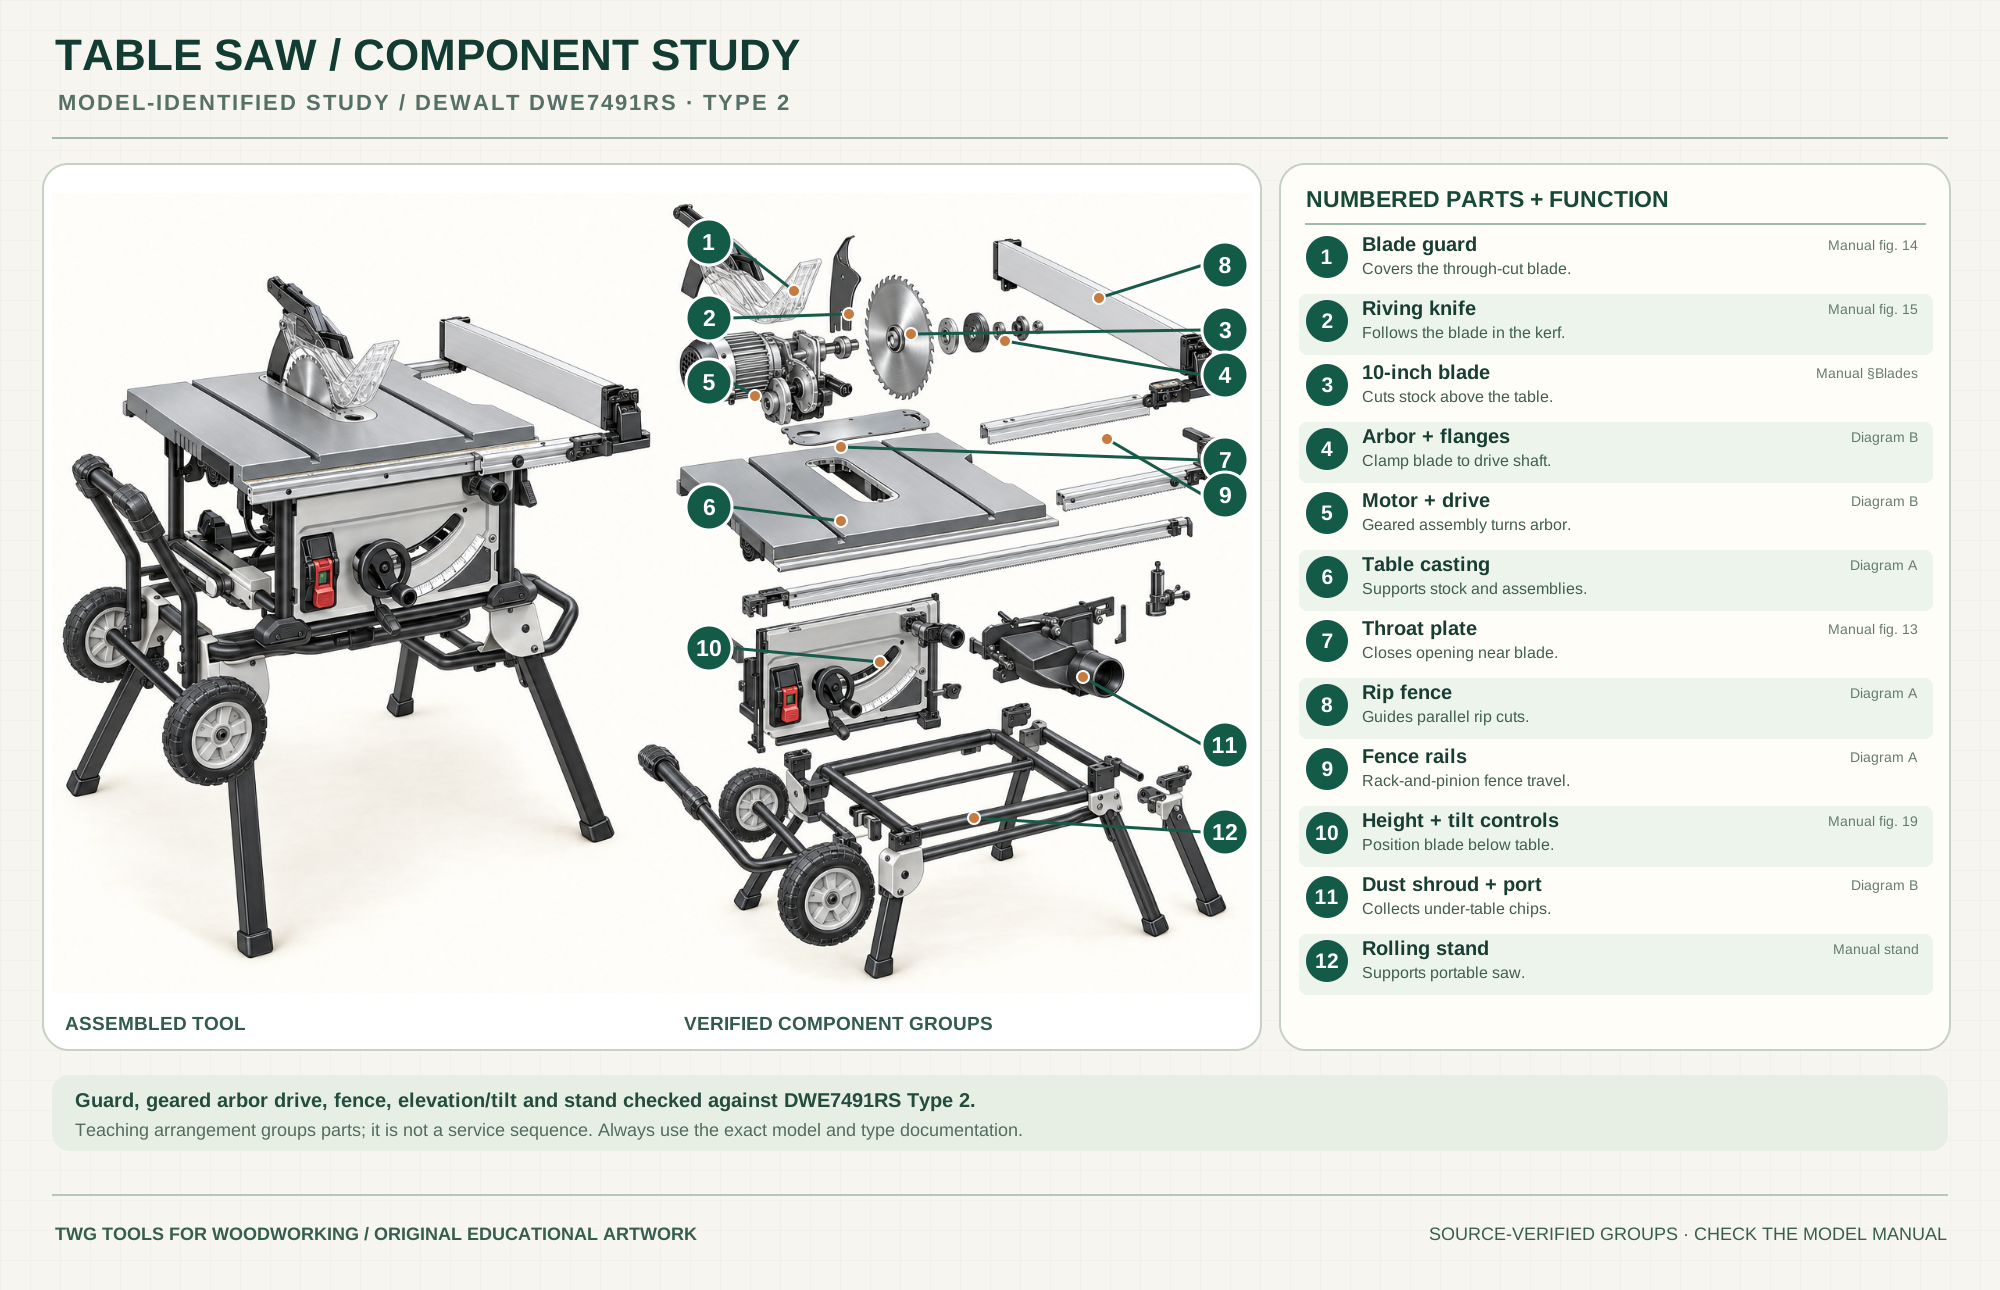
Covers the blade during applicable through-cuts.
Type 2 manual fig. 14Follows the blade through the kerf to help resist closing stock.
Manual fig. 15Cuts the material above the table when correctly mounted.
Manual blade sectionClamp the blade to the drive shaft.
Type 2 diagram BTransmit power through the documented gear group to the arbor.
Type 2 diagram BSupports stock and the saw's guide assemblies.
Type 2 diagram ACloses the tabletop opening around the blade.
Manual fig. 13Guides an edge for a parallel rip cut.
Type 2 diagram APosition the rack-and-pinion fence system.
Type 2 diagram ASet blade elevation and bevel relative to the table.
Manual fig. 19Direct under-table chips toward a collector.
Type 2 diagram BSupports the portable saw when deployed and locked.
Type 2 manual stand sectionTechnical references: DeWalt DWE7491RS Type 2 manual · DeWalt DWE7491RS Type 2 exploded diagram A · DeWalt DWE7491RS Type 2 exploded diagram B. Original educational artwork depicts verified component groups and their relationships; it is not a service sequence or a replacement for the exact model manual.
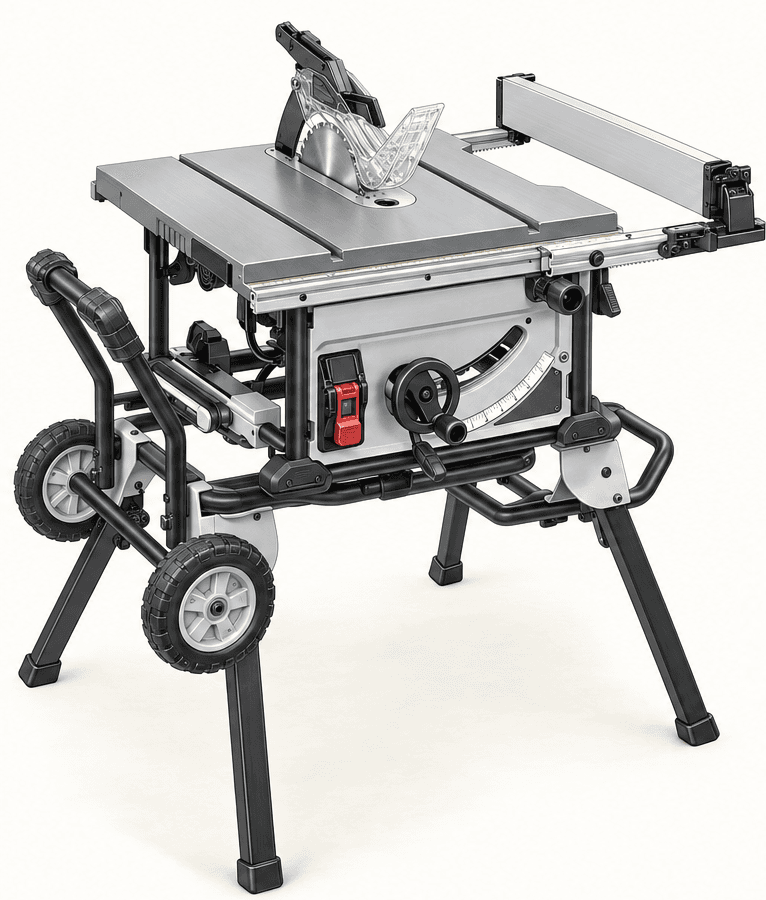
A table saw raises a circular blade through a supported table; a rip fence guides cuts parallel to an edge, while a miter gauge or suitable sled guides crosscuts. The DeWalt DWE7491RS Type 2 reference is a portable jobsite saw with a rolling stand and rack-and-pinion fence rails. Cabinet, contractor and compact saws vary substantially in motor drive, trunnion mounting, mass and safety systems. Never borrow service assumptions from another type.
The Type 2 motor and arbor assembly drive a clamped 10-inch blade. Height and bevel controls position the blade relative to the table. A correctly aligned riving knife follows behind the blade, with the guard used for suitable through-cuts. The fence slides on its rail system to set rip width, while the throat plate supports stock near the blade and the under-table shroud sends chips to a dust port. The poster groups documented systems, not exact Type 2 disassembly geometry.
The specified blade sits between arbor flanges beneath a tightened nut. Use the exact diameter, arbor and speed limits in the Type 2 manual.
The guard covers the exposed blade during applicable through-cuts; the riving knife tracks the kerf to reduce closing behind the blade. Set and align both per the manual.
The table supports the work. An appropriate throat plate closes the opening without touching the blade; change it only with power disconnected.
The rack-and-pinion rails position the rip fence; lock it parallel to the blade for a rip cut and check the rear support.
The front handwheel and bevel controls set blade height and angle. Type 2 drawings show the supporting mechanism, but the illustration avoids unverified hidden precision.
The rolling stand supports the portable saw when deployed and locked. An under-table shroud and port collect chips when connected to suitable extraction.
These decisions make the mechanism useful at the bench.
Use the fence for ripping and a miter gauge or sled for crosscutting. Do not trap a cutoff between a fixed fence and blade.
Disconnect power, inspect the correct blade and throat plate, set modest blade exposure and install guard/riving knife for the operation.
Support infeed and outfeed, position the body out of the kickback line and use a push stick or other suitable device as the hands approach the blade.
Mark a straight reference edge, set the rip fence and keep the board supported through the cut.
Provide broad support and a safe handling plan; a track saw or panel saw may be safer for an oversized sheet.
Use a miter gauge or sled with stable support. Keep the rip fence clear of a free offcut unless a safe stop arrangement is specified.
Use the steps for a first pass, then inspect the work before changing the setup.
The fence references a long edge for ripping; a miter gauge or sled references an end for crosscuts. Combining guides incorrectly can trap stock.
A misaligned fence, pinched kerf or twisted work can drive material back. The riving knife, guard, correct guide and body position all matter.
Tooth count, hook angle, plate thickness and kerf must match material and the riving-knife requirements in the manual.
DWE7491RS has multiple production types. The Type 2 manual and diagrams are the references here; check the type on the tool before ordering parts.
Cabinet saws have different mass, motor/drive arrangements and often different trunnion structures. Do not map this portable Type 2 mechanism onto them.
Rack-and-pinion rails are a feature of the reference model; T-square and other fences set/lock differently.
Some saws add anti-kickback pawls or flesh-detection brakes. Follow the exact saw's documented system and compatible blade rules.
Dado use is model, region, blade and insert specific. Never assume a saw accepts a dado stack without exact manufacturer instructions.
Stop the tool and disconnect power before investigating a fault or changing a part.
Stop; inspect blade sharpness, fence alignment, stock straightness and feed pressure.
Check blade choice/condition, support, throat plate and cut direction.
Disconnect power; check stand lock, blade mounting, debris and damaged blade.
Use the exact tool manual for setup, limits and replacement parts. These lessons, documents and model pages teach relevant techniques or help compare real variations.
Official guarding, blade, fence, stand, alignment and operating instructions for this type.
Official Type 2 table, fence, rail and control service illustration.
Official Type 2 motor/arbor, dust and stand service illustration.
Official model/type selector for current documentation and product specifications.
Maker videos on setup, guards, fence and blade adjustments; check the model shown before following a step.
WoodWorkers Guild of America explains kerf control and riving-knife purpose in a table saw.
General technique demonstration with a different saw; retain the DWE7491RS manual for model-specific setup.
These maker-owned links document relevant tools and tool brands. A product brand may use another company's factory; compare the exact model before choosing parts or accessories.
Cutters, abrasives, guards, guides, dust fittings and service parts vary by tool. Check the model plate and manufacturer manual before ordering or changing a component.
Compare the Saws family →Continue through the Tools library