
Table and plate
The aluminum top supports the work and accepts a removable mounting plate. Confirm plate flatness, router hole pattern and all mounting hardware before use.
Learn how the table, insert, fence, guard and separate router work together to guide repeatable profiles and grooves.
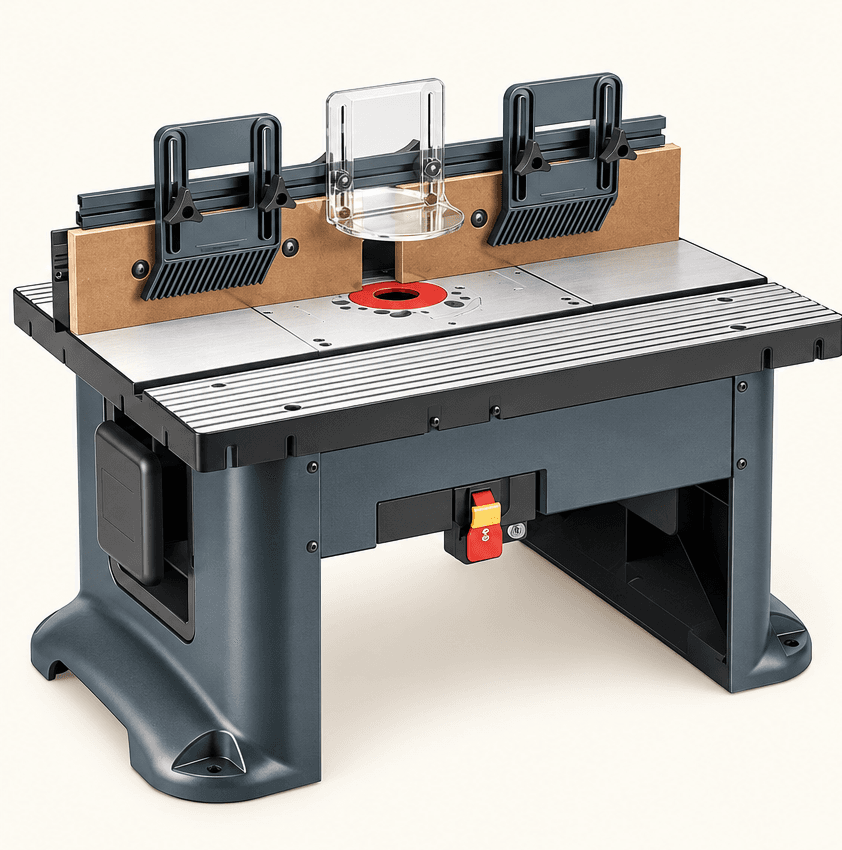
An original educational poster groups twelve model-grounded parts and systems. The numbered descriptions remain readable below the artwork on narrow screens.
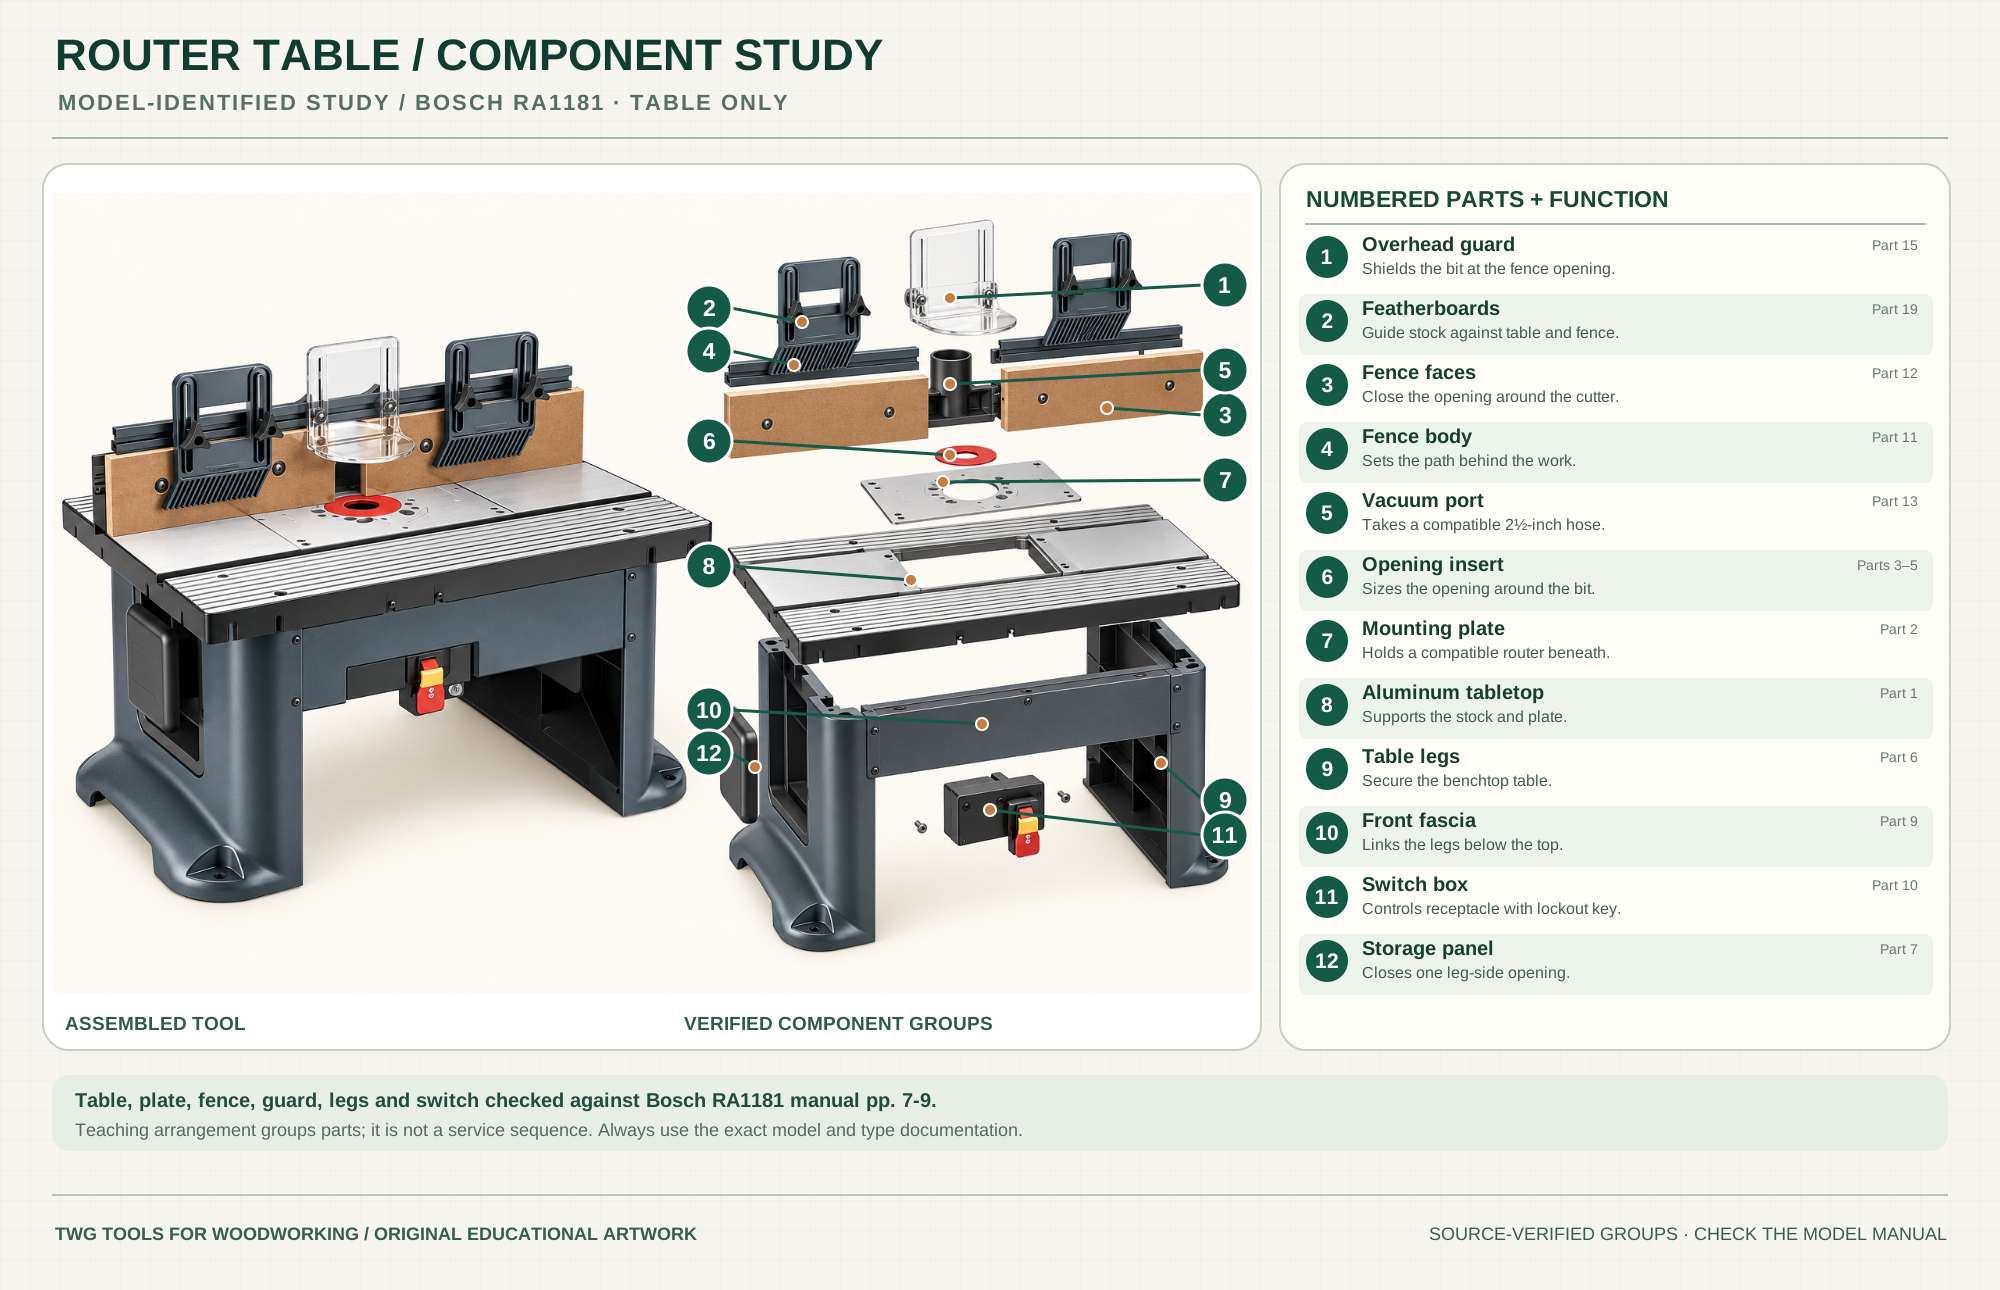
Shields the cutter opening at the fence when installed as instructed.
RA1181 part 15Apply controlled guidance to stock along the table or fence.
Part 19Narrow the unsupported gap around the cutter.
Part 12Sets a straight reference behind the workpiece.
Part 11Connects a compatible 2½-inch extraction hose.
Part 13Sizes the plate opening around the cutter with adequate clearance.
Parts 3–5Holds a compatible separate router beneath the table.
Part 2Supports work around the installed plate.
Part 1Support the benchtop structure when secured to a bench.
Part 6Links the front of the legs below the top.
Part 9Controls the table receptacle with a removable lockout key.
Part 10Closes one leg-side opening of the table assembly.
Part 7Technical references: Bosch RA1181 manual and illustrated parts list, pp. 7–9. Original educational artwork depicts verified component groups and their relationships; it is not a service sequence or a replacement for the exact model manual.
A router table holds a compatible handheld router beneath a flat surface and presents its bit through an insert. This moves the work past a stationary cutter, unlike handheld routing where the tool moves over fixed work. The Bosch RA1181 reference is the table assembly only: its illustrated table does not include a router motor or bit. Check the router's mounting, switch and cutter limits separately.
A compatible router bolts beneath the mounting plate. An insert sizes the opening around its bit; the tabletop supports the stock while the fence faces, guard and featherboards help establish the feed path. The RA1181 switch box controls its receptacle. The actual cutter, collet and motor belong to the separately installed router. The poster groups documented table components for teaching, not a service-disassembly order.
The aluminum top supports the work and accepts a removable mounting plate. Confirm plate flatness, router hole pattern and all mounting hardware before use.
The RA1181 manual lists multiple inserts. Select an opening that clears the installed cutter while supporting the surrounding stock.
Adjustable faces narrow the gap around the bit. The fence must be clamped square and aligned for the intended pass.
The clear guard covers the fence opening; featherboards apply controlled stock guidance when placed correctly. They do not replace a push device or safe hand position.
The fence port accepts a compatible 2½-inch hose. Check that collection and hoses do not obstruct work or controls.
A front switch box and legs form part of the RA1181 assembly. Keep the switch accessible and secure the table to a stable bench.
These decisions make the mechanism useful at the bench.
Use the RA1181 compatibility and mounting instructions for the exact router. Unplug both before installing the router or changing a bit.
Choose an insert with proper clearance, adjust the fence faces and guard, and test the cutter path with power disconnected.
Stand clear of the bit path. On the usual fence-guided cut, feed from right to left against bit rotation; verify direction for every setup and never assume a freehand cut is safe.
Support long stock before and after the cutter, set a shallow first pass and hold the edge against the fence.
Use an appropriate cutter, insert and fence position; cut in stages and use a test piece to check width and depth.
Use a purpose-made carrier, sled or jig that keeps hands away from the cutter. Do not hand-feed an unstable short piece.
Use the steps for a first pass, then inspect the work before changing the setup.
RA1181 parts drawings show the table, not a motor or collet. Router speed and bit limits come from the installed router and cutter.
Close the faces around the bit only as allowed by the guard and cutter clearance. A wide unsupported gap can catch an edge.
Conventional fence-guided feed usually runs right to left. Inside profiles, bearing-guided cuts and other arrangements require a fresh feed plan.
Use compatible collection at the fence port, keeping the guard and cutter visible without exposing hands.
Compact tables mount to a bench; larger floor or cabinet systems add mass, storage and different dust paths.
A lift adds above-table height adjustment on compatible systems. The RA1181 reference uses a mounting plate; do not assume a lift is included.
A fence provides a straight reference. A bearing-guided bit follows the work or template but still needs guarding and safe support.
Large profile bits may need a suitable table opening, reduced speed and multiple passes; use the exact router and bit maker limits.
Stop the tool and disconnect power before investigating a fault or changing a part.
Stop; check fence lock, face alignment, stock support and feed pressure.
Unplug; inspect bit balance, router mounting, plate seating and table fastening.
Inspect the fence port, hose fit and collector flow without removing needed guarding.
Use the exact tool manual for setup, limits and replacement parts. These lessons, documents and model pages teach relevant techniques or help compare real variations.
Manufacturer specifications and included table components; router sold separately.
Another maker's documented table module shows mounting and guarding differences; verify the exact table in use.
WoodWorkers Guild of America demonstrates setting fence position and bit height for a test-cut dado.
A second fence setup demonstration; its setup tool is optional and not part of the RA1181.
These maker-owned links document relevant tools and tool brands. A product brand may use another company's factory; compare the exact model before choosing parts or accessories.
Cutters, abrasives, guards, guides, dust fittings and service parts vary by tool. Check the model plate and manufacturer manual before ordering or changing a component.
Compare the Routing family →Continue through the Tools library