
Motor and cooling
The RF1101 parts breakdown separates rear cover, field, armature, fan, bearings and housing. Cooling openings must remain clear.
Set a repeatable cutting depth, keep a broad base supported, and understand the motor, collet and lock that make a full-size fixed-base router predictable.
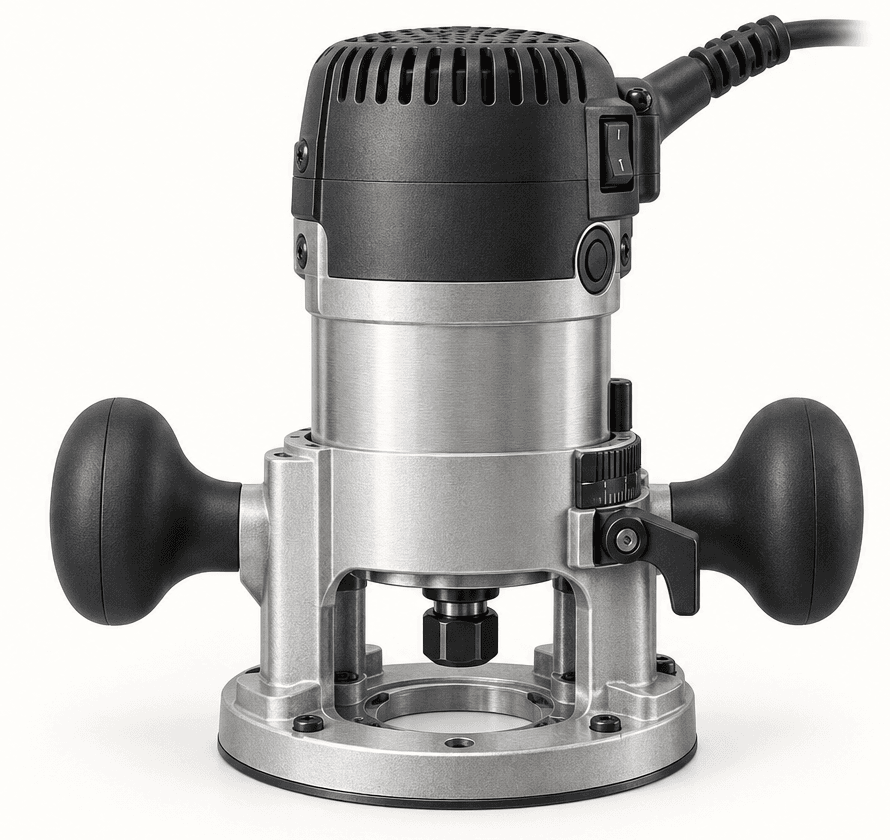
An original educational poster groups twelve model-grounded parts and systems. The numbered descriptions remain readable below the artwork on narrow screens.
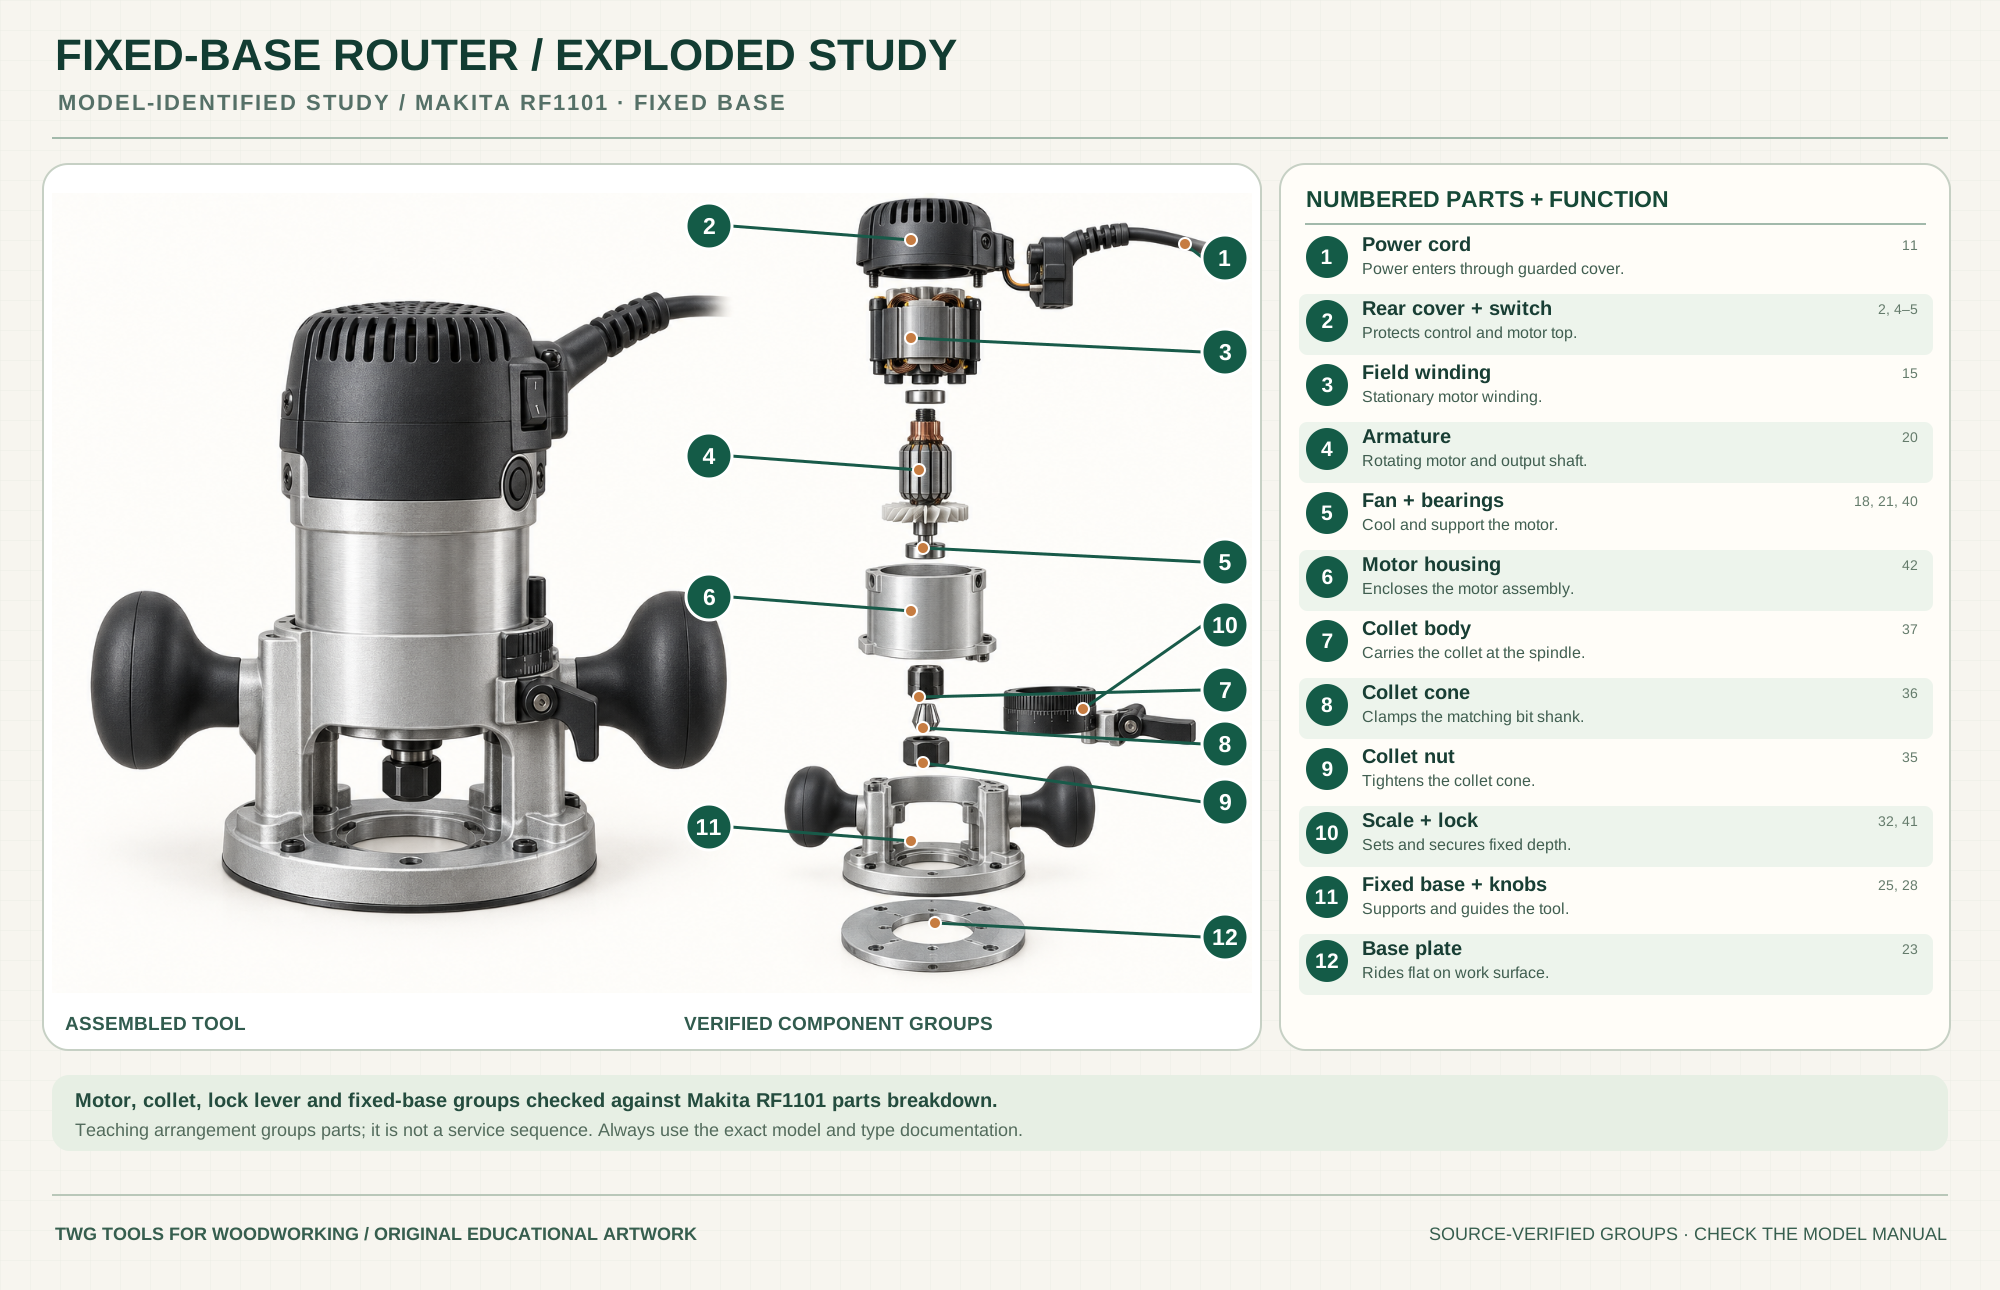
Carries power into the guarded upper housing; keep it outside the cutter path.
Part 11Enclose and control the motor circuit.
Parts 2, 4–5Stationary motor field surrounds the rotating assembly.
Part 15Rotating motor component transmits power to the spindle.
Part 20Cool the motor and support the rotating shaft.
Parts 18, 21, 40Encloses the motor group within the removable router body.
Part 42Connects the spindle to the clamping cone and nut.
Part 37Grips a matching clean bit shank when tightened.
Part 36Compresses the cone around the bit shank.
Part 35Indicate depth setting and hold the fixed base securely.
Parts 32, 41Support the router and give two-hand control.
Parts 25, 28Rides over the work while the cutter passes through its opening.
Part 23Technical references: Makita RF1101 official parts breakdown · Makita RF1101 manual. Original educational artwork depicts verified component groups and their relationships; it is not a service sequence or a replacement for the exact model manual.
A full-size fixed-base router holds its motor at a selected height during a pass. Compared with a trim router, its larger motor, base and two-hand grips suit heavier edge profiles and guided work. Unlike a plunge router, it does not lower the spinning bit into the middle of a board with spring-loaded guide posts. Suitability of any bit still depends on its diameter, speed rating, shank, cut depth and the exact router manual.
The stationary field surrounds a rotating armature. The output shaft drives a correctly matched collet, which clamps the bit shank. A scale ring and lock lever set and hold the motor's position in the fixed base. The base plate rides on the work; a bearing, edge guide, template or fence controls the path only when the setup is suitable.
The RF1101 parts breakdown separates rear cover, field, armature, fan, bearings and housing. Cooling openings must remain clear.
The collet body, cone and nut are separate service parts. Match the cone to the bit shank and avoid bottoming the shank in the spindle.
The router base, twin knobs and base plate provide two-hand control and a broad work-contact surface.
The scale ring indicates height change; the lock lever secures it. Confirm actual bit projection on scrap before cutting.
The switch and controller are under the rear cover. Route the cord clear of the cutter's path.
Guide bushings, edge guides, dust fittings and router tables are model-specific; check the base opening and mount pattern.
These decisions make the mechanism useful at the bench.
With power disconnected, clean the shank and collet, insert to the maker's prescribed depth, and tighten using the correct wrenches.
Support the entire base, set depth before starting, lock it, and test in scrap. Divide deep or wide cuts into multiple passes.
For a common outside edge, plan conventional feed with the guide against the work. Other cuts, inside edges and table mounting need their own feed plan.
Clamp and support the work; use an appropriate bearing-guided cutter and keep both hands on the knobs.
Use a straight bit and a secure guide or jig. Start from a safe entry, keep the base supported, and take staged passes.
Match the bushing or bearing to the template and bit. Check offset and stock allowance before the final pass.
Use the steps for a first pass, then inspect the work before changing the setup.
The RF1101 is sold with 1/4- and 1/2-inch collet options. A loose, damaged or mismatched collet can slip; never use a sleeve or bit beyond the maker's instructions.
Conventional feed resists the bit's pull along a normal outside edge. Grain, inside contours, climb cuts and table routing change the risk; plan those separately.
Large bits and deep engagement raise load. Reduce depth per pass, use backing where needed and make a light final pass only after confirming control.
A compatible hood or table extraction can help, but it must not obscure the bit path or interfere with the guide.
A fixed base locks a set motor height. A plunge base has guided vertical travel and a depth stop; it is a distinct assembly.
Table mounting changes guarding, feed direction, support and switch access. Follow the table and router instructions together.
Use the matching supplied collet; larger shanks can improve grip for suitable bits, but the bit's own rating still governs.
Bearing bits, edge guides and bushings follow different references. Verify clearance and offset for the chosen combination.
Stop the tool and disconnect power before investigating a fault or changing a part.
Stop, unplug and inspect the scale ring, lock and motor seating.
Check bit condition, speed, depth per pass, feed pace and support.
Stop immediately. Inspect matching collet, nut, shank cleanliness and engagement.
Use the exact tool manual for setup, limits and replacement parts. These lessons, documents and model pages teach relevant techniques or help compare real variations.
Official operating and setup instructions for the fixed-base reference model.
Official numbered parts drawing used to check this educational poster.
Model specifications, included collets and intended fixed-base configuration.
Manufacturer explanation of fixed-base tasks, depth setting and table mounting.
WoodWorkers Guild of America demonstrates the locked fixed-base depth and contrasts it with a plunge base's stop rod and turret.
WoodWorkers Guild of America covers bit mounting, workholding, depth, feed direction and stopping the cut; fixed and plunge bases are compared.
WoodWorkers Guild of America explains fixed-base applications, setup and selection alongside plunge-base differences.
These maker-owned links document relevant tools and tool brands. A product brand may use another company's factory; compare the exact model before choosing parts or accessories.
Bits, belts, sleeves, guides, dust fittings and service parts vary by tool. Check the model plate and manufacturer manual before ordering or changing a component.
Compare the Routing family →Continue through the Tools library