
Blade, arbor and guard
The 10-inch blade is clamped on the arbor; a transparent moving guard covers teeth except at the cut. Confirm blade diameter, arbor fit, speed rating and guard return in the exact manual.
Understand the pivot, sliding rails, miter table, bevel and fence before making supported, repeatable crosscuts.
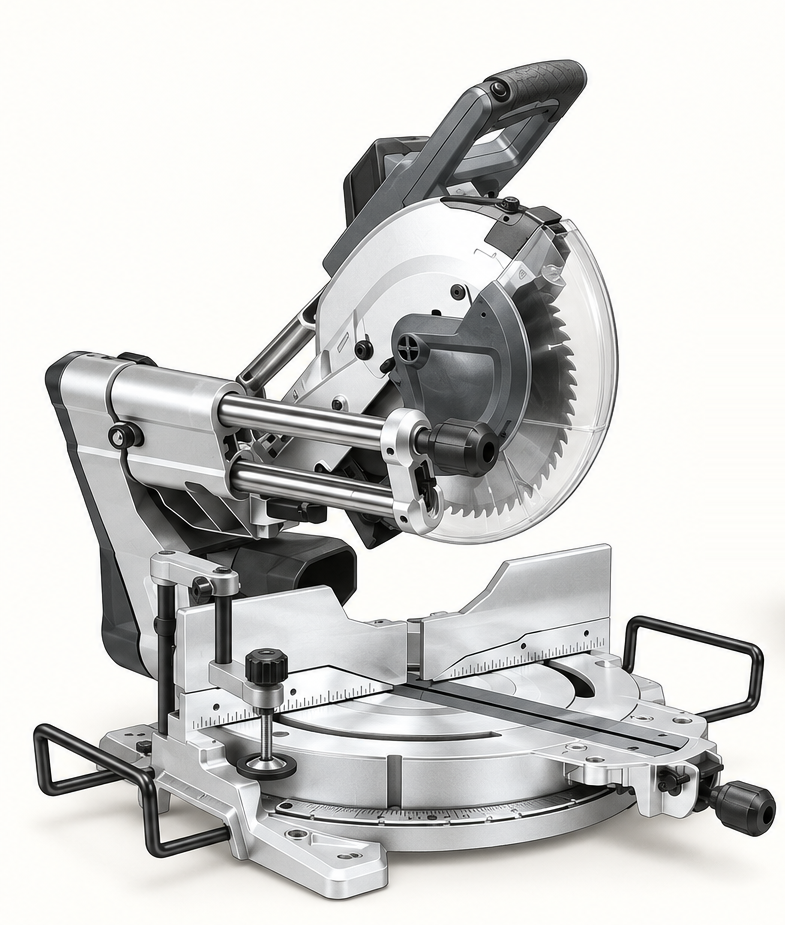
An original educational poster groups twelve model-grounded parts and systems. The numbered descriptions remain readable below the artwork on narrow screens.
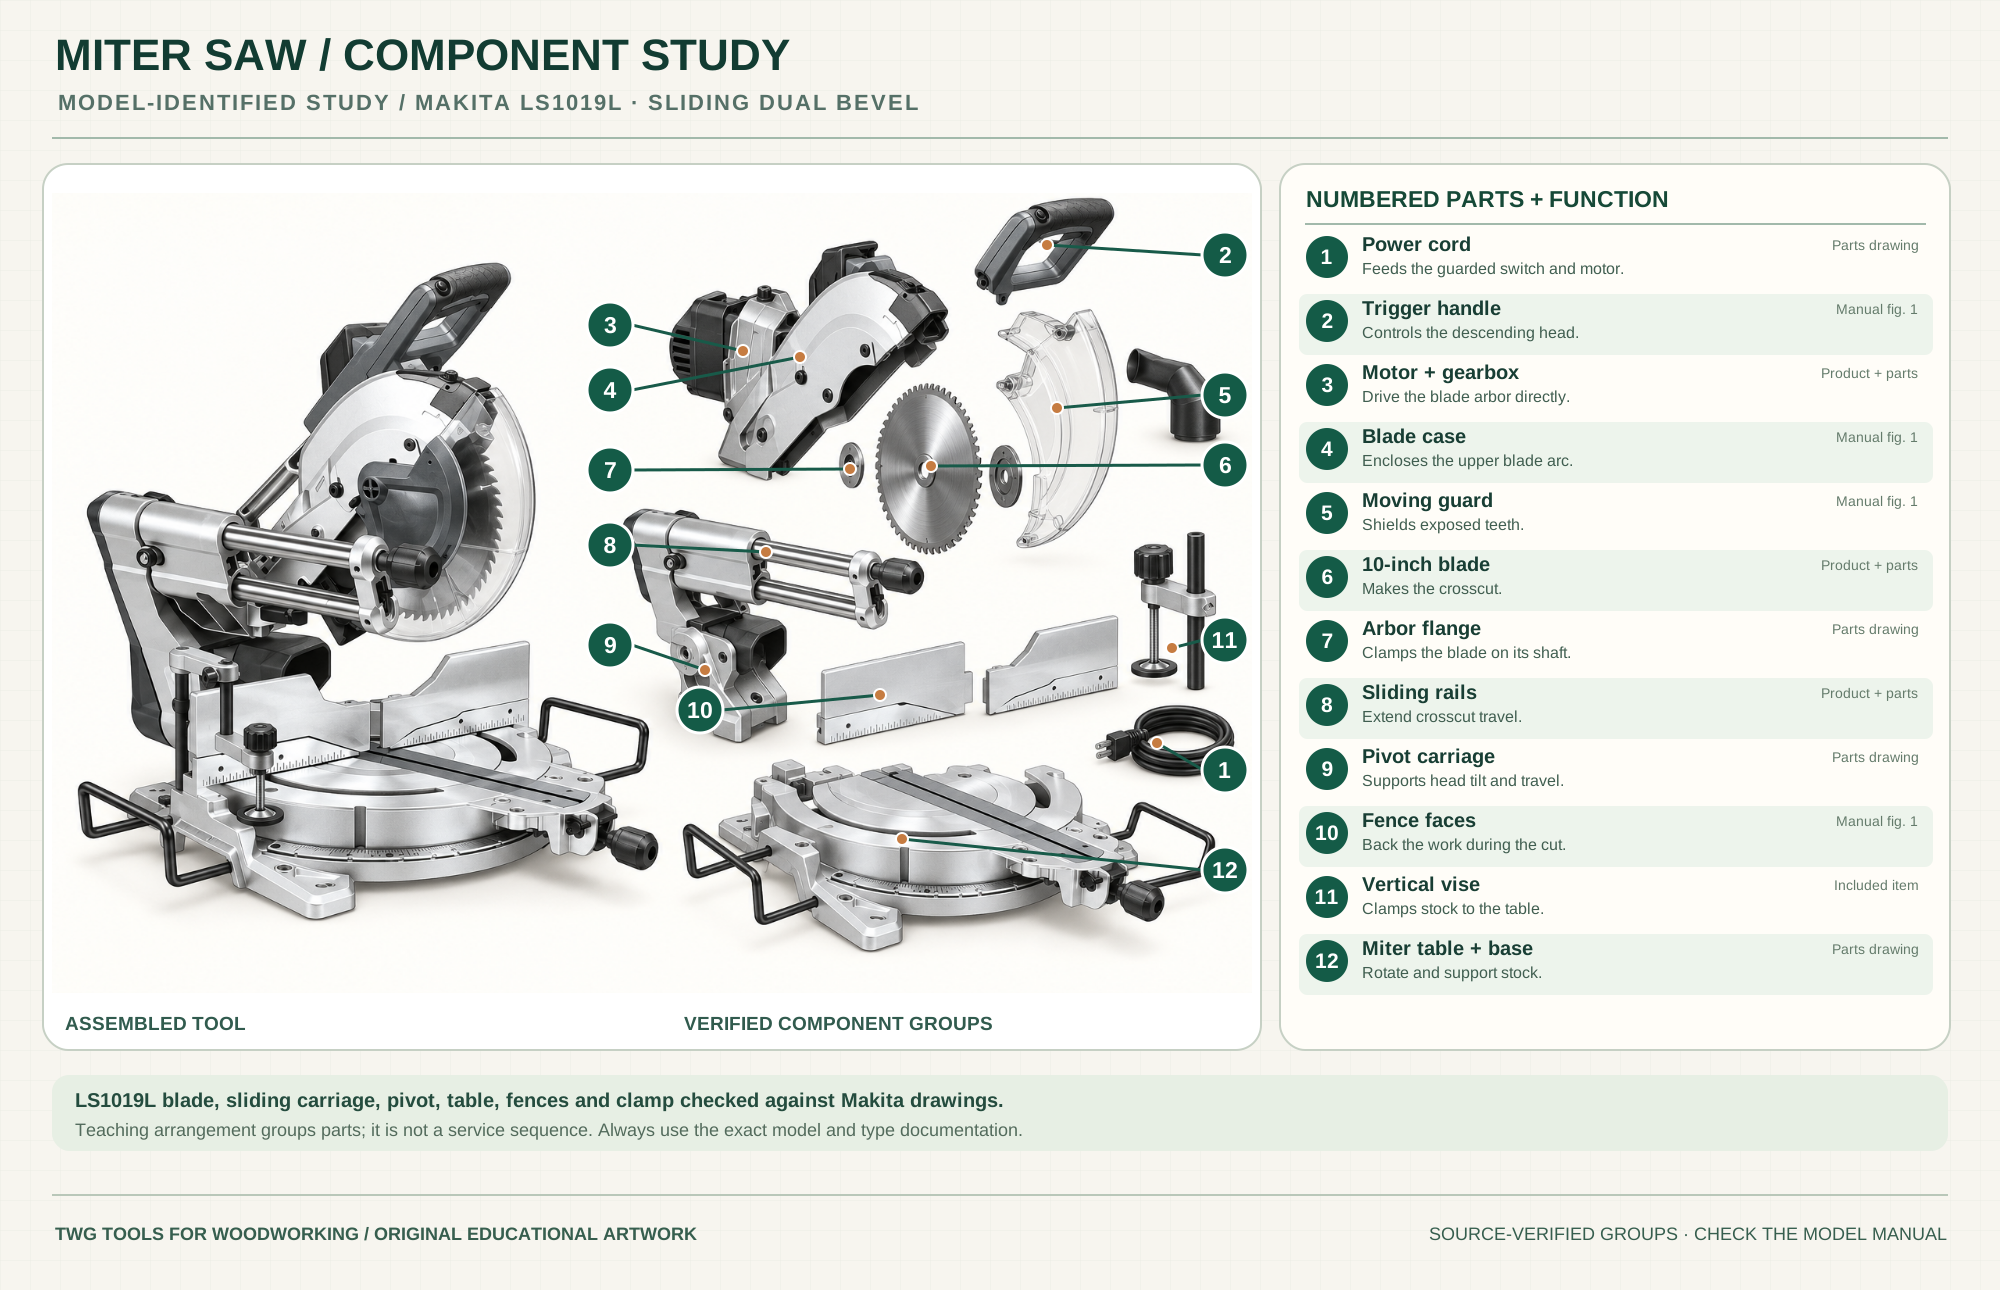
Feeds the guarded switch and motor.
Parts drawingControls the descending saw head.
Manual fig. 1Drive the blade arbor directly.
Product and partsEncloses the upper blade arc.
Manual fig. 1Shields teeth outside the cut.
Manual fig. 1Cuts supported stock across its width.
Product and partsClamps blade to the arbor.
Parts drawingExtend head travel for wider crosscuts.
Product and partsSupports head tilt and travel.
Parts drawingBack the work during the cut.
Manual fig. 1Clamps stock to the table.
Included itemRotate and support stock at the chosen angle.
Parts drawingTechnical references: Makita LS1019L manual · Makita LS1019L parts breakdown. Original educational artwork depicts verified component groups and their relationships; it is not a service sequence or a replacement for the exact model manual.
A miter saw holds the work on a table against a fence while a guarded circular blade pivots down for crosscuts. A rotating table sets miter angle in plan view; tilting the saw head sets bevel angle through the board thickness. The Makita LS1019L reference has sliding rails for wider crosscuts and dual bevel travel. It is not a substitute for ripping long boards lengthwise.
The trigger powers a motor and direct-drive gearbox; the guarded blade turns on an arbor. The head pivots downward and slides on two rails. A miter lock fixes table rotation and a bevel lock fixes head tilt. The clamp, fence and extensions support the stock. The component poster groups documented systems for teaching rather than specifying a service sequence.
The 10-inch blade is clamped on the arbor; a transparent moving guard covers teeth except at the cut. Confirm blade diameter, arbor fit, speed rating and guard return in the exact manual.
The head pivots down while the twin rail carriage extends crosscut reach. Lock sliding travel when the operation or storage instructions require it.
Table rotation changes the miter; head tilt changes the bevel. Test both settings on scrap before cutting finished parts.
Fence faces and the vertical vise hold stock steady. Tall or long pieces need added support at the same level as the table.
A dust nozzle and bag or suitable extraction collect some chips; the cord must stay clear of the blade, rails and stock.
Replaceable inserts support stock beside the blade path. Check their adjustment and clearance after changing blade or angle.
These decisions make the mechanism useful at the bench.
Lock the table at the chosen miter, lock the head at the chosen bevel, and make a scrap cut to check the result rather than relying only on scale marks.
Place stock flat on the table and firmly against the fence. Clamp when appropriate, support long ends, and keep the offcut free to separate.
For a sliding cut, follow the LS1019L manual's sequence and keep hands outside the marked no-hands zone. Never pull a spinning blade toward yourself through stock.
Use a suitable fine crosscut blade, verify paired angles on scrap and support both the work and the offcut.
Use an independent stop on the supported work side; arrange it so a cutoff cannot be trapped between stop and blade.
Use the slide within rated width and thickness. Move the head smoothly without forcing a dull blade.
Use the steps for a first pass, then inspect the work before changing the setup.
A miter rotates the table around a vertical axis. A bevel tilts the blade plane. A compound cut combines both; check scrap for orientation before production.
Crosscut tooth geometry and tooth count affect tearout and feed force. Match diameter, bore and speed to the model and the work.
A short cutoff can move or catch if trapped by a stop, clamp or misaligned fence. Keep the work supported without pinching the kerf.
The bag catches only part of the dust. A compatible extractor and clean port improve collection without obstructing head travel.
A basic saw pivots for crosscuts and miters. Compound adds bevel tilt. Sliding models add guided travel for wider stock.
Dual bevel tilts either direction; single bevel may require reversing the work. Check the model's actual angular range.
Battery platforms change runtime, weight and controls; blade and guard rules still follow the exact manual.
LS1019L has a laser line. Verify alignment with a scrap cut; never substitute the laser for checking the blade path.
Stop the tool and disconnect power before investigating a fault or changing a part.
Check stock straightness, fence seating, miter/bevel locks, and a paired scrap-cut test.
Inspect blade sharpness, tooth pattern, feed force, fence support and sacrificial backing.
Stop, unplug and inspect clean rails and locks; use only the manual's maintenance method.
Use the exact tool manual for setup, limits and replacement parts. These lessons, documents and model pages teach relevant techniques or help compare real variations.
Official operation, slide-cut sequence, guard, angles and safety instructions.
Official numbered drawing used to ground the educational component groups.
Documented slide, direct-drive gearbox, dual bevel and included vise.
WoodWorkers Guild of America checks square, miter and bevel cuts with test stock.
Explains saw configurations, blade choice and cut approach.
These maker-owned links document relevant tools and tool brands. A product brand may use another company's factory; compare the exact model before choosing parts or accessories.
Cutters, abrasives, guards, guides, dust fittings and service parts vary by tool. Check the model plate and manufacturer manual before ordering or changing a component.
Compare the Saws family →Continue through the Tools library