
Motor and transmission
The 9403 parts drawing names field, armature, fan, synchronizing belt, pulley and helical gears.
Learn the belt path, drive and tracking system before using this fast stock-removal tool on a supported surface.
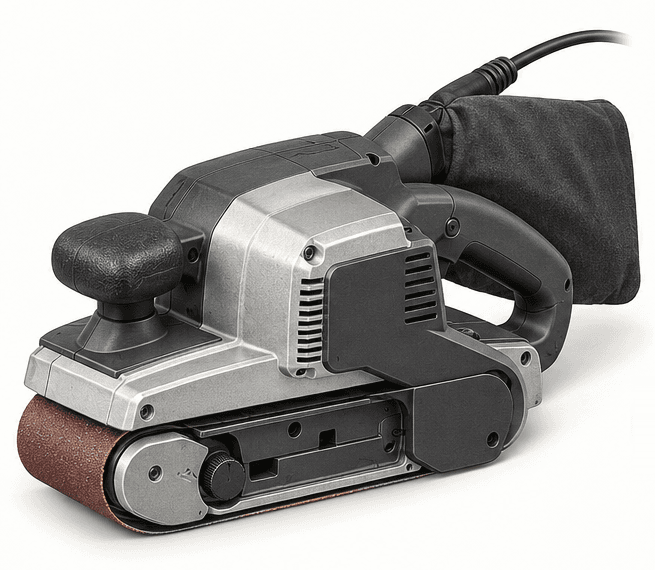
An original educational poster groups twelve model-grounded parts and systems. The numbered descriptions remain readable below the artwork on narrow screens.
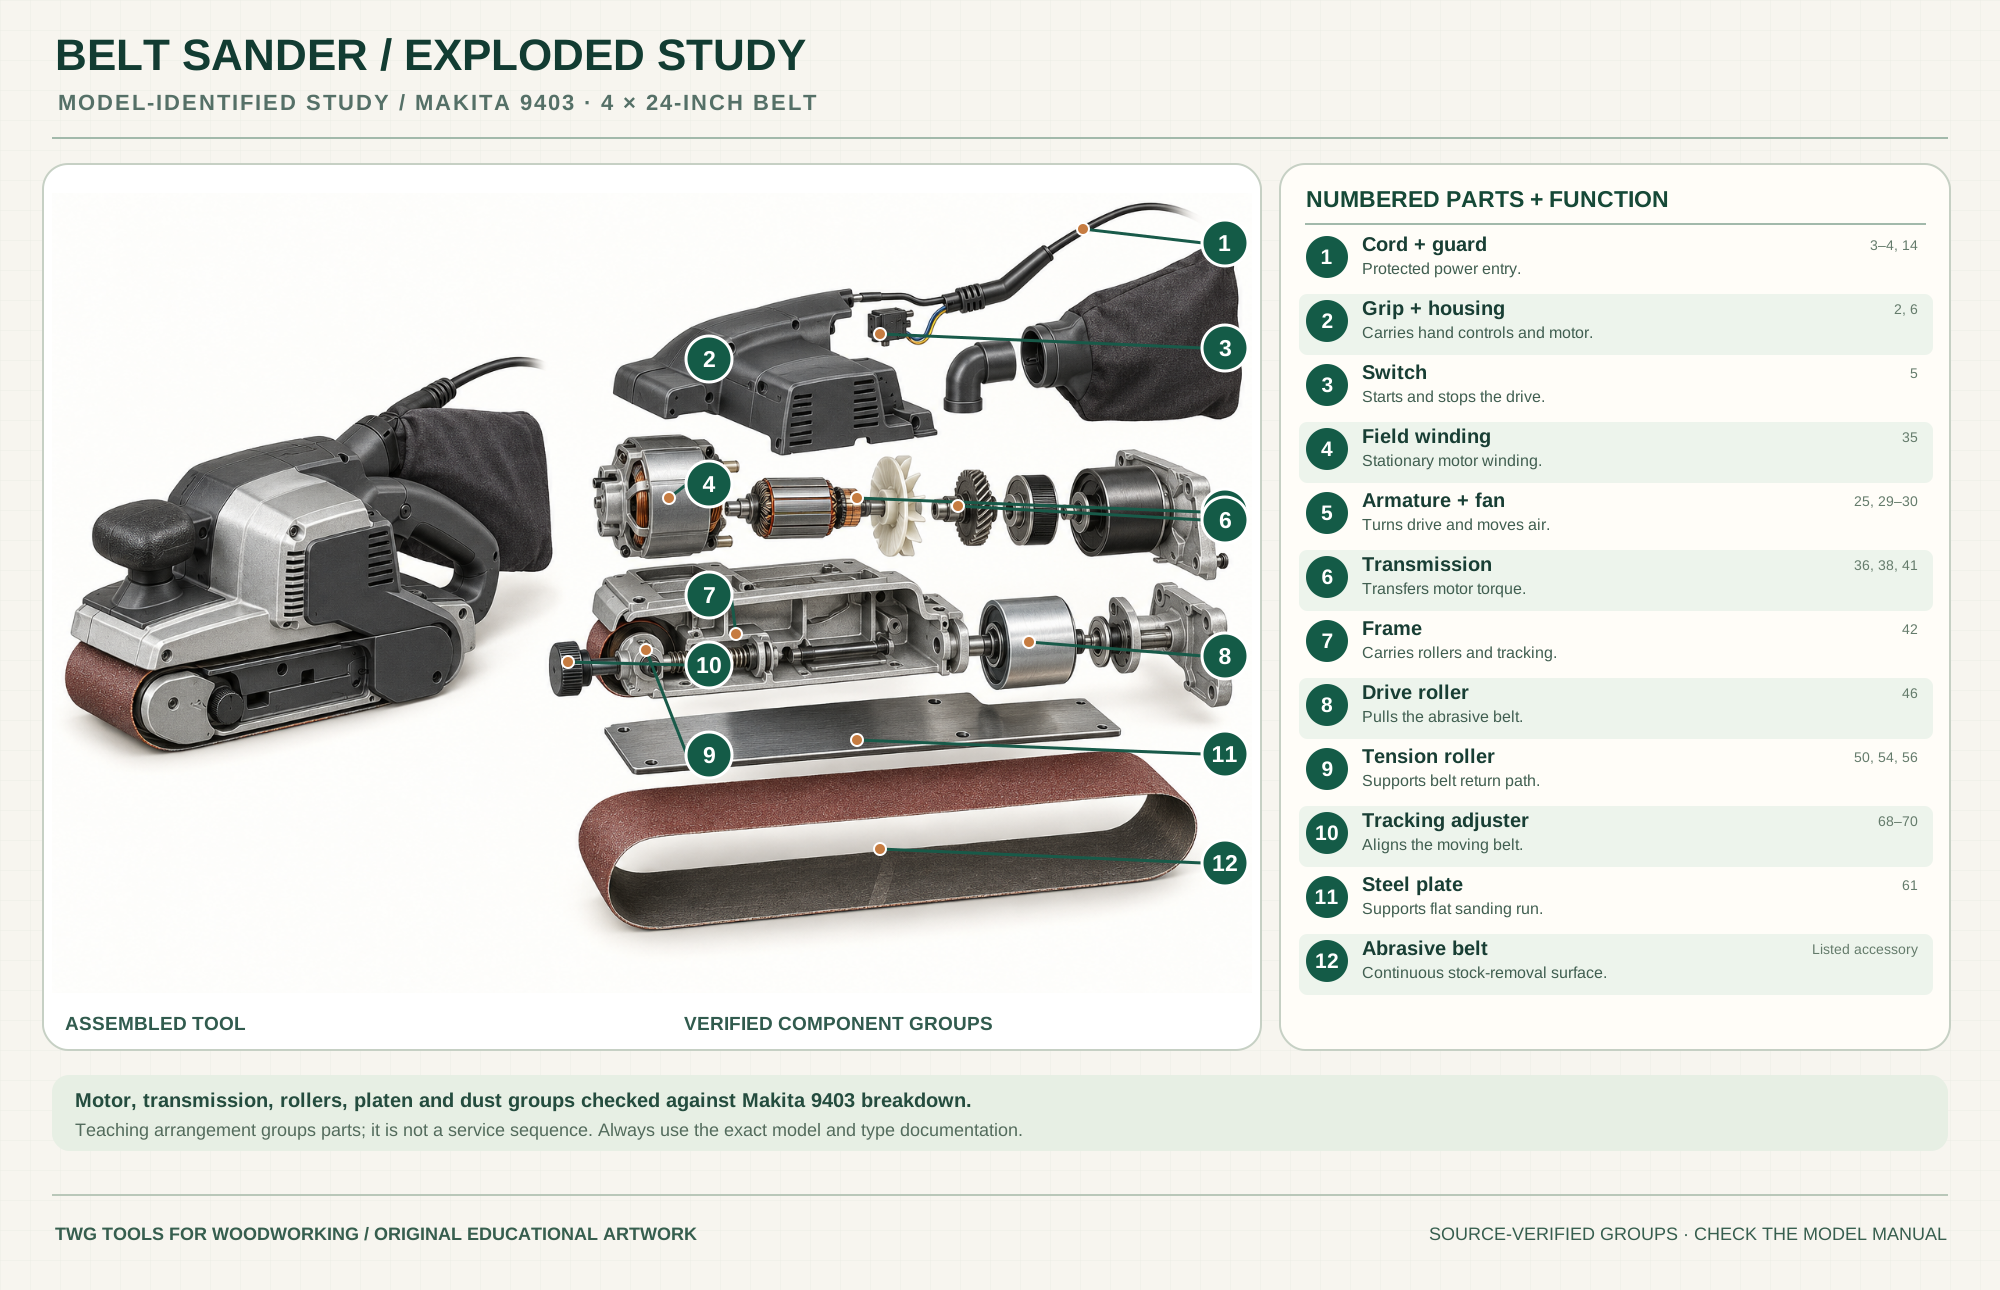
Bring power into the guarded housing.
Parts 3–4, 14Provide control and enclose the drive components.
Parts 2, 6Starts and stops the belt drive.
Part 5Stationary winding around the armature.
Part 35Rotating motor group and air-moving parts.
Parts 25, 29–30Transfers motor torque toward the powered roller.
Parts 36, 38, 41Supports the belt path, roller shafts and tracking hardware.
Part 42Powered roller pulls the continuous abrasive belt.
Part 46Supports and tensions the front end of the belt.
Parts 50, 54, 56Changes belt alignment across the rollers.
Parts 68–70Supports the flat working run of the belt.
Part 61The continuous abrasive loop removes wood as it passes over the platen.
Listed accessoryTechnical references: Makita 9403 official parts breakdown · Makita 9403 manual. Original educational artwork depicts verified component groups and their relationships; it is not a service sequence or a replacement for the exact model manual.
A belt sander runs a continuous abrasive loop over driven and tensioned rollers. It removes wood much faster than a random-orbital sander, so it is useful for rough leveling and shaping but easy to gouge a finished panel. The Makita 9403 reference has a 4 × 24-inch belt and a fixed 1,640 ft/min belt speed; do not assume it has the variable-speed dial found on other models.
The motor's armature turns a transmission and drive roller. A front tension roller supports and tensions the other end of the abrasive loop, while a tracking adjuster keeps it centered. A steel plate supports the flat working run. The dust collector draws debris toward the bag; collection does not eliminate airborne dust.
The 9403 parts drawing names field, armature, fan, synchronizing belt, pulley and helical gears.
The powered roller moves the abrasive loop. Inspect it for buildup that can affect tracking.
The front roller and spring-loaded arm provide belt tension and support the return path.
The adjuster shifts the belt path. Make small corrections while following the maker's procedure.
The plate backs the sanding run so a flat tool can contact a flat surface evenly.
The collector cover, separator, nozzle and bag form a model-specific collection path.
These decisions make the mechanism useful at the bench.
Match the 4 × 24-inch size and intended grit. Check the belt's directional arrow and join before installing.
Test belt tracking with the sander clear of the work and make small adjustments as the manual instructs.
Set the tool down flat after reaching speed. Use overlapping strokes with minimal pressure; lift clear before stopping.
Work gradually across the face, check with a straightedge and stop before removing more than intended.
Support the board and avoid tipping the belt onto one corner, which can round it rapidly.
Use the belt sander only for the rough stage; inspect deep scratches and transition to finer abrasives and a suitable finish sander.
Use the steps for a first pass, then inspect the work before changing the setup.
A belt running off-center can damage the housing or work. Correct tracking before sanding; replace a damaged belt or roller.
Choose the least aggressive grit that does the rough work. A finer tool must still remove scratches left by a coarse belt.
The platen makes a flat contact zone only when the sander is held level and kept moving; a tilted edge cuts much deeper.
Check the bag/nozzle for blockage. Fine sanding dust remains a respiratory and fire concern even with collection.
Portable sanders use different width and length combinations; match the exact model.
The 9403 is a fixed-speed reference. The Metabo HPT SB8V2 demonstrates a distinct variable-speed design.
A handheld sander must only be mounted or clamped when the maker explicitly provides a safe fixture and instructions.
Belt joint, grit and backing must suit wood and the tool's speed; replace torn or clogged belts.
Stop the tool and disconnect power before investigating a fault or changing a part.
Lift clear; inspect belt direction, roller buildup, tension and tracking adjustment.
Use a flatter stance, less pressure and continuous movement; check the platen.
Inspect bag seating, nozzle, separator and airflow; use compatible extraction if specified.
Use the exact tool manual for setup, limits and replacement parts. These lessons, documents and model pages teach relevant techniques or help compare real variations.
Official belt change, tracking, operating and safety guidance.
Official motor, gear, roller, platen and dust system drawing.
Belt size, speed, collection and product configuration.
Compare the control and speed variation of another real belt sander.
WoodWorkers Guild of America demonstrates flat platen control, abrasive choice, clean belts and pacing; its variable-speed example differs from the fixed-speed 9403.
WoodWorkers Guild of America explains workholding, gentle landing, overlapping passes and edge support.
These maker-owned links document relevant tools and tool brands. A product brand may use another company's factory; compare the exact model before choosing parts or accessories.
Bits, belts, sleeves, guides, dust fittings and service parts vary by tool. Check the model plate and manufacturer manual before ordering or changing a component.
Compare the Sanding family →Continue through the Tools library