
Blade and guard
The 100 mm blade cuts the slot during a controlled plunge. The guard and return action must operate freely; keep hands outside the blade path.
Register a plunge-cut slot from a reliable face or edge, then use a matching biscuit to align a glue-up.
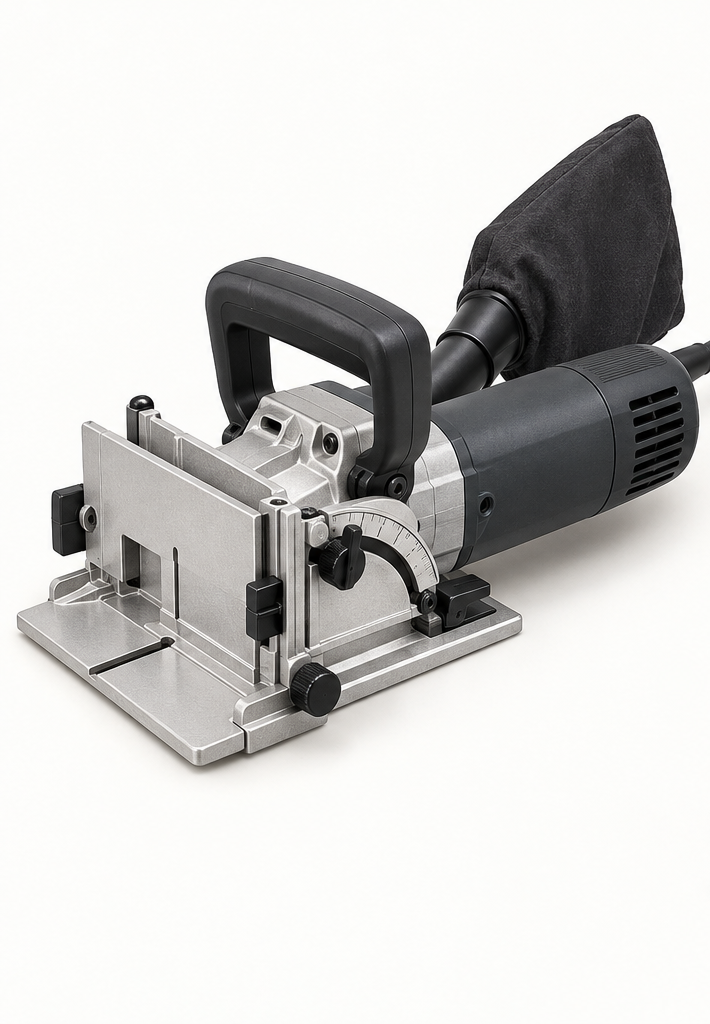
An original educational poster groups twelve model-grounded parts and systems. The numbered descriptions remain readable below the artwork on narrow screens.
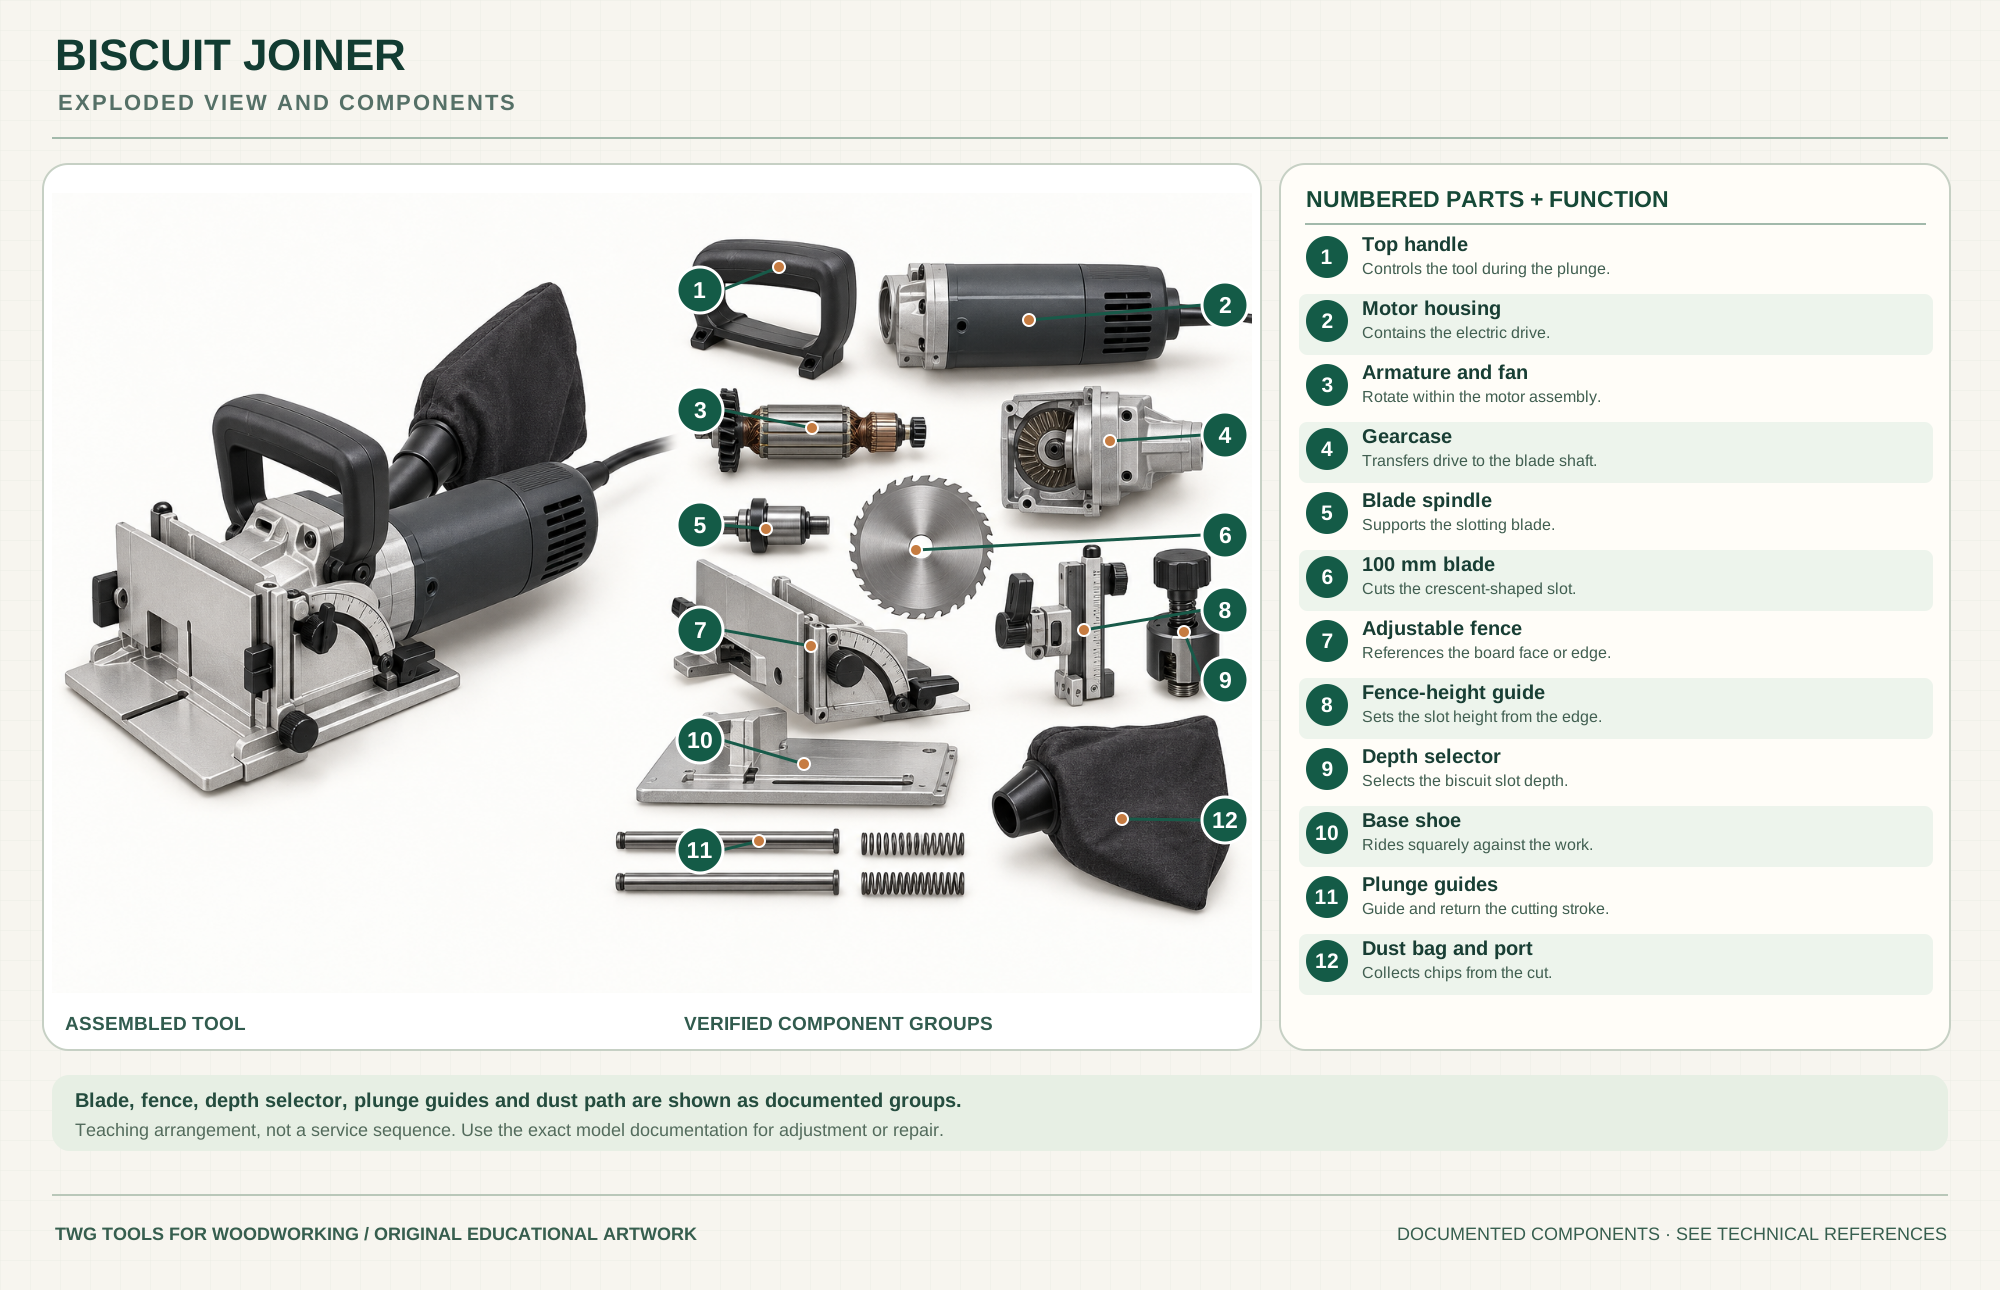
Controls the tool during the plunge.
Manual operationContains the electric drive.
Parts listRotate within the motor assembly.
Parts listTransfers drive to the blade shaft.
Parts listSupports the slotting blade.
Parts listCuts the crescent-shaped slot.
Manual bladeReferences the board face or edge.
Manual fenceSets the slot height from the edge.
Manual fenceSelects the biscuit slot depth.
Manual stopsRides squarely against the work.
Manual baseGuide and return the cutting stroke.
Parts listCollects chips from the cut.
Manual dustTechnical references: Makita PJ7000 instruction manual · Makita PJ7000 parts breakdown. Original educational artwork depicts verified component groups and their relationships; it is not a service sequence or a replacement for the exact model manual.
A biscuit joiner plunges a small circular blade into a board edge or face to make a crescent slot. A compressed wood biscuit in matching slots helps align mating pieces during glue-up. The PJ7000 uses a 100 mm blade, adjustable fence and preset depth stops. A biscuit is chiefly a registration aid; joint strength still depends on wood, adhesive, geometry and load, and a structural joint may need another method.
The motor drives the blade through a gearcase and shaft. The fence and base register the tool to the work; a plunge stroke extends the guarded blade to a chosen depth, then return springs retract it. The dust port and bag collect chips. The poster groups Makita-documented parts for education, not service order.
The 100 mm blade cuts the slot during a controlled plunge. The guard and return action must operate freely; keep hands outside the blade path.
The fence references a face or edge and changes slot height and angle. Lock the setting and use the same reference face on both boards.
Preset stops suit common biscuit sizes. Verify actual slot depth on scrap and match the biscuit and wood thickness.
Guide rods and springs constrain the forward cutting motion and retract the blade when pressure is released.
The shoe sits flat against the work. Clamp narrow or unstable pieces and keep the tool square to the layout line.
A bag or compatible extractor removes chips from the slot; poor collection can interfere with the cut.
These decisions make the mechanism useful at the bench.
Dry-assemble the joint and draw continuous registration marks across the mating pieces.
Reference the same face on both boards, set the fence and slot depth, then confirm on scrap of matching thickness.
Start clear of the stock, hold both handles and plunge straight; let the blade retract fully before lifting the tool.
Slots can help keep edges aligned while clamps close the glue line; joint accuracy still depends on straight, square edges.
Use matching face references and careful slot placement for shelves, dividers and cabinet alignment.
A suitable fence angle and smaller biscuit can help align a miter, subject to stock thickness and blade clearance.
Use the steps for a first pass, then inspect the work before changing the setup.
Changing which face rests on the fence shifts the slots and can make the final surfaces uneven.
Biscuits can allow small lateral adjustment. They do not correct badly cut edges or replace clamps.
Check biscuit and slot depth against remaining wall thickness to avoid breaking through a face.
A compressed biscuit swells with water-based glue. Apply glue according to the joint design and assemble before it binds.
Common sizes 0, 10 and 20 require corresponding depth stops; use the correct biscuit for available material.
Machines differ in fence height, angle and reference accuracy; calibrate the actual tool.
Loose-tenon systems use deeper mortises and different reinforcement. Choose by joint demands, not just speed.
The PJ7000 is corded; cordless joiners change battery and weight considerations while the slot layout method remains similar.
Stop the tool and disconnect power before investigating a fault or changing a part.
Check reference face, fence height, angle lock, stock squareness and layout marks.
Stop, unplug and inspect debris or damaged plunge parts; service before reuse.
Check blade sharpness, feed pressure, dust bag and port blockage with power disconnected.
Use the exact tool manual for setup, limits and replacement parts. These lessons, documents and model pages teach relevant techniques or help compare real variations.
Official depth stops, fence, blade change, operation and safety.
Official exploded parts drawing used to verify the educational groups.
These maker-owned links document relevant tools and tool brands. A product brand may use another company's factory; compare the exact model before choosing parts or accessories.
Cutters, abrasives, guards, guides, dust fittings and service parts vary by tool. Check the model plate and manufacturer manual before ordering or changing a component.
Compare the Joinery family →Continue through the Tools library