
Parallel-link arms
The DW788 uses upper and lower linked arms to guide short vertical blade travel. Do not force the work sideways against the blade.
Use a tensioned fine blade and supported table to cut intricate curves and interior openings under control.
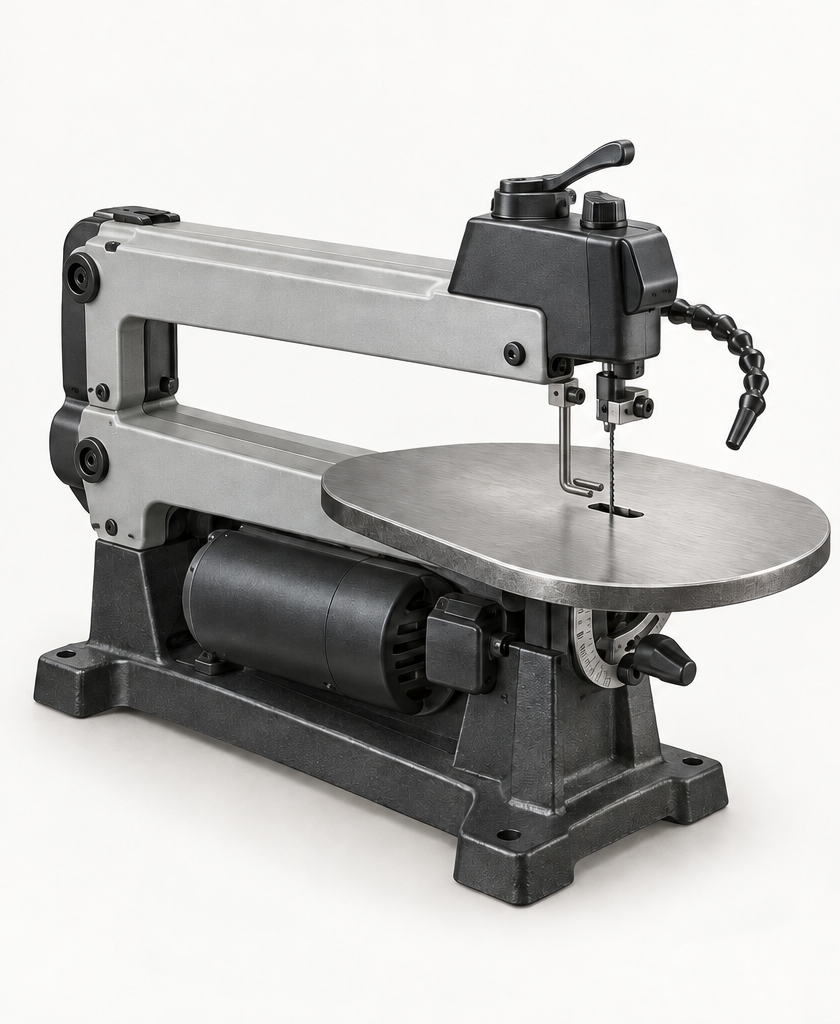
An original educational poster groups twelve model-grounded parts and systems. The numbered descriptions remain readable below the artwork on narrow screens.
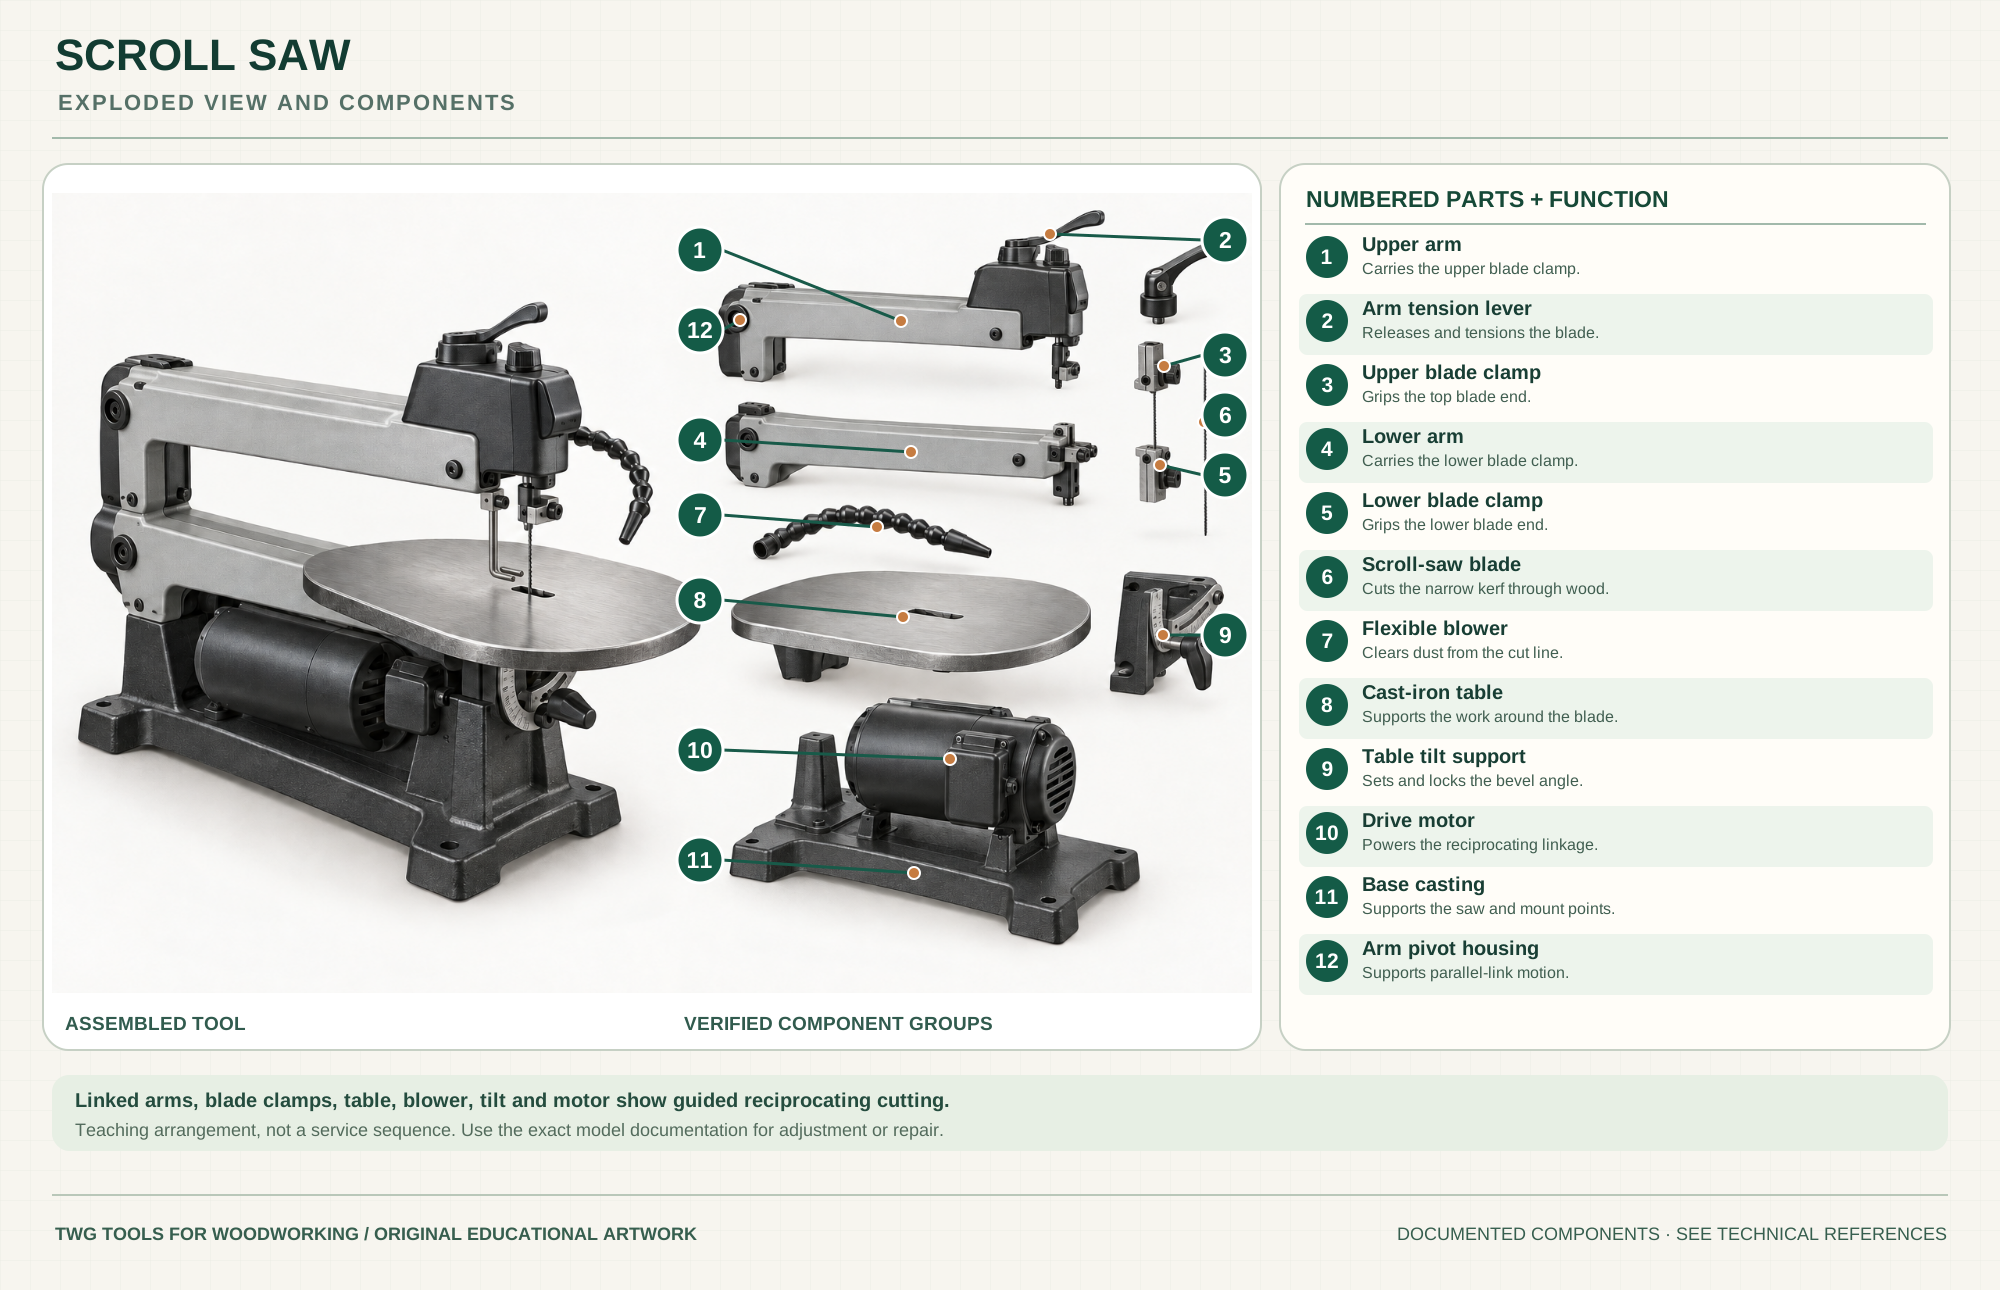
Carries the upper blade clamp.
Manual armReleases and tensions the blade.
Manual controlsGrips the top blade end.
Manual clampCarries the lower blade clamp.
Manual armGrips the lower blade end.
Manual clampCuts the narrow kerf through wood.
Manual bladesClears dust from the cut line.
Manual blowerSupports the work around the blade.
Manual tableSets and locks the bevel angle.
Manual tiltPowers the reciprocating linkage.
Manual partsSupports the saw and mount points.
Manual mountingSupports parallel-link motion.
Model; manualTechnical references: DeWalt DW788 instruction manual · DeWalt DW788 official model page. Original educational artwork depicts verified component groups and their relationships; it is not a service sequence or a replacement for the exact model manual.
A scroll saw moves a narrow blade up and down through a table. It can follow tight curves and make interior cutouts after a starter hole. The DW788 uses a double parallel-link arm, tool-free blade clamps and a tilting cast-iron table. A band saw excels at thicker, longer curves but its continuous blade cannot be threaded through a closed interior opening.
A motor drives the arm linkage so the clamped blade reciprocates through the table. A top lever sets blade tension; tool-free clamps grip plain-end blades. The blower helps expose the line, while the table supports the work and tilts for bevels. The exploded layout identifies visible functional groups, not a service sequence.
The DW788 uses upper and lower linked arms to guide short vertical blade travel. Do not force the work sideways against the blade.
Clamp both blade ends securely, then set tension with the top lever as the manual instructs. Recheck after blade changes.
The thin blade enables tight shapes. Throat distance limits how far the cut can reach from an edge; blade tooth geometry sets cut quality.
The cast table supports the work. Lock its tilt and check the blade-to-table angle before an accurate bevel cut.
The DW788's adjustable rod and foot remain in place as a barrier beside the blade. Set it to contact the work surface; bevel it with the table as the manual directs. Never remove it for a cut.
Aim the flexible blower at the cut line and add suitable extraction for fine dust; airflow is not a guard.
Use speed appropriate to material and blade. Keep stock flat on the table without bringing fingers into the blade path.
These decisions make the mechanism useful at the bench.
Choose tooth count and width for material thickness, radius and desired finish. Use blades compatible with the DW788 clamps.
With power off, clamp the blade, operate the tension lever and verify it tracks vertically without loose ends.
Set the material hold-down to the stock, keep the blank flat on the table, guide without twisting and reduce feed pressure around small radii.
Drill a starter hole, disconnect power, release one clamp, thread the blade and retension before cutting.
Use narrow blades and a pattern to follow repeated curves; plan fragile bridges and order of cuts.
Cut templates, decorative inlays and fine shapes where a larger saw cannot reach.
Use the steps for a first pass, then inspect the work before changing the setup.
Too little tension encourages wandering and breakage; excess can damage blades. Use the model procedure and a scrap cut.
For a curve, rotate the stock around the blade while feeding lightly. Pushing sideways can distort the cut.
Thin matching pieces may be cut as a secured stack only within safe blade and material limits; keep layers from shifting.
A zero-clearance support or backer can reduce splintering on fragile material; ensure it does not interfere with blade travel.
DW788 uses tool-free clamps for plain-end blades. Other saws may accept pinned blades; the fitting and minimum hole differ.
A larger throat handles wider patterns; arm and drive designs affect vibration and access.
Bevel range and calibration vary. Return to square and test before precision work.
Reverse-tooth, skip-tooth and spiral blades have different finish and handling; test each on scrap.
Stop the tool and disconnect power before investigating a fault or changing a part.
Check tension, clamp seating, tooth choice, side pressure and material thickness.
Check bench mounting, blade installation and speed; stop for abnormal arm noise.
Check tilt lock and blade-to-table angle with a square, then test on scrap.
Use the exact tool manual for setup, limits and replacement parts. These lessons, documents and model pages teach relevant techniques or help compare real variations.
These maker-owned links document relevant tools and tool brands. A product brand may use another company's factory; compare the exact model before choosing parts or accessories.
Cutters, abrasives, guards, guides, dust fittings and service parts vary by tool. Check the model plate and manufacturer manual before ordering or changing a component.
Compare the Saws family →Continue through the Tools library