
Blade case and plunge
The blade stays enclosed until the operator releases and presses the plunge. Check the return before every cut; this is not a conventional swinging lower guard.
Guide a plunge blade on a rail for controlled, straight cuts in supported panels and boards.
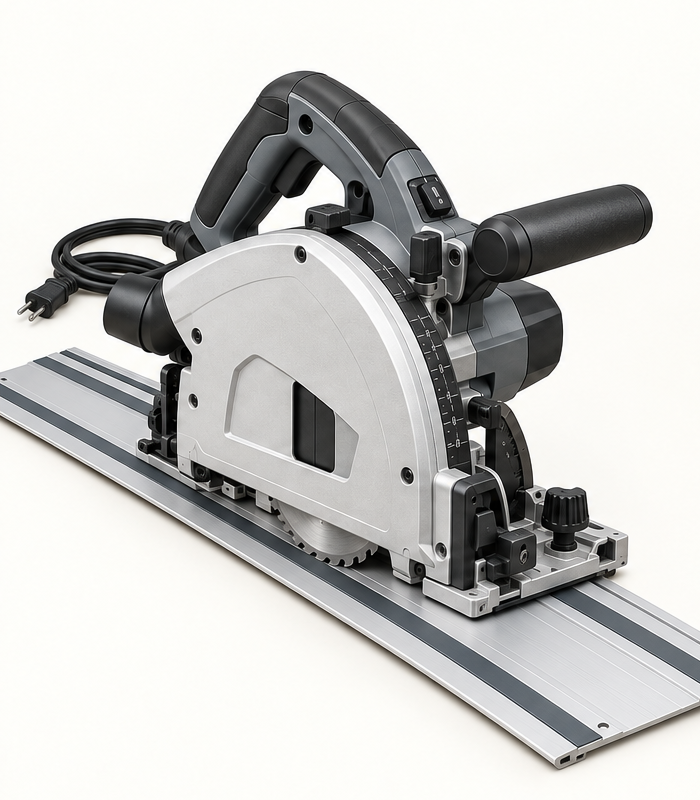
An original educational poster groups twelve model-grounded parts and systems. The numbered descriptions remain readable below the artwork on narrow screens.
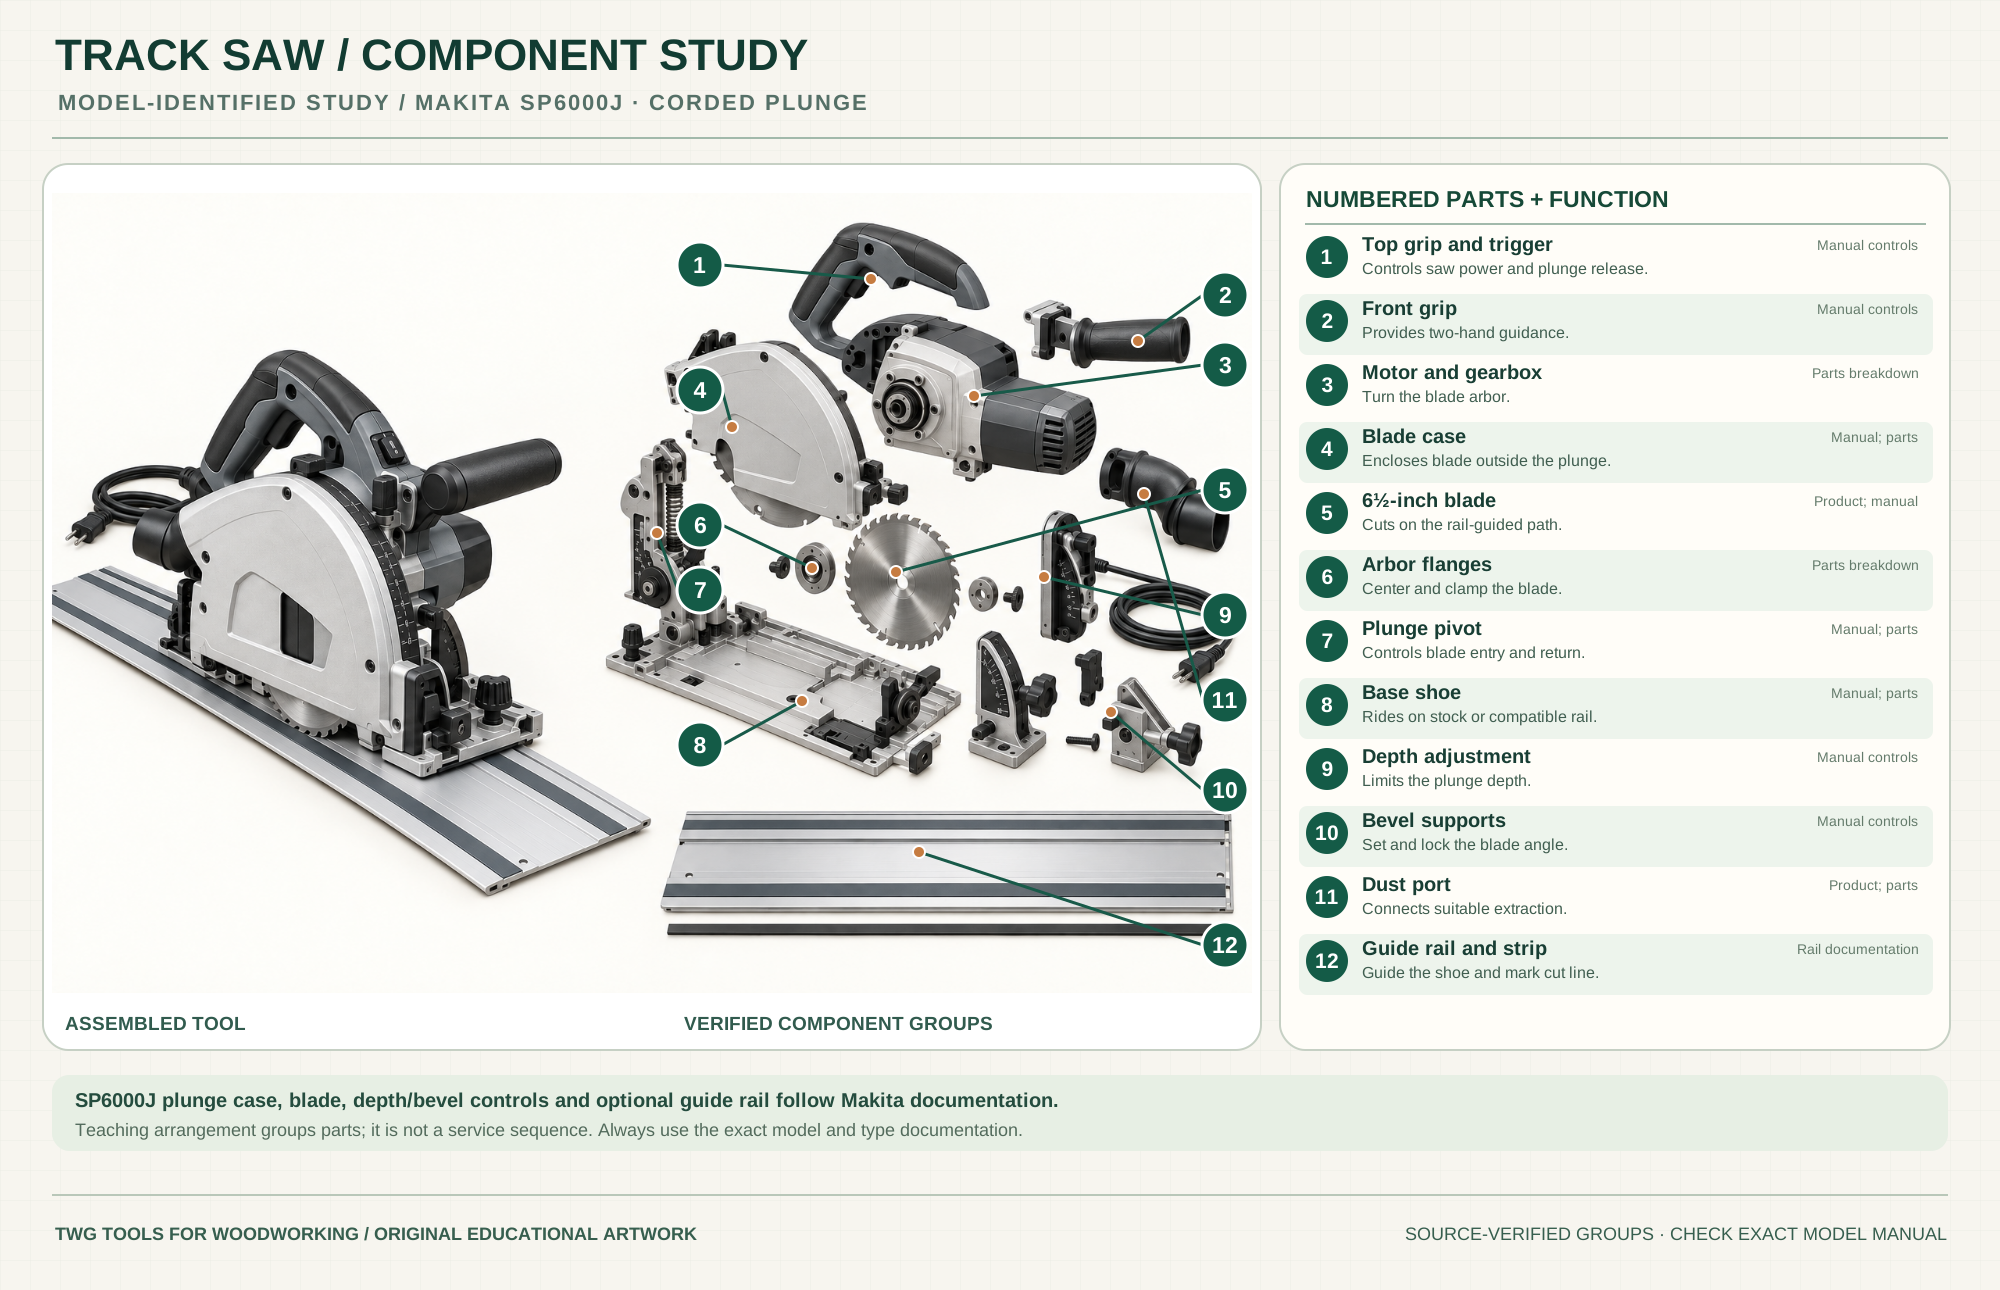
Controls saw power and plunge release.
Manual controlsProvides two-hand guidance.
Manual controlsTurn the blade arbor.
Parts breakdownEncloses blade outside the plunge.
Manual; partsCuts on the rail-guided path.
Product; manualCenter and clamp the blade.
Parts breakdownControls blade entry and return.
Manual; partsRides on stock or compatible rail.
Manual; partsLimits the plunge depth.
Manual controlsSet and lock the blade angle.
Manual controlsConnects suitable extraction.
Product; partsGuide the shoe and mark cut line.
Rail documentationTechnical references: Makita SP6000J instruction manual · Makita SP6000J parts breakdown · Makita SP6000J product and guide rail details. Original educational artwork depicts verified component groups and their relationships; it is not a service sequence or a replacement for the exact model manual.
A track saw plunges a guarded blade from an enclosed case while its shoe follows a compatible guide rail. The Makita SP6000J is a corded 6½-inch plunge saw; its rail supports a consistent line and a replaceable strip indicates the cut edge after calibration. The rail is a separate accessory with some tool-only packages; bundles such as SP6000J1 include one. A conventional circular saw with a straightedge has different guard and plunge geometry, and a table saw moves stock past a fixed blade.
The motor turns an arbor-held blade within a spring-return blade case. The operator sets depth and bevel, seats the base on a compatible rail and plunges into supported stock. Rail ribs guide the shoe while a splinter strip marks the kerf. The poster separates documented control groups for learning; it does not prescribe service order or claim that every package includes a rail.
The blade stays enclosed until the operator releases and presses the plunge. Check the return before every cut; this is not a conventional swinging lower guard.
Use an approved blade diameter, bore and rating; follow the spindle-lock and flange sequence in the SP6000J manual.
The shoe engages a compatible guide rail. Adjust sliding fit per the manual, support the rail and clamp when needed.
Depth stops limit projection, while bevel locks tilt the blade. The rail adds height, so use the appropriate scale or allowance and test on scrap.
Both handles steady the saw during plunge and travel. Route the cord and extraction hose behind the saw so neither crosses the cut.
A dust port accepts suitable extraction. Keep the hose from shifting the rail or pulling the saw off line.
These decisions make the mechanism useful at the bench.
Place the rail's calibrated strip on the waste-side cut boundary. Confirm the strip still matches the installed blade, bevel and rail.
Support the panel and offcut so the kerf cannot close on the blade or drop as the cut finishes. Clamp the rail if its grip is uncertain.
Set enough projection for the stock and sacrificial surface, using the manual's rail-depth guidance. Test clearance below before starting.
Cut sheet goods where they are fully supported instead of handling a full sheet across a table saw.
A rail can guide a straight trim; check hardware, material and plunge clearance before cutting an installed or removed door.
For a plunge within a panel, use the rear fixed stop or equivalent arrangement required by the SP6000J manual, then plan entry, exit and surrounding support carefully.
Use the steps for a first pass, then inspect the work before changing the setup.
The sacrificial rail strip is trimmed by the blade and becomes the cut-line reference. A new blade or bevel may change its relationship.
A rail is only as accurate as its placement. Uneven stock, dust beneath it or hose drag can move it.
Excessive depth increases exposed tooth below the panel and can damage supports; too little depth leaves an incomplete cut.
Support the kerf and follow the model's anti-kickback guidance. A rail does not eliminate binding from stock movement.
The SP6000J model and SP6000J1 package differ in included accessories; verify the actual box contents.
Battery models change runtime, weight and controls. Rail and blade compatibility remain model-specific.
Lengths, connector joints, clamps and sliding fits vary by system. Do not assume all rails mate correctly.
A circular saw uses a swinging lower guard and may follow a straightedge; a plunge track saw has an enclosed blade and dedicated guide interface.
Stop the tool and disconnect power before investigating a fault or changing a part.
Check rail alignment, clamping, shoe fit, hose drag and blade condition.
Check blade suitability, sharpness, rail strip contact and feed direction.
Stop; check stock and offcut support, depth, blade and kerf closure before restarting.
Use the exact tool manual for setup, limits and replacement parts. These lessons, documents and model pages teach relevant techniques or help compare real variations.
Official plunge, guide, depth, bevel, blade change, kickback and safety directions.
Tool-component drawing for the SP6000J saw in the rail-kit package; verify exact accessory package separately.
Official corded plunge saw specification and accessory references.
Rail and splinter-strip reference for compatible track-system setup.
Independent hands-on guide to initial rail and saw adjustments; use Makita's manual for safety and limits.
These maker-owned links document relevant tools and tool brands. A product brand may use another company's factory; compare the exact model before choosing parts or accessories.
Cutters, abrasives, guards, guides, dust fittings and service parts vary by tool. Check the model plate and manufacturer manual before ordering or changing a component.
Compare the Saws family →Continue through the Tools library