
Headstock and spindle
The headstock supports the rotating spindle. Match center, faceplate or chuck mounting to the JWL-1221VS spindle and inspect engagement before turning.
Understand spindle support, speed ranges, tool-rest placement and safe presentation of a cutting edge to rotating wood.
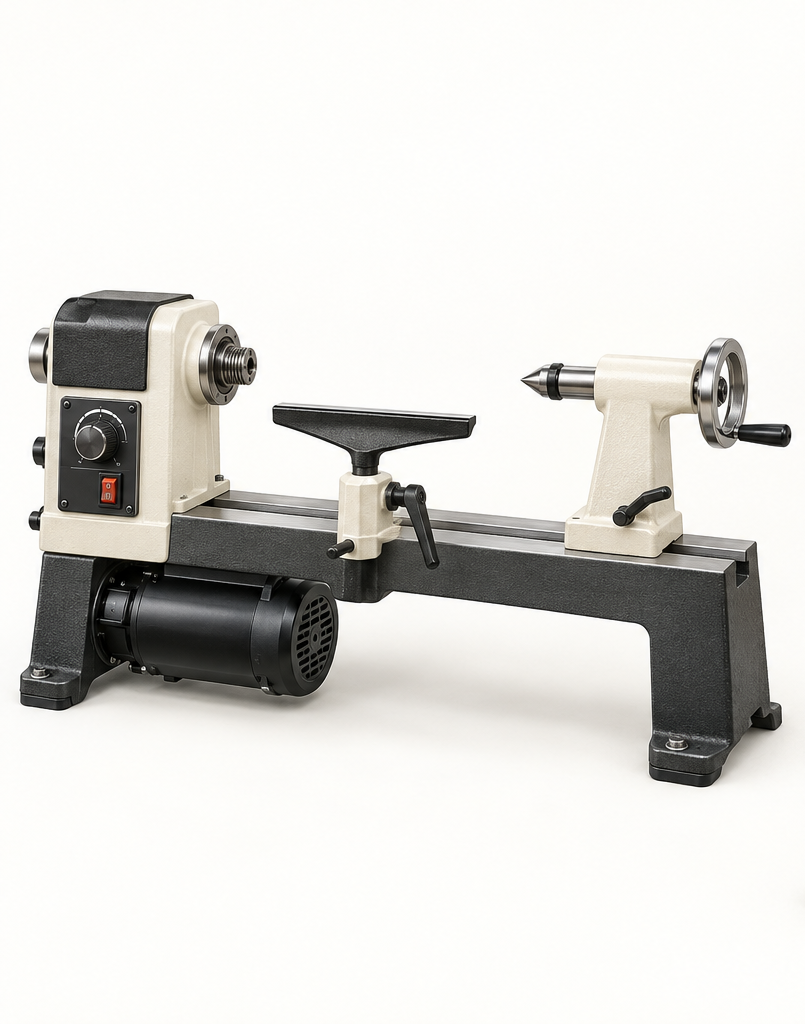
An original educational poster groups twelve model-grounded parts and systems. The numbered descriptions remain readable below the artwork on narrow screens.
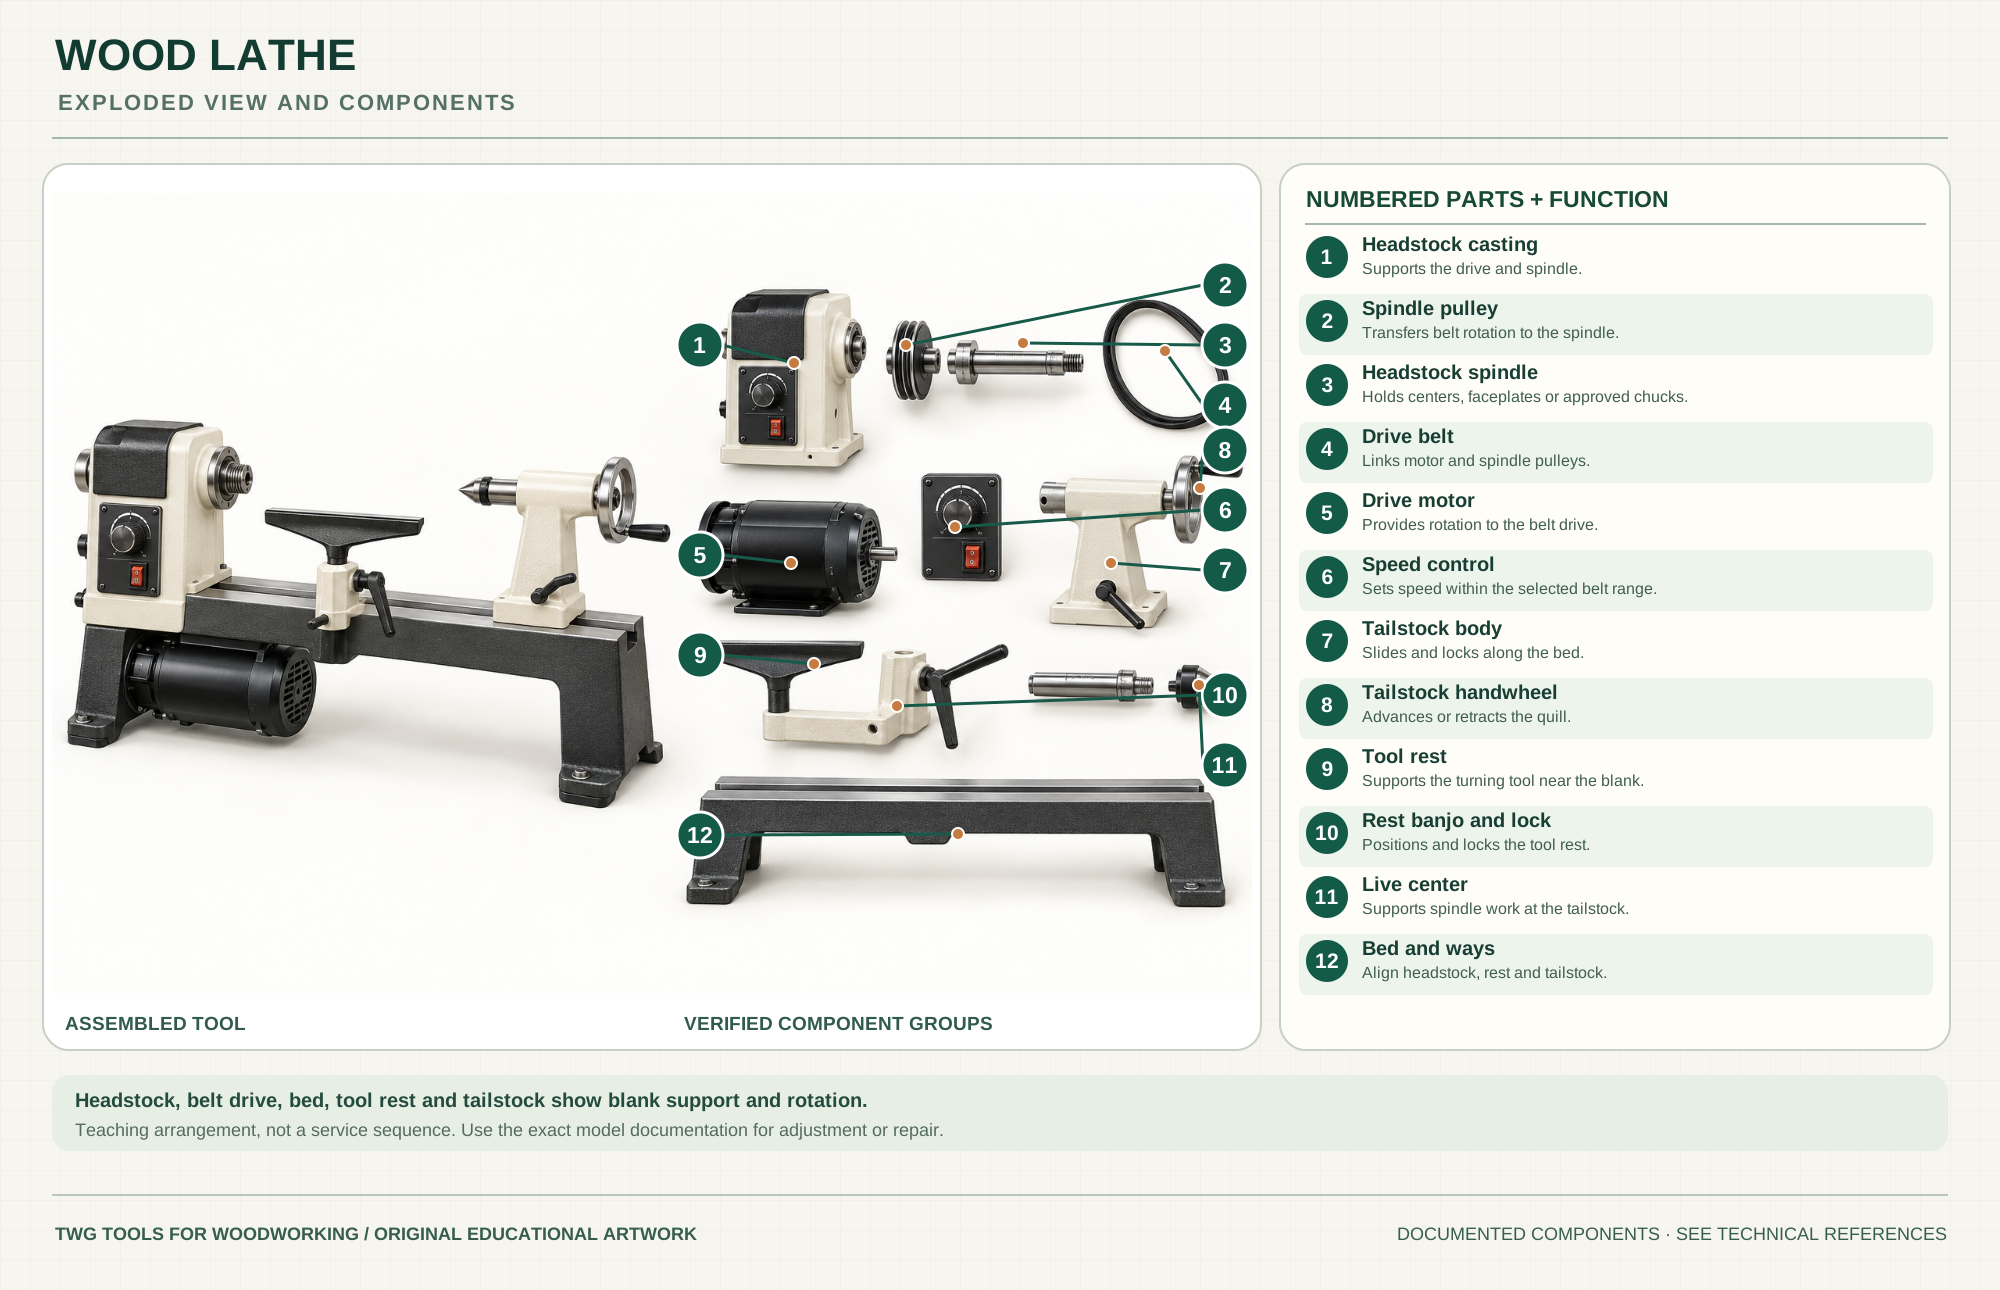
Supports the drive and spindle.
Manual partsTransfers belt rotation to the spindle.
Manual driveHolds centers, faceplates or approved chucks.
Manual spindleLinks motor and spindle pulleys.
Manual beltProvides rotation to the belt drive.
Manual partsSets speed within the selected belt range.
Manual controlsSlides and locks along the bed.
Manual tailstockAdvances or retracts the quill.
Manual tailstockSupports the turning tool near the blank.
Manual setupPositions and locks the tool rest.
Manual setupSupports spindle work at the tailstock.
Manual centersAlign headstock, rest and tailstock.
Manual partsTechnical references: JET JWL-1221VS manual and parts drawings · JET JWL-1221VS official model page. Original educational artwork depicts verified component groups and their relationships; it is not a service sequence or a replacement for the exact model manual.
A lathe rotates the blank while a hand-held turning tool rests on a rigid support. The JWL-1221VS is a bench-format variable-speed wood lathe with a 12½-inch swing and 20¼ inches between centers. A drill press rotates the cutter into stationary wood; a lathe rotates the wood past a cutting edge. Turning capacity, safe speed and mounting method depend on the blank, balance, tooling and exact machine.
A motor drives the headstock spindle through pulleys and a belt. The spindle accepts approved centers, faceplates or chucks. The bed aligns the headstock, movable tool-rest banjo and tailstock; the tailstock quill supports between-centers work. The electronic speed control works within a selected belt range. The component poster separates documented groups for teaching and is not a service sequence.
The headstock supports the rotating spindle. Match center, faceplate or chuck mounting to the JWL-1221VS spindle and inspect engagement before turning.
The documented drive uses a motor, pulleys and belt. Set a suitable belt range with the machine disconnected, then adjust speed only within that range.
The bed ways guide the tailstock and tool-rest base. Keep the mating faces clean and lock both accessories before startup.
The banjo positions the rest close to the blank, below or near its center as the cut requires. Rotate the blank by hand to confirm clearance before power.
A locked tailstock and advanced quill support spindle work with a suitable live center. Do not assume this support replaces a secure headstock mount.
Know the on/off switch and speed knob before mounting wood. Stop immediately for wobble, loosened stock or unexpected vibration.
These decisions make the mechanism useful at the bench.
Use between-centers support for suitable spindles, or a suitable faceplate or chuck for face work. Follow the exact accessory instructions and wood condition.
Assess diameter, balance and secure mounting; start at a low suitable speed and stand out of the blank's projected path at startup.
Lock the rest near the work without contact. Reposition it only after stopping and turning the blank by hand to check clearance.
Turn handles, legs and posts between centers, using layout marks and calipers to control repeated diameters.
Mount suitable blanks with an approved faceplate or chuck, respecting swing and balance; choose cuts for grain orientation.
Pens, knobs and boxes benefit from a stable bench, sharp tools and small, controlled cuts.
Use the steps for a first pass, then inspect the work before changing the setup.
A large or uneven blank stores more energy and may vibrate. Slow down, improve mounting and remove excess waste before attempting a faster finish.
The tool rests on the locked support before its cutting edge meets wood. A tool held unsupported is hard to control.
The wood grain meets a turning edge differently in a spindle and a bowl. Choose an appropriate gouge and presentation for each cut.
As the blank becomes round and smaller, move the rest closer with the machine stopped; recheck clearance by hand.
Compare swing, between-centers length, mass and footprint against actual blanks. The JWL-1221VS is a bench machine.
This model pairs variable control with belt ranges. Other lathes may use stepped pulleys alone; follow the exact chart.
Spindle work commonly uses two centers; bowls often use a faceplate or chuck. Each demands its own secure setup.
Traditional gouges, scrapers and carbide tools differ in edge presentation. Learn the manufacturer's method for the tool being used.
Stop the tool and disconnect power before investigating a fault or changing a part.
Stop and inspect blank balance, mounting, stand stability and suitable speed.
Disconnect power and check belt condition, range selection and tension by the JET manual.
Review rest position, tool sharpness and presentation; seek qualified turning instruction before restarting.
Use the exact tool manual for setup, limits and replacement parts. These lessons, documents and model pages teach relevant techniques or help compare real variations.
These maker-owned links document relevant tools and tool brands. A product brand may use another company's factory; compare the exact model before choosing parts or accessories.
Cutters, abrasives, guards, guides, dust fittings and service parts vary by tool. Check the model plate and manufacturer manual before ordering or changing a component.
Compare the Wood Turning family →Continue through the Tools library