
Caul
Spread clamp force and keep parts aligned during assembly, while preserving the separate jobs of closing a joint, supporting the work and protecting its surface.
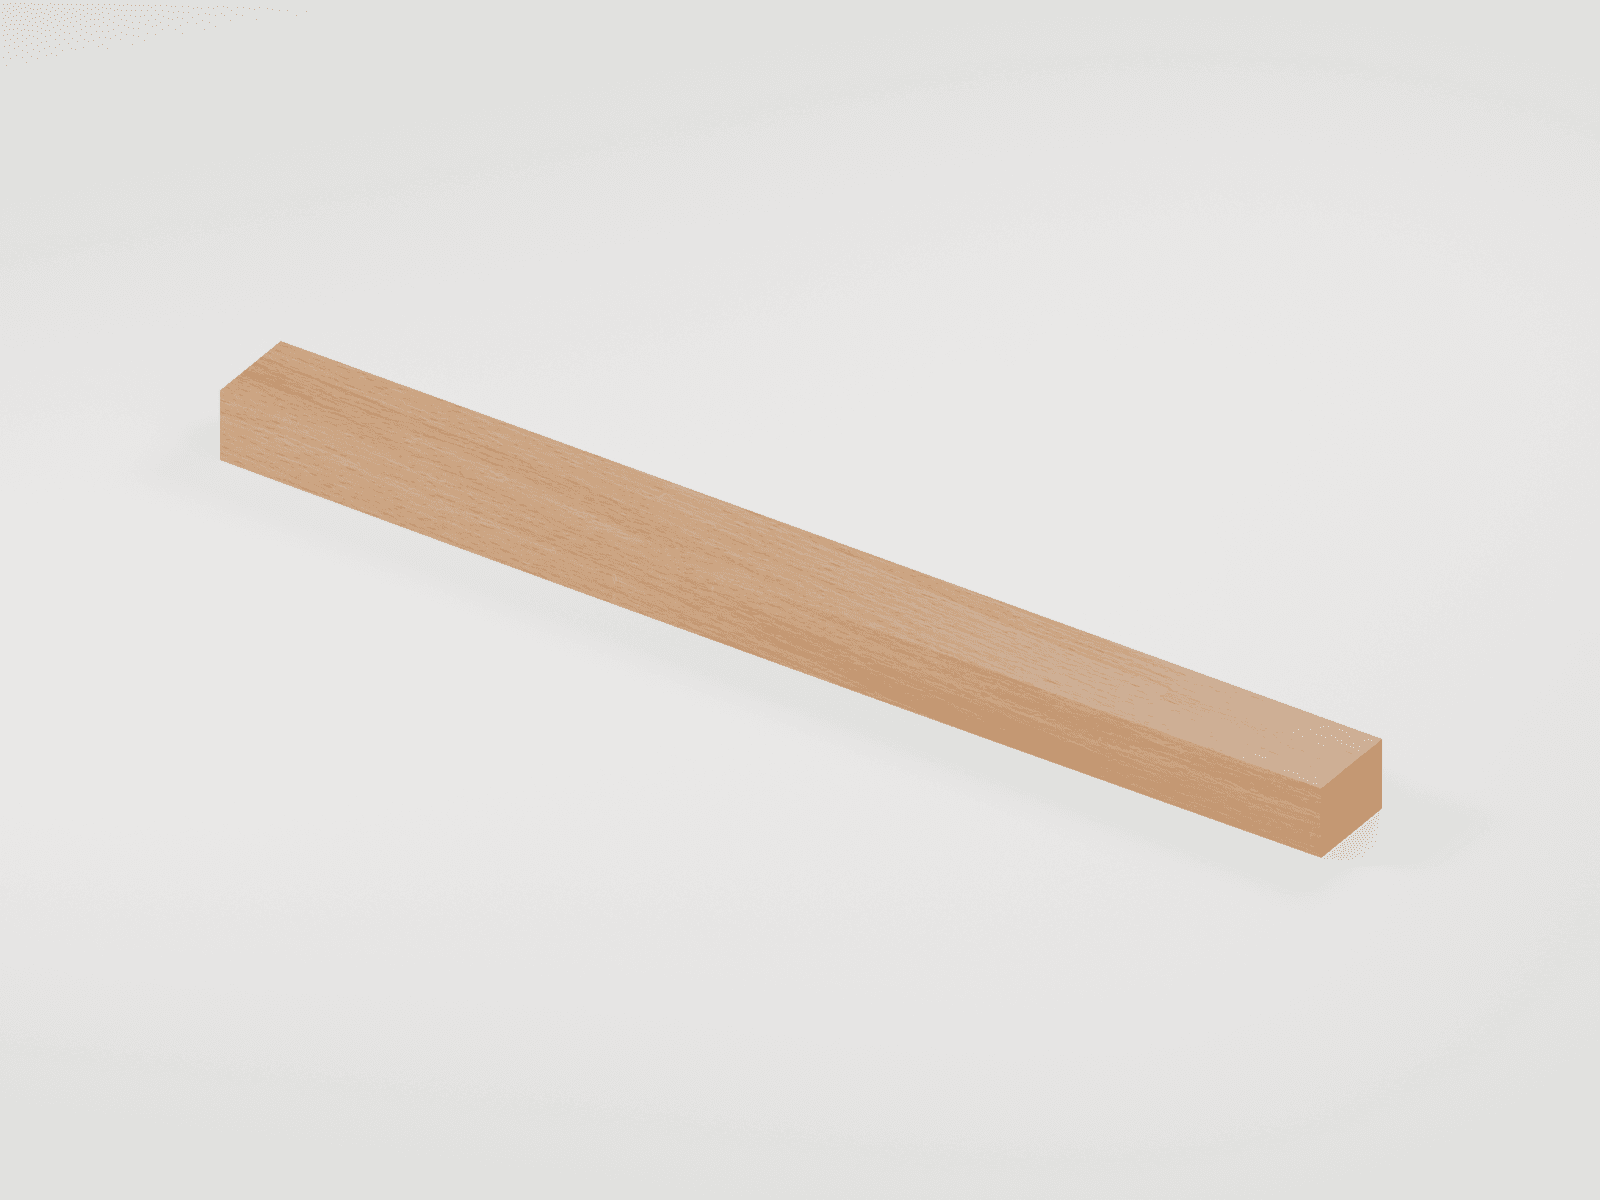
See the intact tool and its features
An original educational poster identifies 4 documented features of this tool. The numbered descriptions remain readable below the artwork on narrow screens.
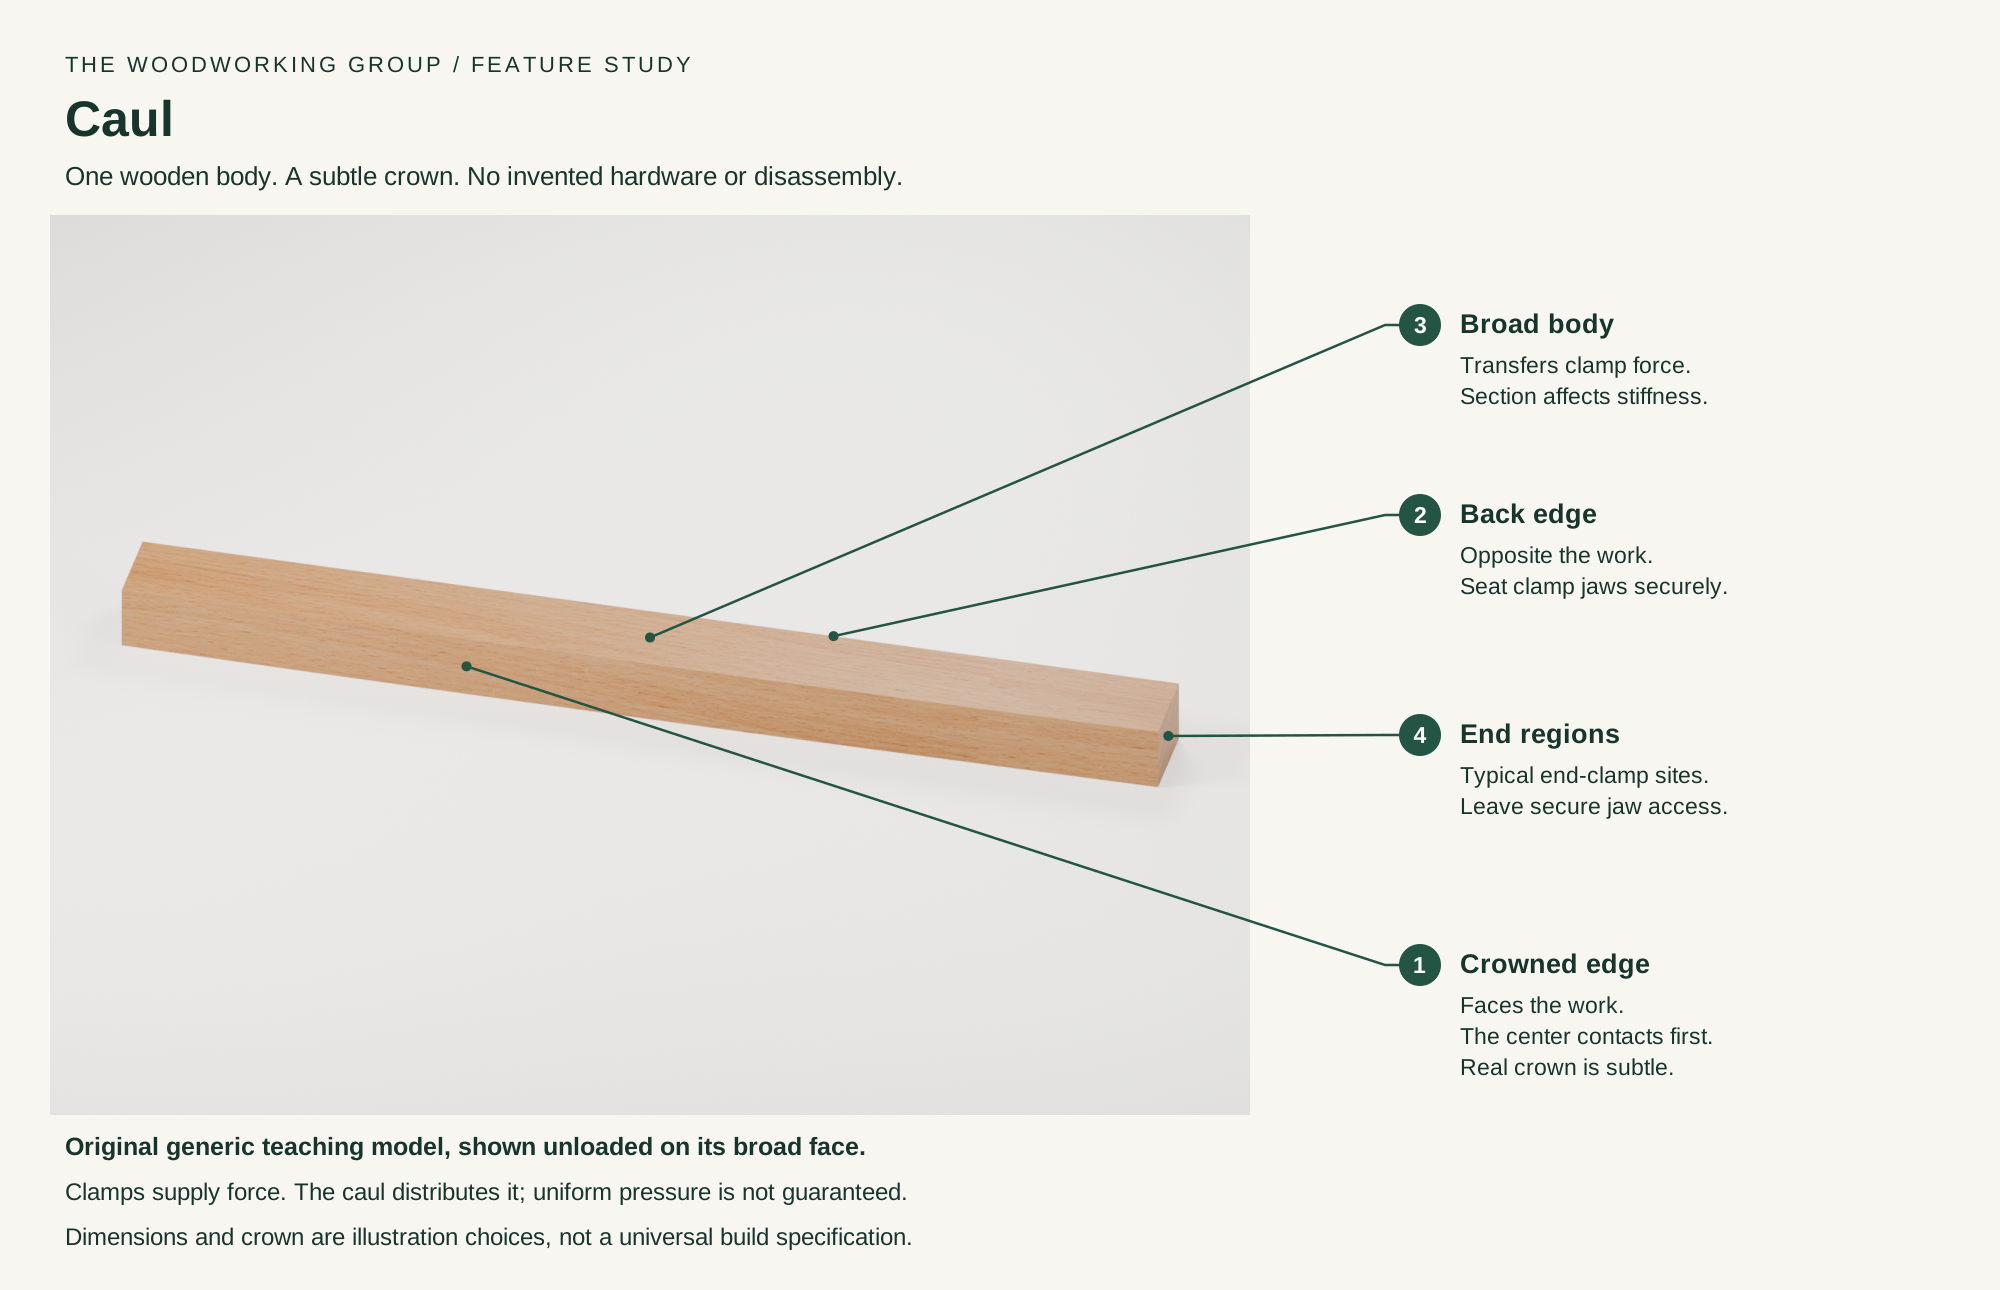
- Crowned working edge
Faces the work and initiates center contact.
- Back edge
Provides the outer side opposite the work.
- Broad body
Transfers force between clamps and work.
- End regions
Common sites for paired end clamping.
Technical references: Easy cauls · Convenient cauls for panel glue-ups · Woodpeckers clamping-cauls documentation. One closed wooden body appears in both studio views, resting on a broad face. Its working edge has a slight convex crown, while the back remains straight. The 24-inch length, 2-inch end depth, 1.5-inch thickness and 1/16-inch center crown are original illustration choices, not a build plan, universal crown or load rating. No loaded deformation is modeled. Original educational artwork depicts the intact tool and magnified features; the additional views are not detachable parts.
What it is and what each part does
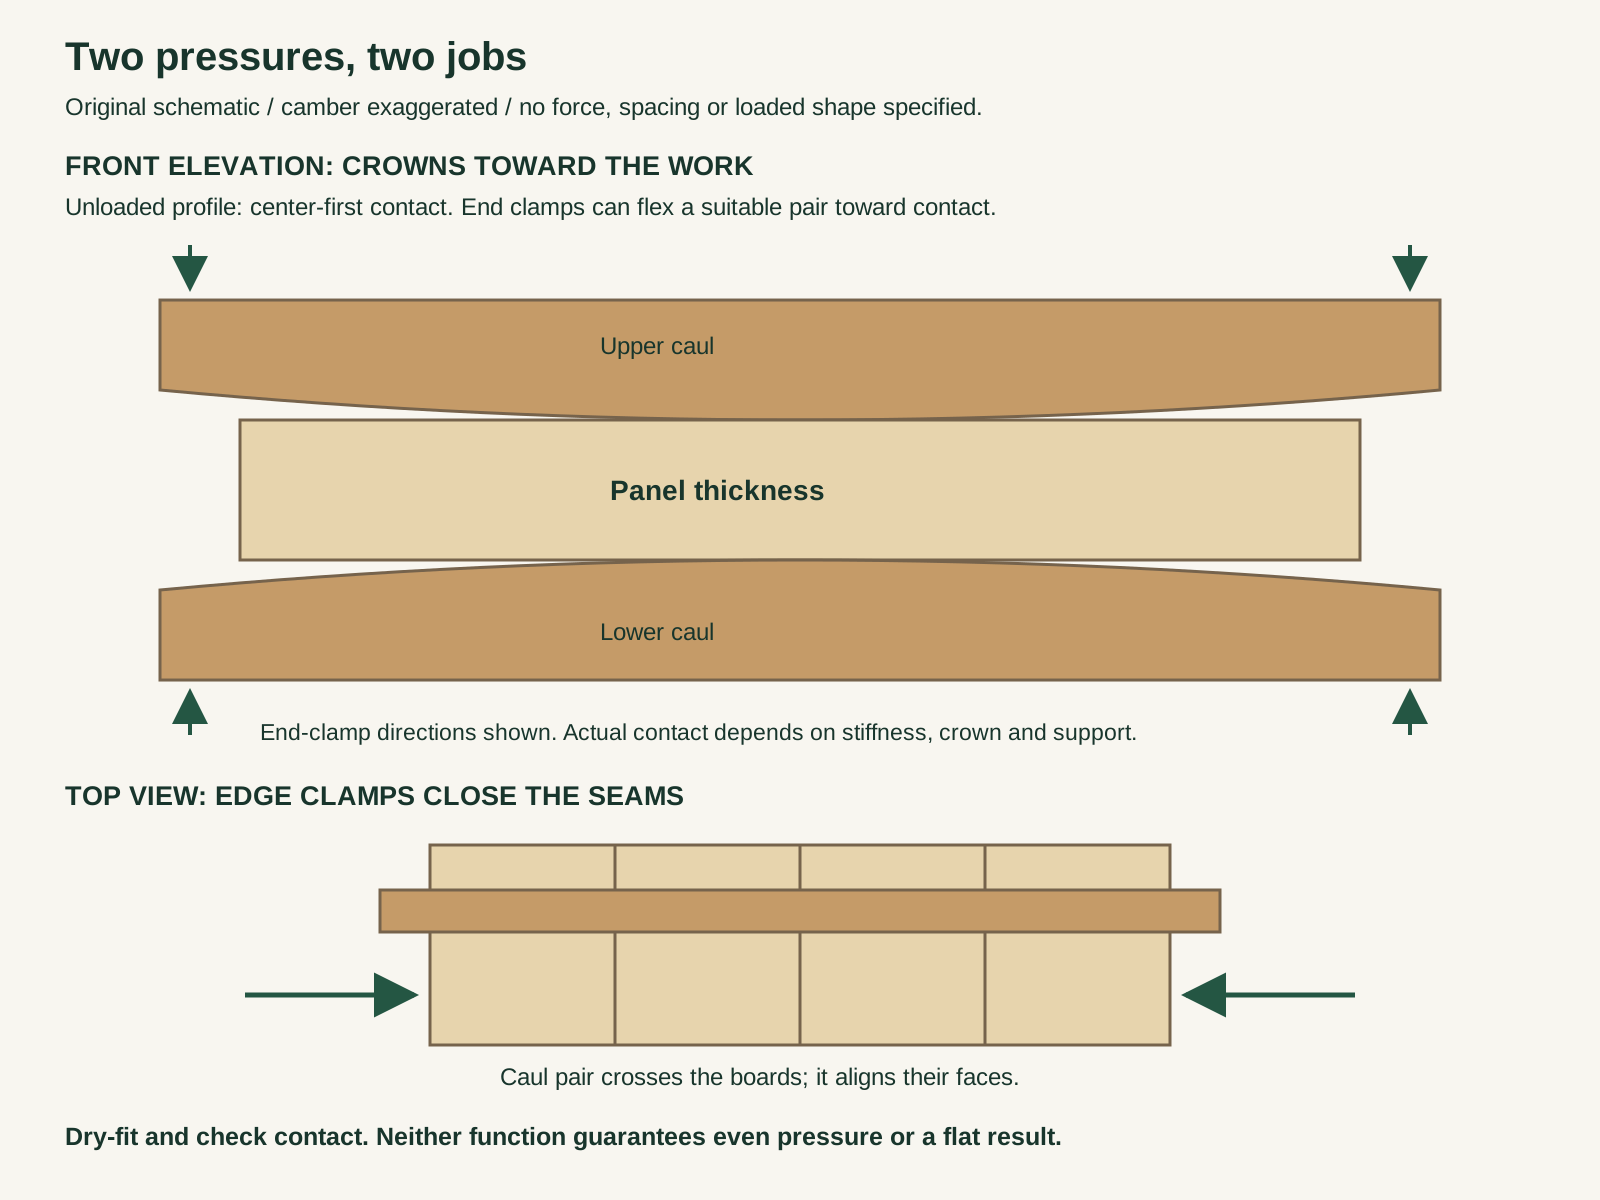
A caul is a pressure-distributing piece placed between clamps and work. It does not create force by itself. A small clamp pad mainly protects a local contact; a longer caul can bridge a span. In a panel glue-up, paired cauls help align the faces, while separate edge clamps close the board joints.
A slight convex crown faces the work so the center contacts first. Clamping the end regions can flex a suitable caul toward broader contact. The result depends on its span, stiffness, crown, clamp positions and the work beneath it; a generic curve does not guarantee uniform pressure. Dry-fit the complete arrangement and check contact rather than judging success by handle force alone.
1. Crowned working edge
The gently convex edge faces the work. In this example the crown is cut into one edge; the whole body is not drawn as a bent spring.
2. Back edge
The opposite long edge provides the outer side of this caul. Clamp jaws must seat securely in the actual setup.
3. Broad body
Carries load between clamp locations and the work. Its material and cross section affect stiffness; appearance alone does not establish force or capacity.
4. End regions
Common locations for end clamps when using a pair across a panel. Leave suitable access and use stable jaw seating, not a slipping tip contact.
How the main groups connect
Set, guide and control the action
These decisions make the mechanism useful at the bench.
Test the span and contact
Dry-fit with the real work and supports. A caul that is too flexible may not apply useful center pressure; an overly stiff or over-crowned caul can require excessive force.
Aim the crown correctly
For a crowned pair, turn the working edges toward the opposite faces of the panel. Keep the pair aligned so pressure is not applied in offset lines.
Keep the caul from bonding
Use a suitable release barrier on the contact surface and test it with the actual adhesive. Keep wax, oil or release material off the joint faces and surfaces that must take a finish.
Align an edge-glued panel
Paired cauls cross the boards and help keep neighboring faces aligned. Edge clamps still supply pressure across the glue joints.
Reach a casework joint
A suitable caul can transfer pressure toward a shelf or rail where clamp jaws cannot reach directly. Place the support and force over the intended joint.
Support edging or a delicate surface
Use a clean, appropriately shaped caul to spread contact and reduce local dents. Confirm that the face actually fits the work instead of bridging over it.
Setup, technique and finish quality
Use the steps for a first pass, then inspect the work before changing the setup.
- Prepare accurately fitting parts and a stable assembly surface. Inspect the cauls and clamps; do not use clamp force to disguise a badly fitted joint.
- Arrange the full dry assembly with cauls, end clamps, edge clamps and release barriers. Verify reach, clearance and access before opening the glue.
- For a crowned pair across a panel, face both crowns inward toward the work and align the upper and lower cauls. Check center contact and reasonable end travel.
- Apply the adhesive according to its instructions and assemble within its working time. Bring the appropriate clamps into contact gradually, keeping the parts aligned.
- Balance caul pressure and edge-joint pressure. Watch for board movement, bowing, dents, twisting or a caul that contacts only in the middle.
- Recheck alignment, joint closure and support while adjustments remain possible. More clamp force is not a substitute for the correct layout.
- Keep the assembly restrained for the adhesive-specific time and conditions. Support loose parts while releasing clamps gradually, then inspect the joint and clean the cauls.
Two different directions of pressure
Cauls above and below a panel help align its faces. Edge clamps squeeze the boards together across the seams. One function does not automatically supply the other.
Crown is conditional
A shallow curve can help reach the middle, but there is no universal crown or clamp spacing for every span, section, wood and glue-up.
A caul is not a flattening cure
Clamping warped or poorly prepared stock temporarily flat does not guarantee that it will stay flat after release. Correct the underlying fit and support.
Veneering is a separate pressure problem
A few bars do not automatically distribute enough pressure over an entire veneer sheet. Use suitable platens and a validated pressing arrangement for the veneer, substrate and adhesive.
What changes by model or material
Flat bars or boards can protect surfaces and distribute pressure in suitable setups. Confirm their actual contact rather than assuming that every caul needs a crown.
A shallow convex working edge helps initiate contact near the center. The illustrated body has this profile; the unloaded curve is intentionally subtle.
Contoured cauls fit irregular work; broad platens support sheet bonding. Their shape and supporting clamp arrangement must match the job.
Engineered phenolic or metal designs may have model-specific ratings and hardware. Do not transfer those claims to a shop-made wooden caul.
Choosing the tool
- Choose length, stiffness and contact shape for the intended span and assembly, with room for secure clamp seating.
- Use sound material without splits or damaged bearing surfaces. Match protective contact material to the work.
- Prove the complete arrangement in a dry run. The model dimensions and camber are illustration choices, not a universal recipe.
Useful accessories
- Appropriate end clamps and separate edge clamps
- Adhesive-compatible release film or another tested barrier
- Stable supports and clean protective pads
- A suitable reference for checking panel alignment
Care, troubleshooting and safety
Secure the work, protect sharp edges and release any stored clamping pressure before adjustment or maintenance.
Care checklist
- Remove glue buildup without damaging the working profile. A hardened lump can concentrate pressure and dent the work.
- Inspect for splits, permanent distortion and damaged clamp-contact areas before reuse.
- Store wooden cauls so they remain dry and stable. Mark the working edge and keep matched or job-specific pieces identifiable.
Common mistakes
- Expecting cauls alone to close the edge joints in a panel.
- Turning a crowned working edge away from the work.
- Assuming tighter handles prove uniform pressure or adequate glue coverage.
- Letting release products contaminate the bonding faces or finished surface.
Safety at the operation
- Support the assembly and cauls so they cannot fall when a clamp is moved or released. Keep heavy setups off unstable edges.
- Keep fingers clear of clamp jaws and closing gaps. Release stored bending force gradually and stay out of a slipping clamp's path.
- Do not use cracked cauls, overloaded clamps or extra handle extensions to overcome a poor fit. Follow clamp capacity and use instructions.
- Follow the adhesive label and safety data for handling, ventilation, skin/eye protection and cleanup. This guide is not a universal glue, pressing-time or pressure specification.
When the result goes wrong
Check upper/lower alignment, support and contact across the span. Confirm the boards are properly prepared and the edge clamps are not pulling them out of plane.
Check orientation, caul stiffness, span and clamp placement in a dry run. A thin flexible bar may not transmit useful force to the center.
The crown may be excessive or the caul too stiff for the setup. Stop before overloading clamps or crushing the work; change the arrangement.
Revisit supports, force direction and balance. Do not assume that still more caul pressure will fix a misaligned or badly fitted assembly.
The barrier may be missing, damaged or incompatible with the adhesive. Use a material-appropriate removal method rather than prying hard against a delicate surface.
Manuals and educational resources
Use the exact model documentation for setup, limits and replacement parts. These lessons, documents and model pages teach relevant techniques or help compare real variations.
Manufacturer documentation
Woodpeckers clamping-cauls documentation
Manufacturer information for its phenolic system. This is not the source drawing or specification for the wooden TWG illustration, and its force claims are not transferred here.
Titebond glue-use FAQs
Manufacturer guidance showing that clamp and drying requirements depend on the actual adhesive and joint. Follow the specific product instructions.
Learn and compare
Easy cauls
Howard Hirsch explains the purpose of a slight crown for reaching the center of casework. The construction method is not reproduced in this guide.
Convenient cauls for panel glue-ups
William Flather describes paired alignment cauls and separate bar clamps across the panel. His threaded-rod hardware is not depicted here.
Veneering FAQ
VeneerSupplies explains why inadequate or uneven pressing can cause veneer problems. Its adhesive-specific recommendations are not a universal caul recipe.
General hand-tool operation
CCOHS guidance on inspecting tools and keeping work secure.
Manufacturers & Brands
These maker-owned links document relevant tools and tool brands. A product brand may use another company's factory; compare the exact model before choosing parts or accessories.
Choose parts for the exact model
Handles, irons, saw plates, clamping pads and other replacements vary by maker and model. Use the maker's documentation before changing a component.
Compare the Assembly Support Tools family →Continue through the Tools library