
Brass back
The solid milled spine stiffens and adds weight to the thin blade, but also limits cutting depth. Do not twist the blade in a kerf.
Understand the stiff back, fine rip toothline and careful starting cut that make hand-cut dovetails controllable.
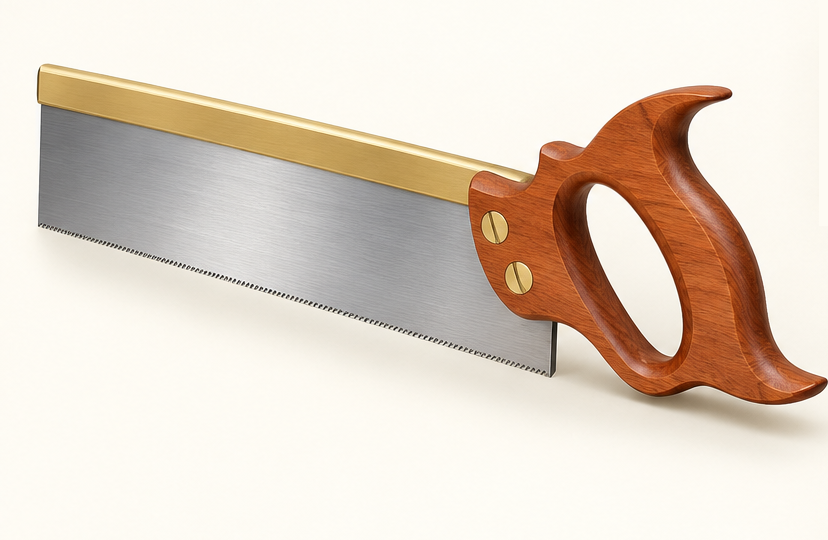
An original educational poster identifies 5 documented construction features. The numbered descriptions remain readable below the artwork on narrow screens.
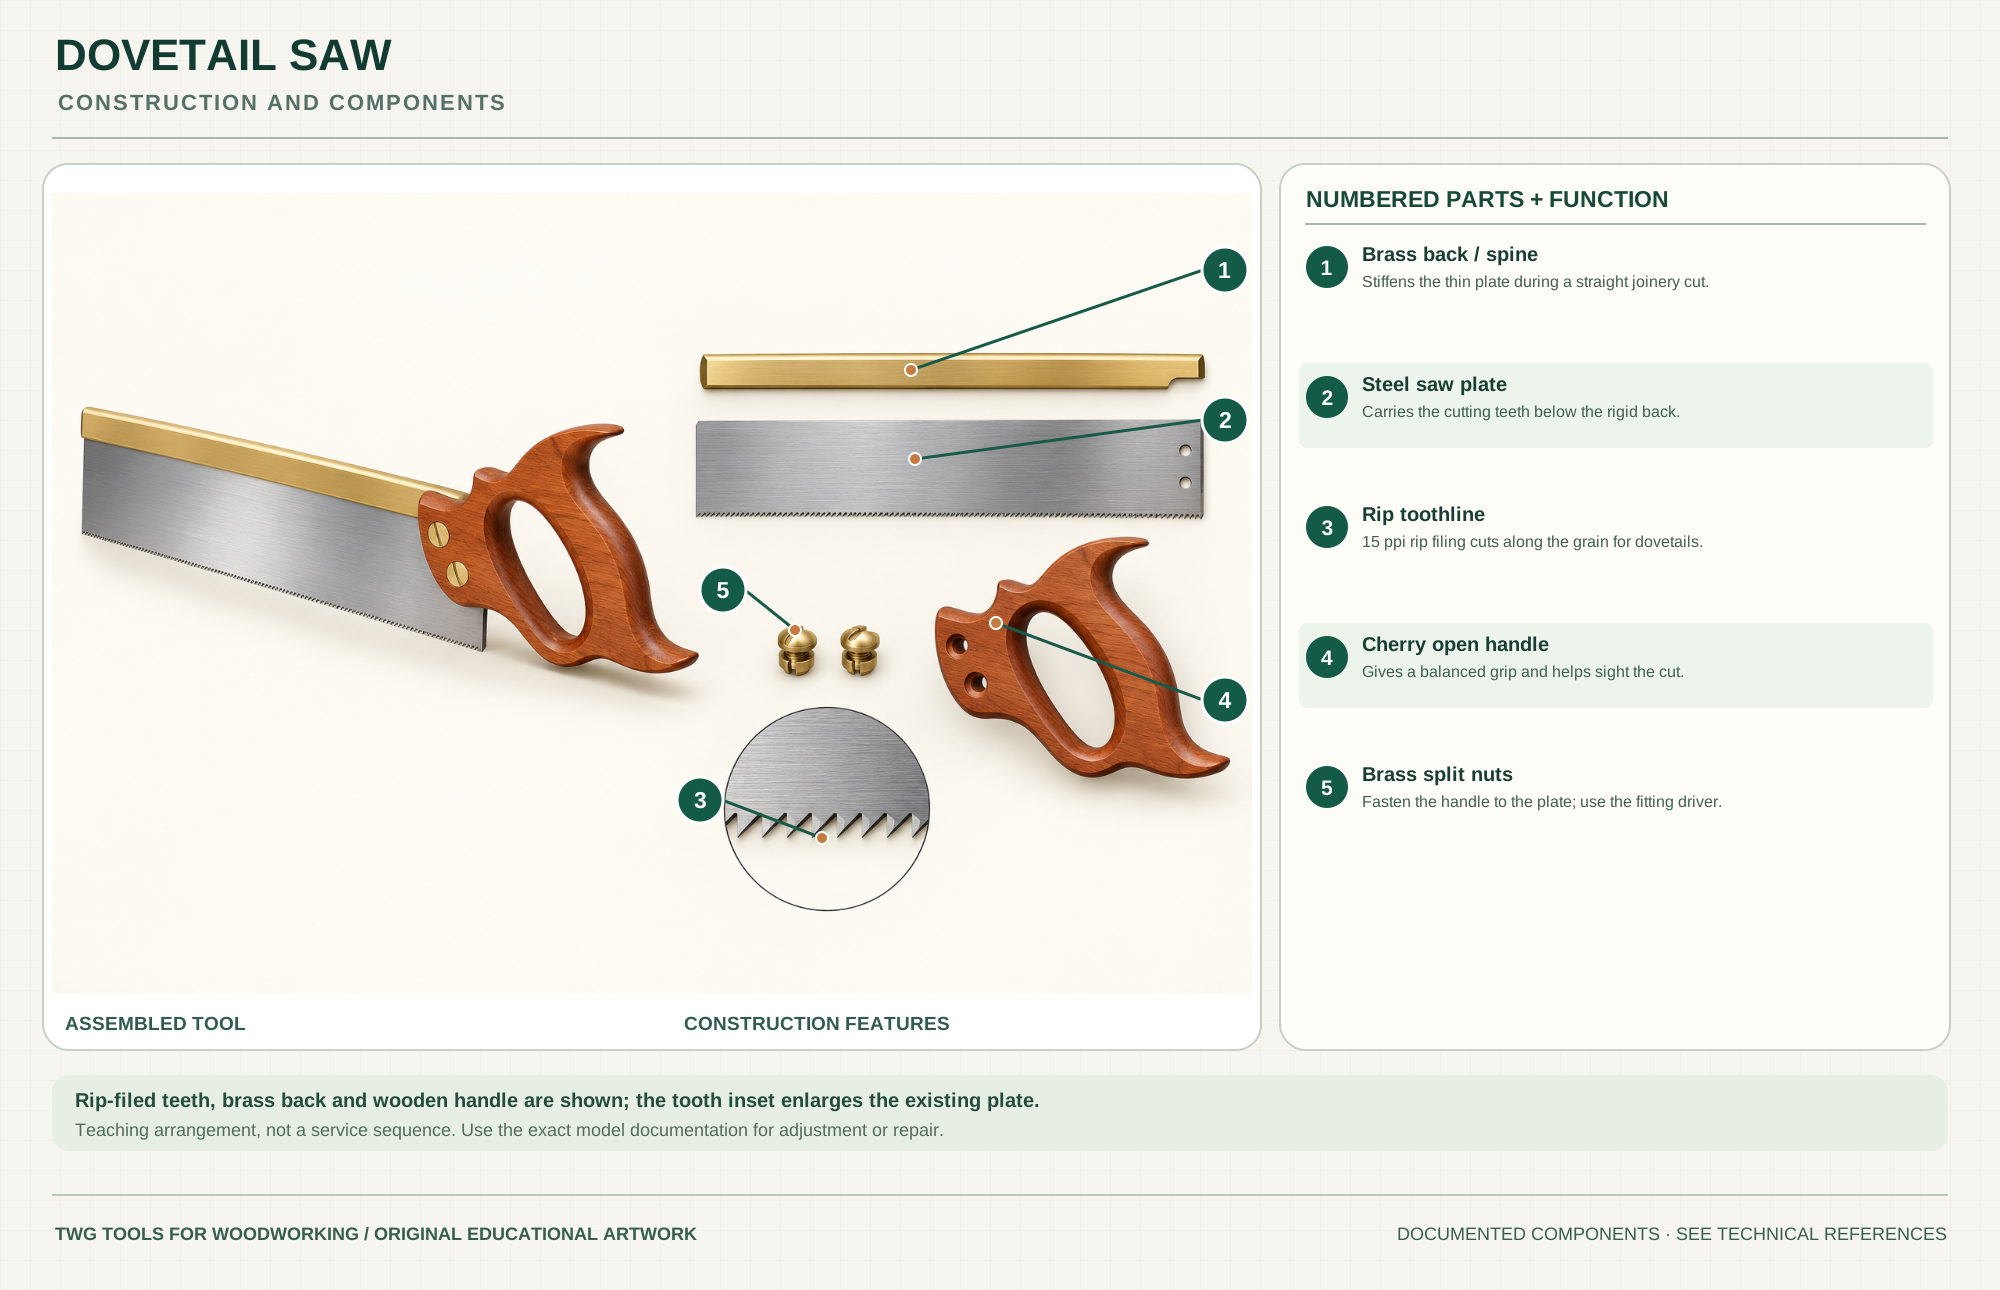
Stiffens the thin plate during a straight joinery cut.
Carries the cutting teeth below the rigid back.
15 ppi rip filing cuts along the grain for dovetails.
Gives a balanced grip and helps sight the cut.
Fasten the handle to the plate; use the fitting driver.
Technical references: Lie-Nielsen 1-SAW-DS product and technique · Lie-Nielsen back-saw instructions. Five meaningful external construction features of the 1-SAW-DS; the tooth detail enlarges the existing blade, rather than adding a separate component. Original educational artwork depicts documented component groups and their relationships; it is not a service sequence or a replacement for the exact model manual.
A dovetail saw is a fine-toothed backsaw for short, accurate joinery cuts along the grain. The named Lie-Nielsen 1-SAW-DS has a stiff brass back, thin Swedish-steel plate, cherry open handle and 15-points-per-inch rip filing. Its 10-inch usable blade and 1⅝-inch depth limit the height of a through cut. A crosscut carcass saw uses different filing to sever fibers across the grain; a larger tenon saw has more capacity for deeper joinery.
The brass spine holds the thin plate rigid while the fine rip teeth remove a narrow kerf. Two split-nut bolts secure the wooden handle. Accuracy begins with the first few strokes: keep the plate registered beside the layout line, use the whole toothline with light pressure and let the saw's set provide clearance. The poster shows actual external groups, not a service sequence.
The solid milled spine stiffens and adds weight to the thin blade, but also limits cutting depth. Do not twist the blade in a kerf.
The 1-SAW-DS uses a 0.020-inch plate with slight set. The maker quotes about 0.003 inch of set per side and a 0.026-inch kerf; this is model-specific, not a universal dovetail-saw value.
Fifteen points per inch are filed for cuts running with the grain, as in dovetail tails and pins. A tooth close-up in the poster repeats this feature at larger scale.
The cherry grip is held by traditional brass split nuts. It gives directional control; a correctly fitting split-nut screwdriver is needed for fastener work.
These decisions make the mechanism useful at the bench.
Mark baseline and tails or pins with a knife or sharp pencil; identify the waste side before cutting. Hold the board upright and stable.
Set the teeth beside the waste-side line, sight the blade across both faces and start slowly with little downward force. The model instructions recommend the plate flush with the stock top rather than a pronounced tilt.
Use long even strokes, keeping the blade upright and watching the near and far layout lines. Stop at the baseline; a small set makes late corrections difficult.
Saw tail or pin cheeks to the baseline, then remove waste using a suitable coping saw and chisel or the planned method.
The fine rip teeth can cut short tenon cheeks and other shallow cuts within the saw's depth.
Cut parallel kerfs in scrap to learn the saw's tracking and the line offset before cutting a fitted joint.
Use the steps for a first pass, then inspect the work before changing the setup.
The very first kerf guides later strokes. A fine-set saw has little room for correction once off the line.
The maker notes that grabbing or jumping is often too much downward pressure. Reduce pressure and use more of the toothline.
Dovetail fitting depends on preserving the layout line. Decide which face is waste before bringing teeth to wood.
The spine eventually meets the work. Use a deeper backsaw or another method when the required cut exceeds this model's blade depth.
Rip filing suits dovetail cheek cuts with the grain. A crosscut carcass saw has a different tooth geometry for shoulder and across-grain work.
The grip shape changes comfort and fastener type; this reference has an open cherry handle and split nuts.
Some saws taper plate depth for a different sightline and balance. The selected 1-SAW-DS is the standard straight-back form.
Finer teeth suit smaller work but can cut more slowly; tooth count, set and filing vary by maker. Use a matching sharpening method.
Secure the work, protect sharp edges and release any stored clamping pressure before adjustment or maintenance.
Recheck the first kerf, sighting on both faces, even pressure and tooth set; practice in scrap before altering the set.
Reduce downward pressure, check the stock is secure and inspect tooth sharpness.
Check blade twist, stock movement and whether the cut exceeds the spine-limited depth.
Use the exact model documentation for setup, limits and replacement parts. These lessons, documents and model pages teach relevant techniques or help compare real variations.
Exact cherry-handle dovetail saw specifications and detailed sawing advice.
Official 14 and 20 tpi saw details for comparing pitch and molded spine construction; these parts are not interchangeable with the reference saw.
Manufacturer comparison of rip/crosscut filing and backsaw variations.
These maker-owned links document relevant tools and tool brands. A product brand may use another company's factory; compare the exact model before choosing parts or accessories.
Handles, irons, saw plates, clamping pads and other replacements vary by maker and model. Use the maker's documentation before changing a component.
Compare the Hand Saws family →Continue through the Tools library