
Hood and dust port
The hood covers the drum. The JWDS-1632 manual specifies a 4-inch collection connection and calls for dust extraction before sanding.
Follow stock through a controlled conveyor beneath one abrasive-wrapped drum, and learn where this machine fits in thickness and finish work.
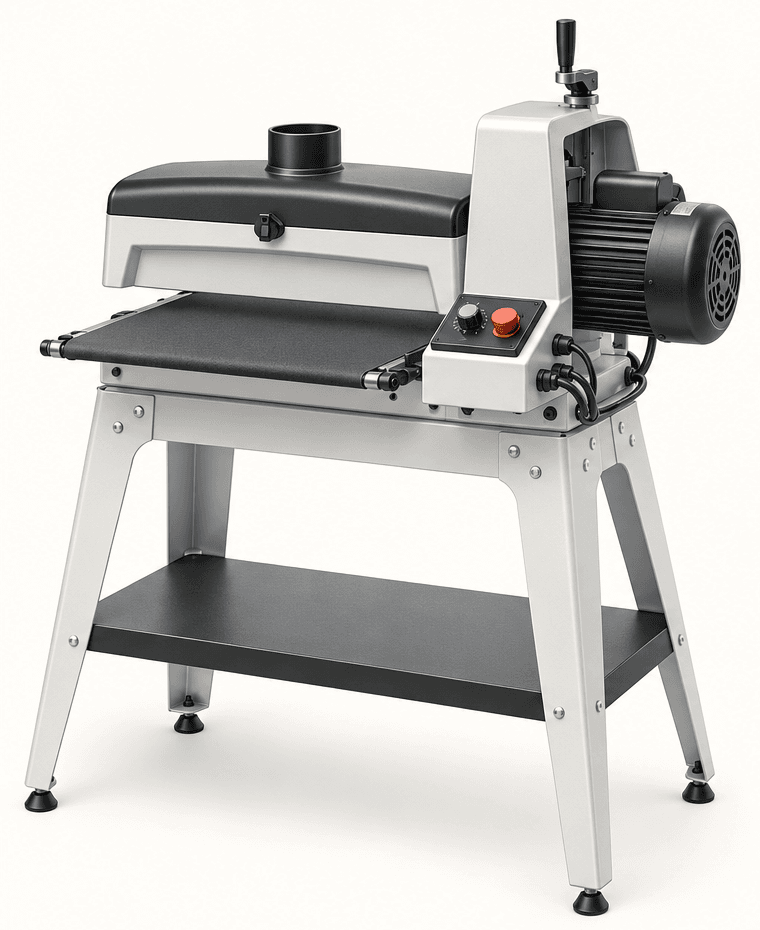
An original educational poster groups twelve model-grounded parts and systems. The numbered descriptions remain readable below the artwork on narrow screens.
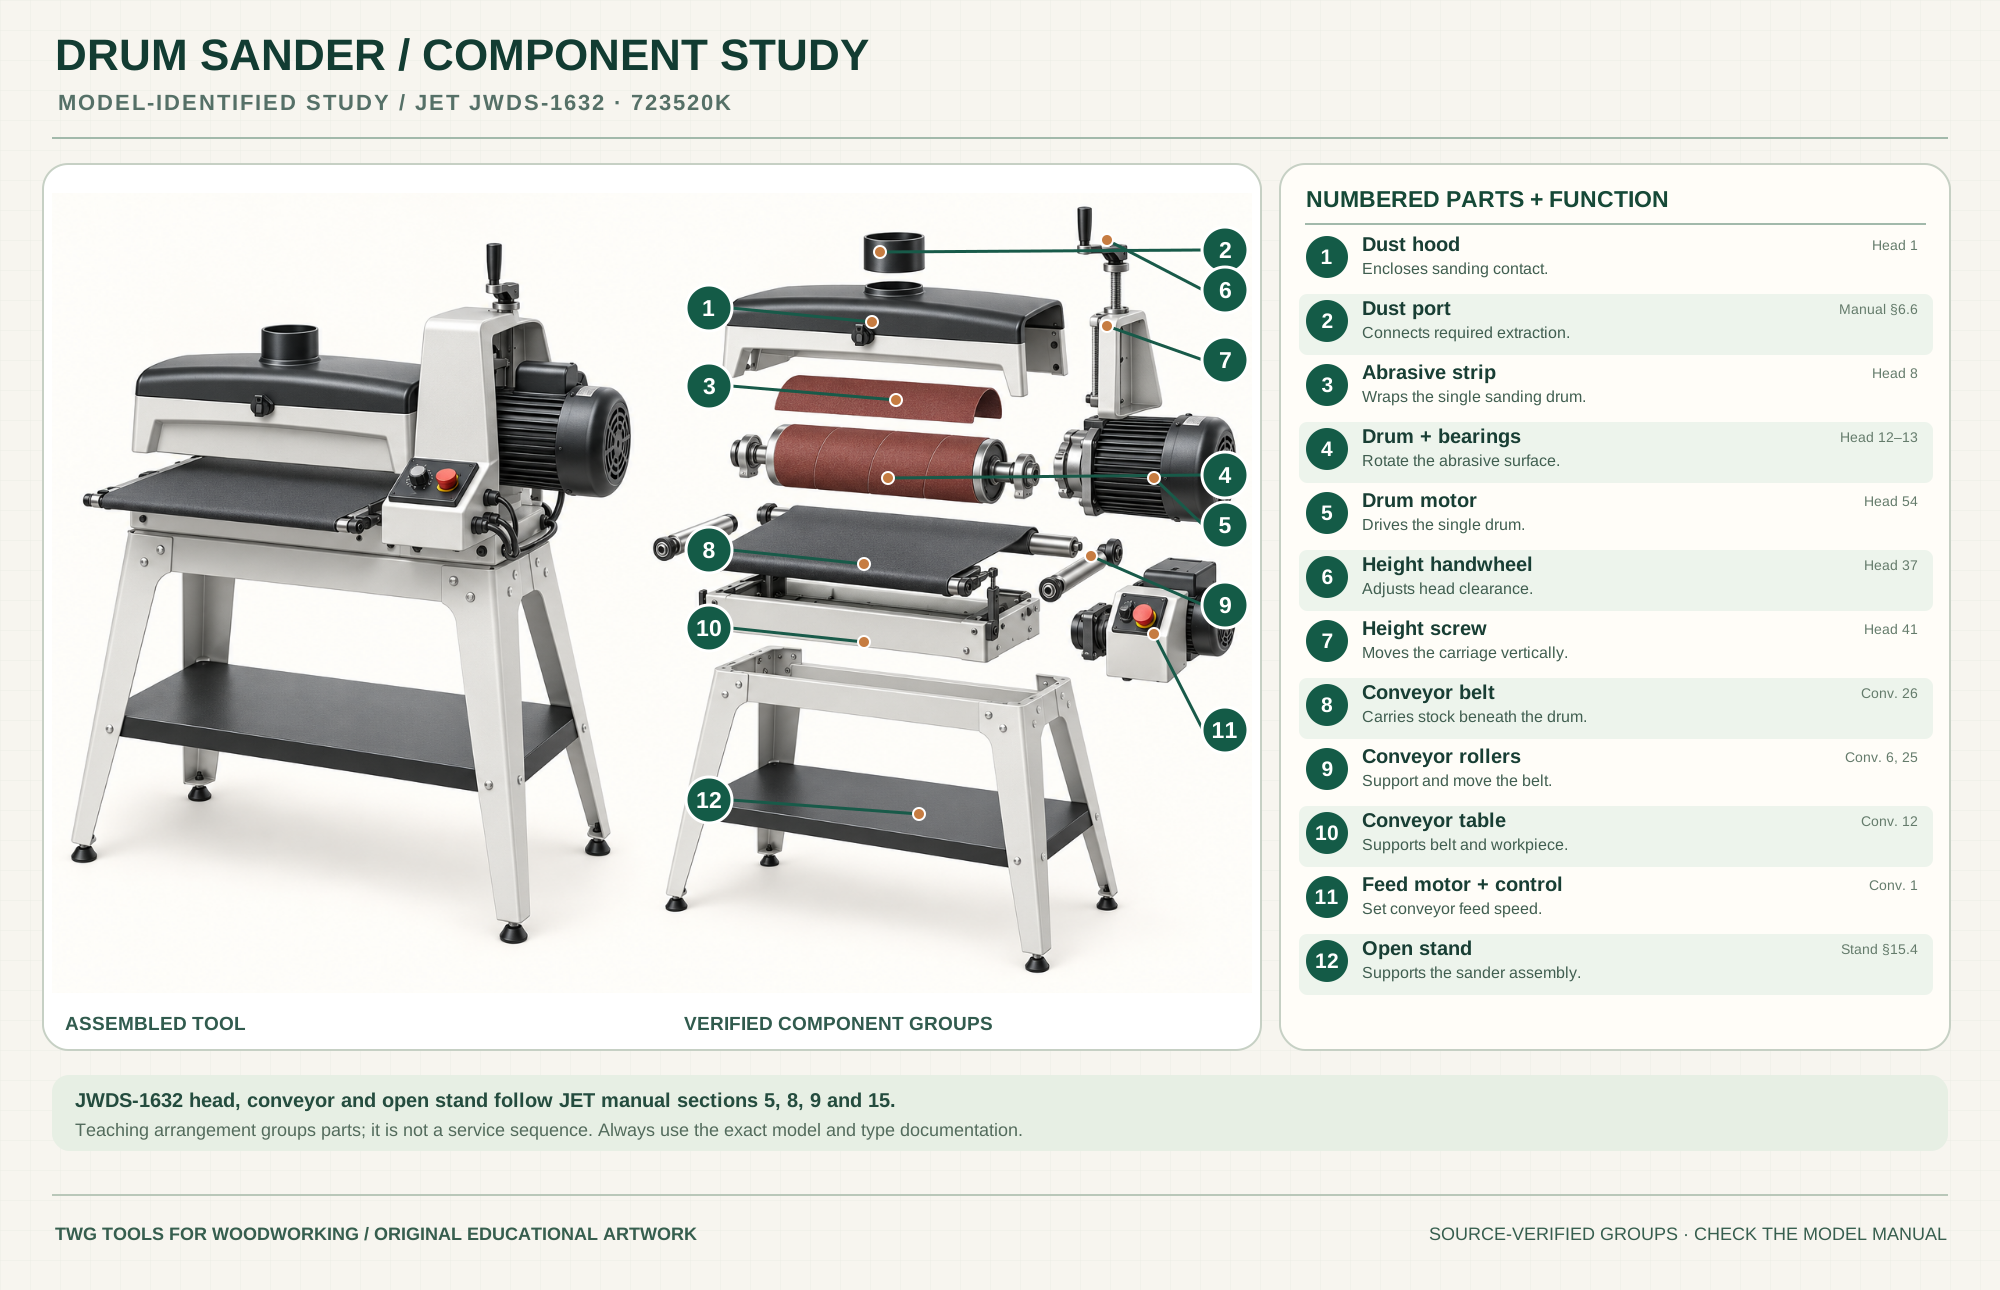
Encloses the sanding zone over the single drum.
Head item 1Connects the required dust extraction system.
Manual §6.6Wraps around the single drum for sanding contact.
Head item 8Rotate and support the abrasive sanding surface.
Head items 12–13Powers the sanding drum.
Head item 54Adjusts the head-to-conveyor clearance.
Head item 37Moves the head carriage when adjusted.
Head item 41Carries the work under the rotating drum.
Conveyor item 26Support and move the feed belt.
Conveyor items 6, 25Supports belt and stock below the drum.
Conveyor item 12Move the conveyor at the selected feed speed.
Conveyor item 1Supports the machine on a stable shop floor.
Manual §15.4Technical references: JET JWDS-1632/JWDS-1836 official manual; use JWDS-1632 head, conveyor and stand sections. Original educational artwork depicts verified component groups and their relationships; it is not a service sequence or a replacement for the exact model manual.
A drum sander feeds a board beneath a rotating abrasive cylinder. It can bring panels and thin stock toward a consistent thickness and refine broad surfaces, but removes far less material per pass than a planer and does not automatically flatten twisted or cupped stock. The JET JWDS-1632 reference is a single-drum, open-end machine with a separate conveyor feed; other models may have closed frames, two drums or oscillation.
A drum motor rotates the abrasive-wrapped cylinder while a separate feed system moves stock on the conveyor belt. The handwheel and screw set head-to-table clearance. A hood and dust port enclose the sanding zone and connect to suitable collection. The JET manual documents these groups; the poster separates them for education without claiming exact hidden linkage geometry or a service sequence.
The hood covers the drum. The JWDS-1632 manual specifies a 4-inch collection connection and calls for dust extraction before sanding.
One drum carries a replaceable abrasive strip. Clamp the wrap according to the JET instructions so it cannot unwind under load.
The separate motor at the head rotates the sanding drum; keep its cooling area clear.
The top handwheel turns a documented height screw to change the drum-to-conveyor gap. Make a small change and test the result.
A belt over its rollers carries the work; a feed motor and control set movement independently of drum rotation.
The open stand supports the assembly. Long or wide work needs properly aligned infeed and outfeed support.
These decisions make the mechanism useful at the bench.
Remove glue lumps and metal; verify stock fits the manual's minimum length/thickness and is stable on the belt.
Use the approved strip size and grit, wrap it firmly and maintain dust collection.
Set head clearance just below the high spot, choose a compatible feed speed and make modest passes; listen for motor load and burning.
Refine a supported panel after glue squeeze-out is removed, taking balanced light passes on both faces.
Use the exact model's minimum thickness and carrier guidance; small pieces can be unsafe or feed poorly.
Use calipers across the panel and make repeated light passes rather than trying to plane away a large amount with abrasive.
Use the steps for a first pass, then inspect the work before changing the setup.
A conveyor follows the stock's reference face; a bowed or twisted board may remain bowed or twisted after sanding.
Deep cuts, slow feed, loaded abrasive and weak collection can scorch wood or strain the motor.
A second pass after turning the work can handle wider panels only within the maker's capacity and support instructions.
Incorrect wrap or loose clamps may mark work and damage the machine. Follow the manual's wrap installation steps.
Open-end machines allow a controlled two-pass width; closed-frame machines limit width to the drum span but support both ends.
A dual-drum model can carry different grits simultaneously. JWDS-1632 has one drum; do not infer a second sanding head.
Some newer heads oscillate side to side; the JWDS-1632 reference manual does not specify that mechanism.
Feed-rate systems and load sensing vary by model; use the controls in the exact manual.
Stop the tool and disconnect power before investigating a fault or changing a part.
Reduce depth, adjust feed, replace loaded abrasive and verify collection.
Check stock reference face, belt tracking, head alignment and support.
Stop; inspect conveyor cleanliness/tension, stock minimums and contact pressure.
Use the exact tool manual for setup, limits and replacement parts. These lessons, documents and model pages teach relevant techniques or help compare real variations.
Maker's single-drum specifications and open-end configuration. The manual governs technique where current marketing copy is inconsistent.
WoodWorkers Guild of America demonstrates broad-panel sanding applications; adjust settings for the exact machine.
A second manufacturer's documented open-end layout for comparing feed, abrasive and alignment methods.
These maker-owned links document relevant tools and tool brands. A product brand may use another company's factory; compare the exact model before choosing parts or accessories.
Cutters, abrasives, guards, guides, dust fittings and service parts vary by tool. Check the model plate and manufacturer manual before ordering or changing a component.
Compare the Sanding family →Continue through the Tools library