
Blade carrier
Provides a repeatable blade seat. Register a flat, suitable blade rather than forcing an incompatible taper or irregular edge.
Hold a chisel or plane iron at a repeatable bevel angle and learn how projection, clamping and roller contact work together.
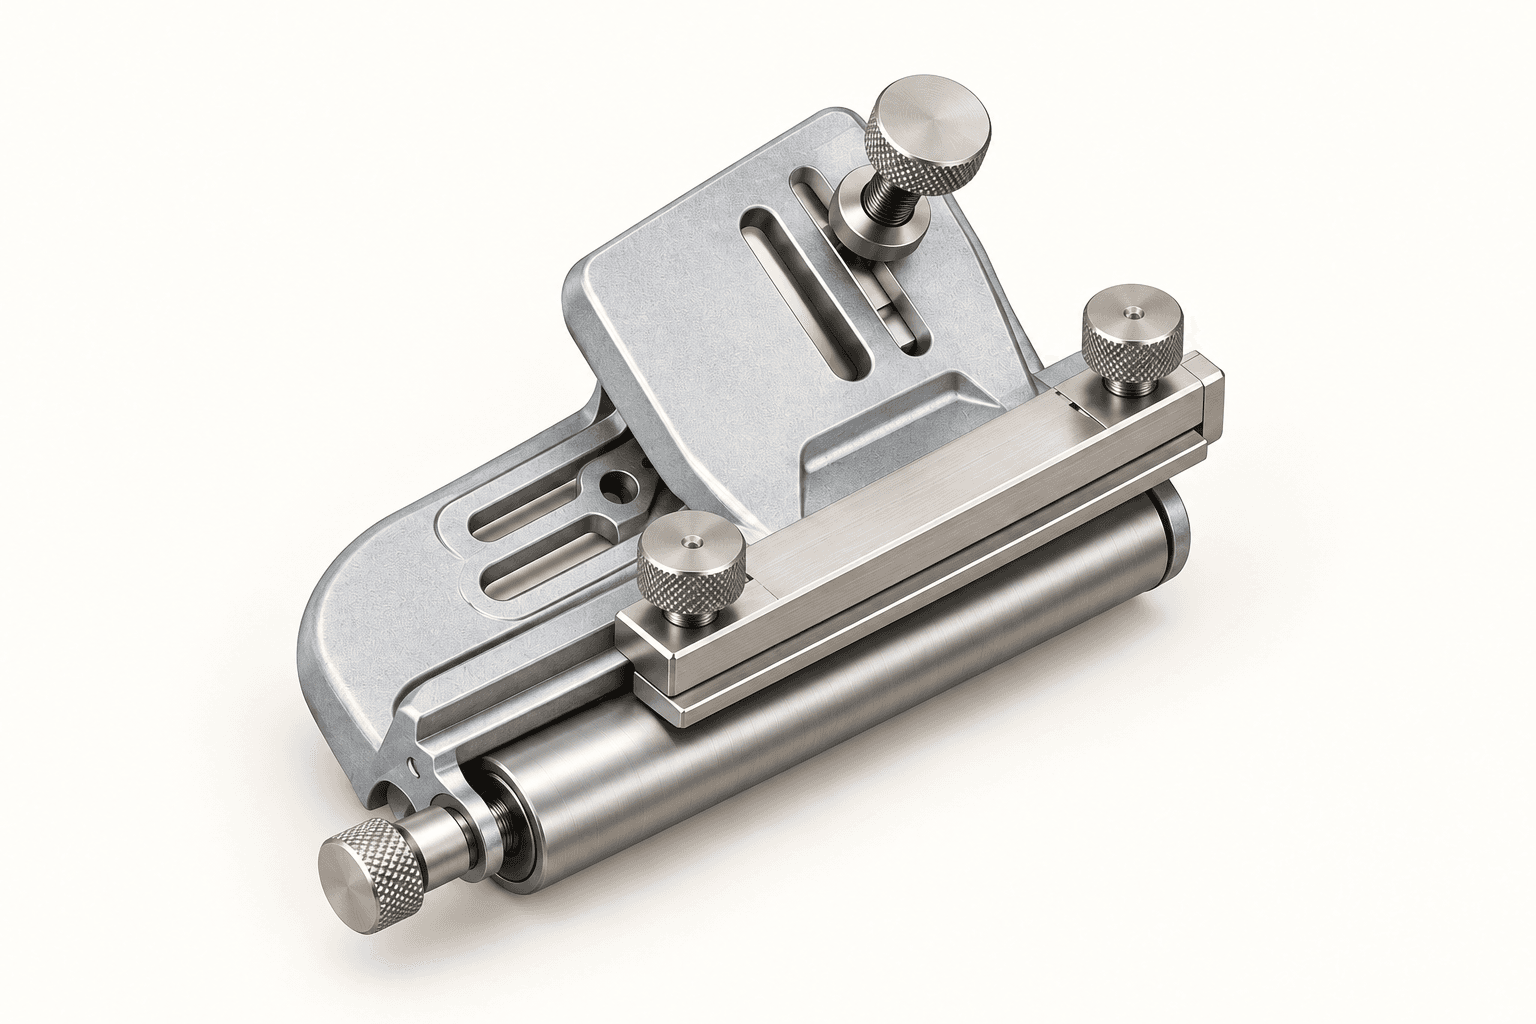
An original educational poster identifies 7 documented construction features. The numbered descriptions remain readable below the artwork on narrow screens.
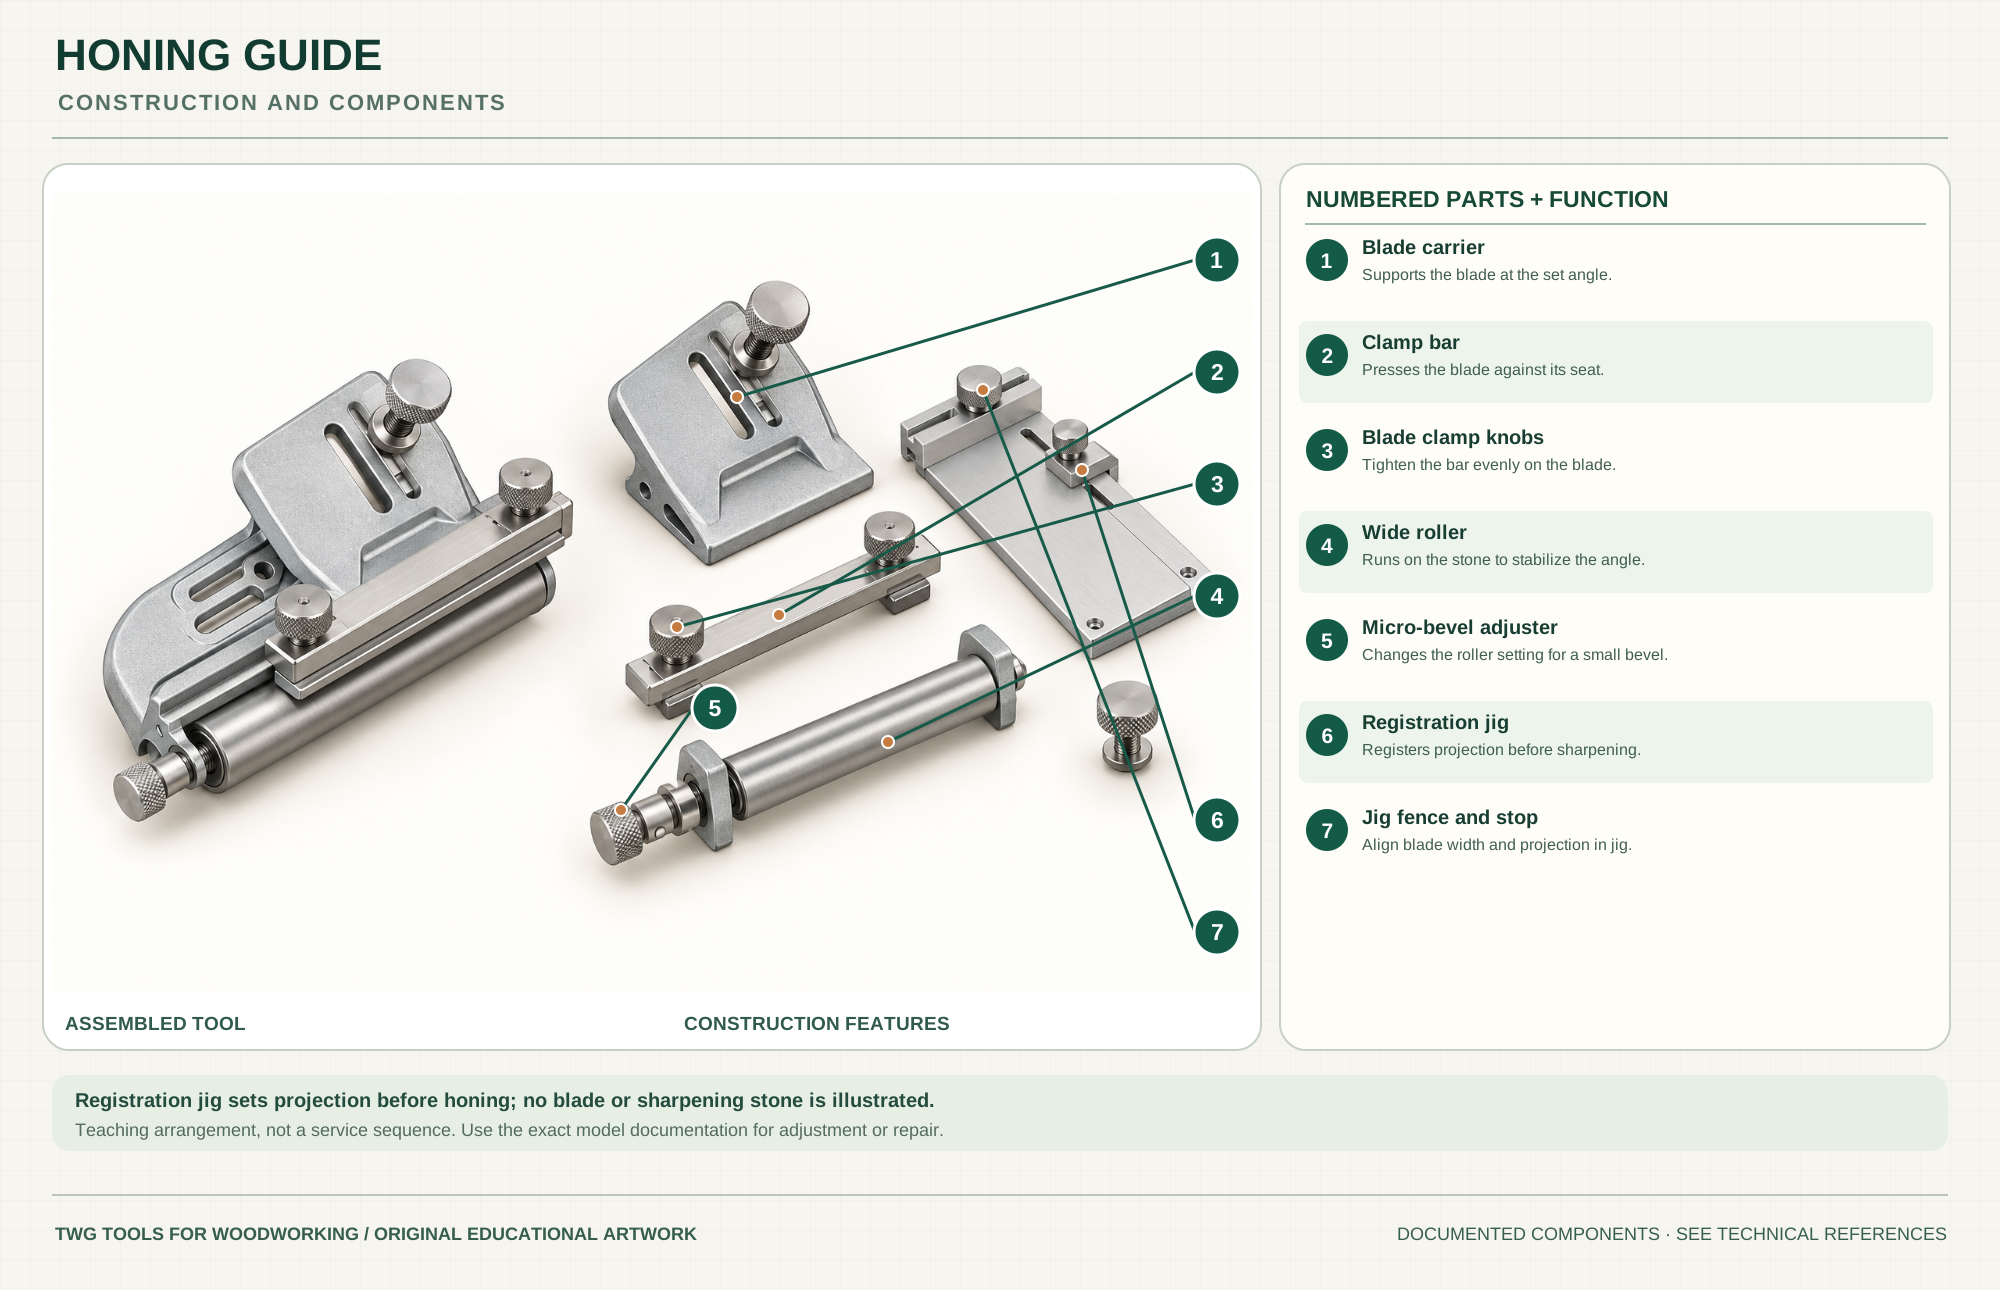
Supports the blade at the set angle.
Presses the blade against its seat.
Tighten the bar evenly on the blade.
Runs on the stone to stabilize the angle.
Changes the roller setting for a small bevel.
Registers projection before sharpening.
Align blade width and projection in jig.
Technical references: Veritas Mk.II standard honing guide 05M09.01 · Veritas Mk.II honing guide official instructions. The Mk.II blade carrier and roller hold a repeatable sharpening angle. The separate registration jig sets blade projection before honing and is removed for stone use. Original educational artwork depicts documented component groups and their relationships; it is not a service sequence or a replacement for the exact model manual.
A honing guide constrains a sharp edge at a repeatable angle while the blade moves on an abrasive stone. It is useful for plane irons and straight chisels, especially when returning to the same primary or small secondary bevel. Freehand honing offers more flexibility; a grinding machine removes material faster but requires different heat and wheel control. The selected Veritas Mk.II standard guide 05M09.01 has a separate registration jig, blade carrier, clamp bar, wide roller and micro-bevel setting. Its advertised 15–54-degree bevel and 1/2–2-7/8-inch blade-width ranges depend on configuration and blade shape, so check the manual before assuming a particular tool will fit.
The registration jig establishes blade projection before sharpening. The blade is clamped in the carrier, the jig is removed, and the roller tracks on the stone as the bevel contacts the abrasive. A micro-bevel setting changes the roller geometry for a small secondary bevel. The poster spaces the groups to explain their relationships; it does not depict every fastener or a service sequence.
Provides a repeatable blade seat. Register a flat, suitable blade rather than forcing an incompatible taper or irregular edge.
Secure the iron square to its reference edge. Tighten evenly and recheck projection after clamping.
References the stone surface and reduces tipping. Keep it clean of abrasive slurry and swarf.
Sets blade projection for the target bevel before honing. The jig is removed before rolling on the abrasive.
These decisions make the mechanism useful at the bench.
Flatten or prepare the back as required and choose a stone sequence for the steel. A guide cannot fix a deeply chipped edge without enough abrasion.
Set the selected angle in the jig, align the blade and tighten the bar. Remove the jig before contacting the stone.
Keep roller and bevel on the abrasive, use controlled strokes and check a continuous burr before finishing the back.
Return a straight or lightly cambered edge to a repeatable bevel, allowing for the actual iron geometry.
Maintain a square edge and consistent bevel without repeatedly guessing projection.
Use the model's micro-bevel position for a small final bevel rather than regrinding the full face.
Use the steps for a first pass, then inspect the work before changing the setup.
A repeatable stop matters as much as the scale: a few millimeters of projection change will change the bevel.
A hollow abrasive surface changes the support relationship between edge and roller. Maintain stones by their maker's method.
A polished bevel alone leaves a wire burr. Finish the back without rounding the edge.
Different guides reference blade sides or faces and fit different widths and profiles.
Special jaws or jigs may be needed; the standard guide range does not guarantee every specialty blade is compatible.
Use the lubricant and cleaning method specified for the stone. Keep grit transfer under control.
Secure the work, protect sharp edges and release any stored clamping pressure before adjustment or maintenance.
Check blade alignment, clamp pressure, roller contact and stone flatness.
Clean the blade and clamp faces, then retighten evenly without exceeding the maker's instruction.
Confirm the new bevel reaches the apex across its width and remove the final burr.
Use the exact model documentation for setup, limits and replacement parts. These lessons, documents and model pages teach relevant techniques or help compare real variations.
These maker-owned links document relevant tools and tool brands. A product brand may use another company's factory; compare the exact model before choosing parts or accessories.
Handles, irons, saw plates, clamping pads and other replacements vary by maker and model. Use the maker's documentation before changing a component.
Compare the Honing Guides & Strops family →Continue through the Tools library