
Rail and fixed jaw
The cold-drawn steel rail guides the moving jaw. Check it is clean and straight; the fixed jaw provides the opposing face.
Align broad parallel jaws and apply even pressure to casework, frames and panel glue-ups.
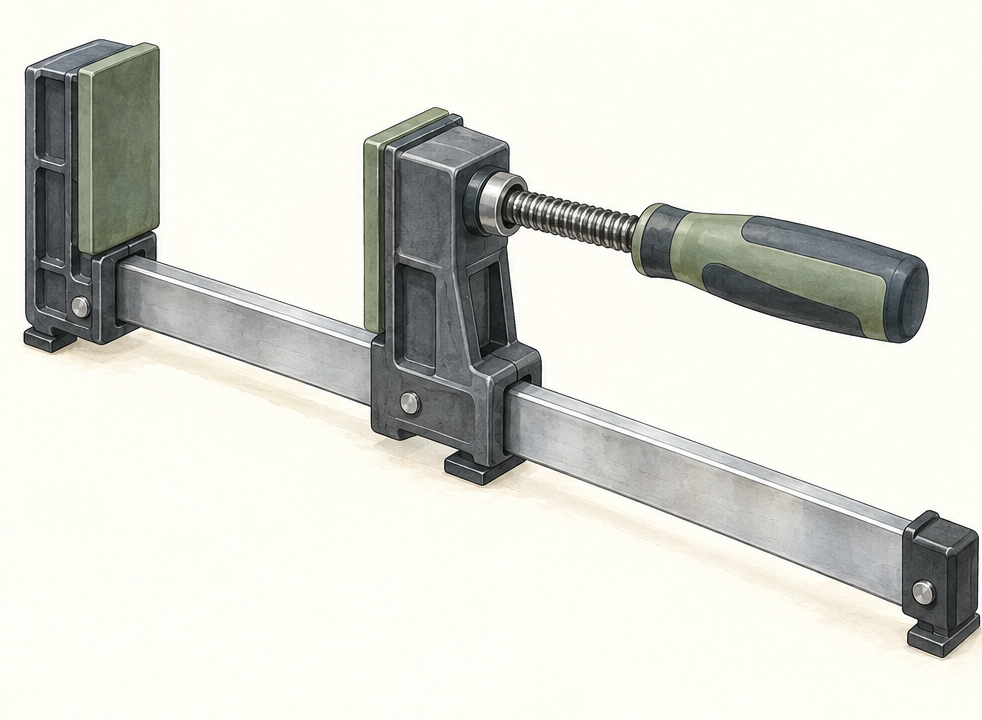
An original educational poster identifies 7 documented construction features. The numbered descriptions remain readable below the artwork on narrow screens.
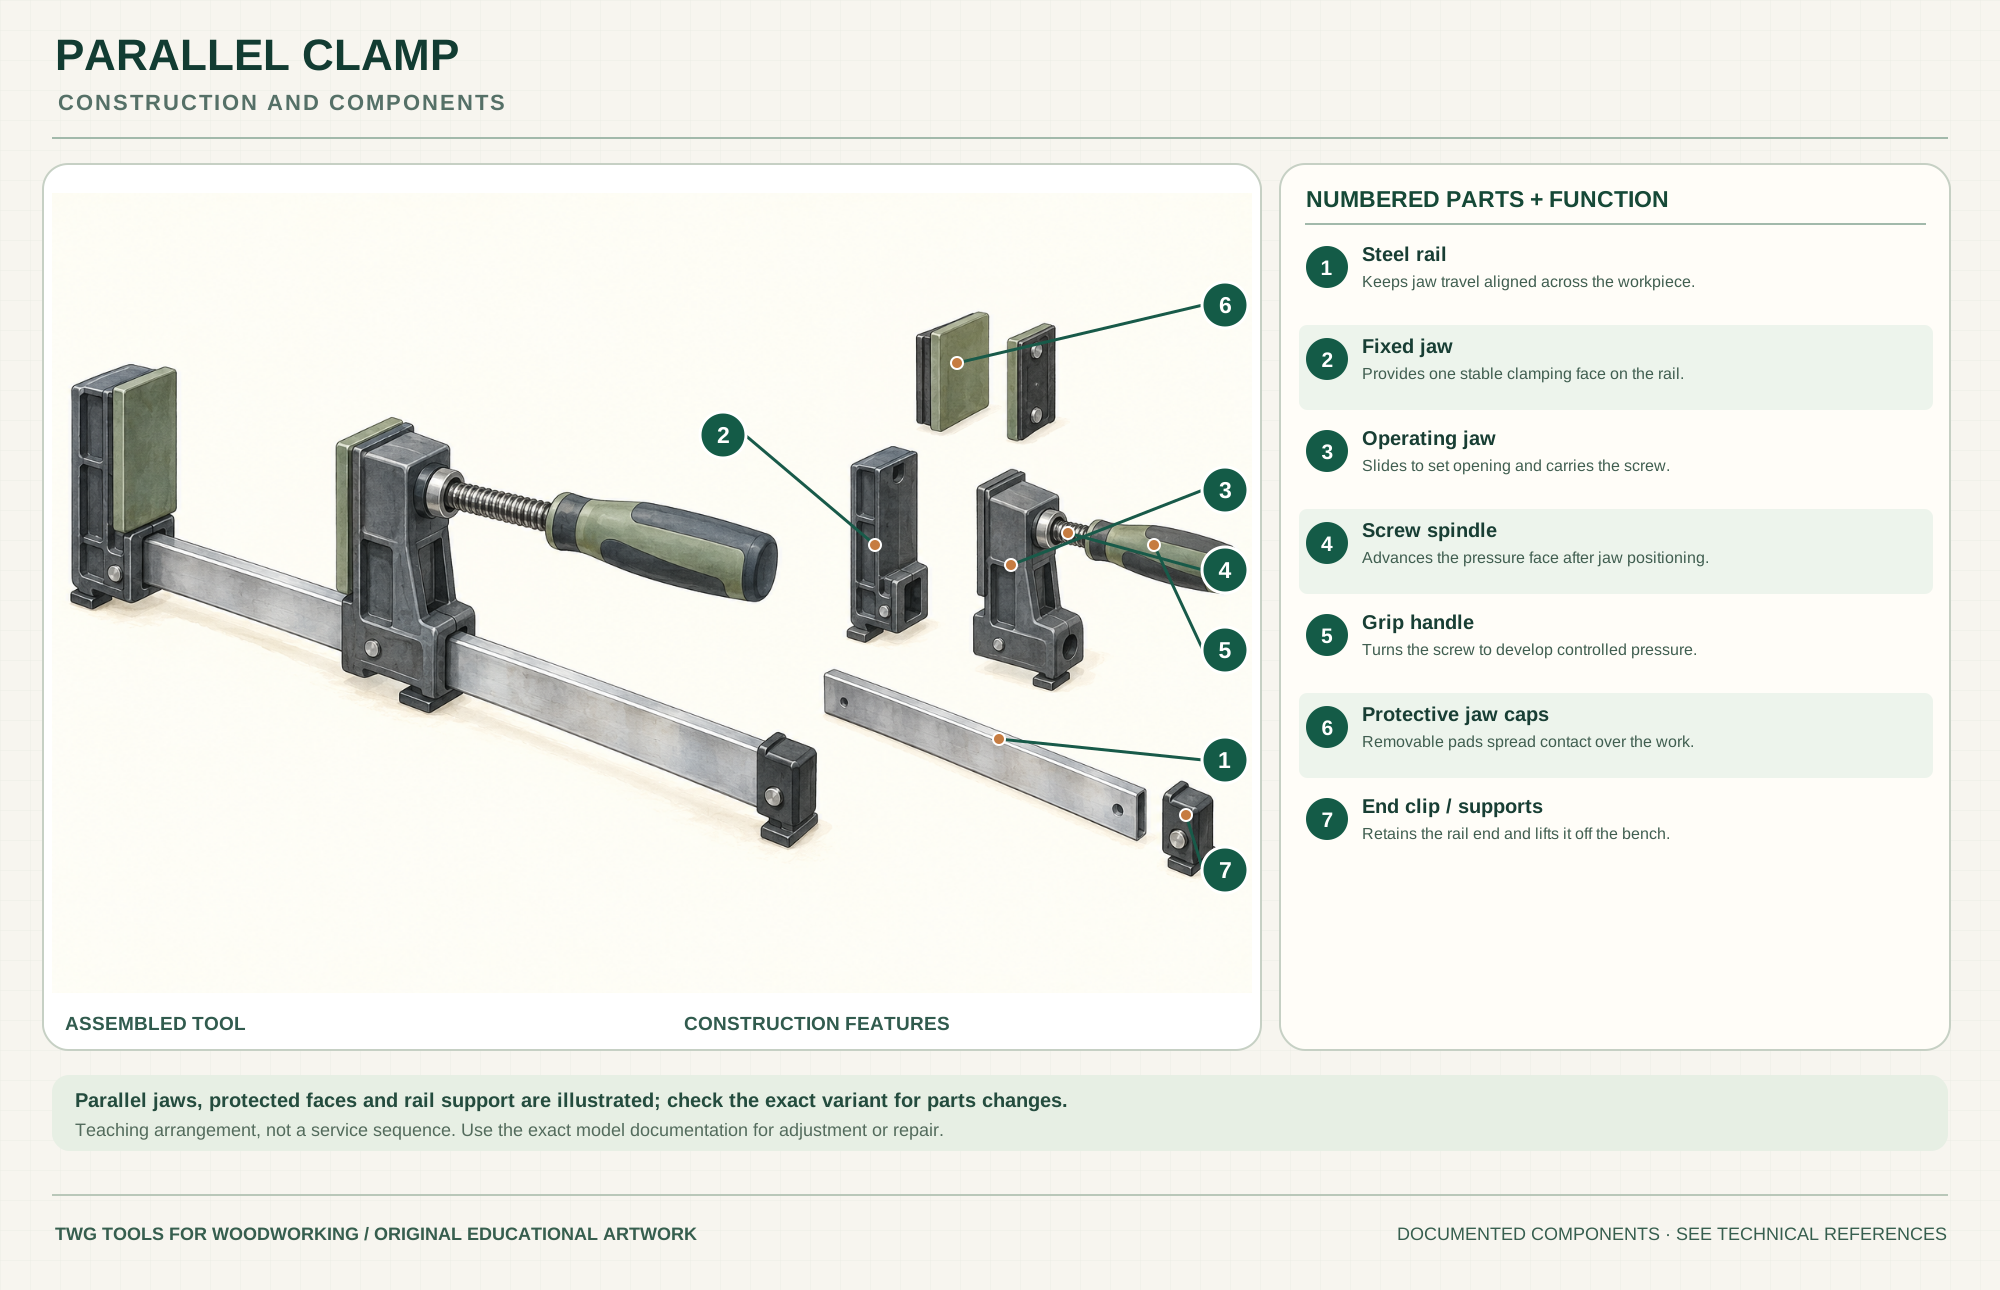
Keeps jaw travel aligned across the workpiece.
Provides one stable clamping face on the rail.
Slides to set opening and carries the screw.
Advances the pressure face after jaw positioning.
Turns the screw to develop controlled pressure.
Removable pads spread contact over the work.
Retains the rail end and lifts it off the bench.
Technical references: BESSEY KRE3524 model brochure · BESSEY K Body REVO product information. Seven documented external groups of the KRE3524 parallel clamp; components are spaced for explanation, not for service disassembly. Original educational artwork depicts documented component groups and their relationships; it is not a service sequence or a replacement for the exact model manual.
A parallel clamp brings two wide jaw faces toward a workpiece while a long steel bar supports alignment. The selected K Body REVO KRE3524 has a 24-inch opening and 3¾-inch throat; the maker's brochure quotes nominal clamping force up to 1,700 pounds. This is capacity, not a target pressure for every glue-up. Unlike a light spring or one-hand clamp, the screw lets you build sustained pressure; unlike a pipe clamp, the broad protected faces help keep an assembly square and above the bench.
The fixed jaw anchors one end of the steel rail. The operating jaw slides to the approximate opening, and a screw spindle driven by the handle advances its pressure face. Large parallel jaw surfaces and removable protective caps spread contact. Rail supports and the end clip help bench registration. The poster spaces these real groups for teaching, not as a service-disassembly procedure.
The cold-drawn steel rail guides the moving jaw. Check it is clean and straight; the fixed jaw provides the opposing face.
The moving jaw slides for rough positioning and includes the screw mechanism. The KRE family has protection against unintended sliding when unloaded.
Turning the grip advances the pressure face. The maker documents a steel hex socket for tightening in certain situations; use controlled force rather than chasing the clamp's maximum rating.
Removable jaw pads protect surfaces and spread contact. Check them for dried glue or debris before a finish-sensitive glue-up.
Support pieces lift the rail off the bench and help stable placement. The end clip retains the rail-end arrangement on this configuration.
These decisions make the mechanism useful at the bench.
Check mating edges, squareness and caul position before applying glue. Clamps should close good joints, not force badly machined parts into shape.
Place jaws square to the work and distribute clamps along the joint or case. Use cauls or pads if pressure would dent edges or distort a panel.
Bring clamps to light contact, verify alignment, then tighten in stages and recheck. Follow adhesive open time and cure instructions.
Alternate or arrange clamps to balance force, with cauls when needed to keep boards flush.
The parallel faces can press opposing cabinet sides while a square and diagonal measurements check the box.
Broad faces and pads can hold rails and stiles while joints seat; use corner blocks or cauls when geometry needs them.
Use the steps for a first pass, then inspect the work before changing the setup.
Large faces spread force and reduce the tendency to tip a case, but the work still needs a square reference.
Excess pressure can bow panels, squeeze out too much adhesive or dent soft wood. Bring joints into contact, then verify the actual fit.
Replace damaged protective caps and remove glue buildup to protect finished surfaces.
The opening and throat determine which assemblies fit. Measure the project and allow for cauls before selecting length.
Pipe clamps can span long work with suitable pipe, but their faces and bench registration differ. Use the arrangement that keeps the assembly flat.
The selected KRE3524 is a 24-inch model; the family offers other openings. Capacity and spreading range vary by exact SKU.
The maker documents a reversible setup for spreading on KRE variants. Follow its official instructions before changing the jaw arrangement.
One-hand clamps place work quickly; the KRE screw gives deliberate pressure control for a sustained glue-up.
Secure the work, protect sharp edges and release any stored clamping pressure before adjustment or maintenance.
Release pressure, check edge fit and clamp arrangement; use balanced placement and cauls rather than more torque.
Clean and dry the rail, inspect moving-jaw grip and consult the maker's service information.
Clean or replace pads and add a suitable protective block before reclamping.
Use the exact model documentation for setup, limits and replacement parts. These lessons, documents and model pages teach relevant techniques or help compare real variations.
Current official KRE family construction, accessories and operating information.
Manufacturer comparison of K Body variants and accessories; identify the exact SKU before choosing replacements.
Maker description of edge panels, casework and protective pad use; Rockler's model differs from the KRE.
These maker-owned links document relevant tools and tool brands. A product brand may use another company's factory; compare the exact model before choosing parts or accessories.
Handles, irons, saw plates, clamping pads and other replacements vary by maker and model. Use the maker's documentation before changing a component.
Compare the Woodworking Clamps family →Continue through the Tools library