
Base and reference sole
The U-shaped casting bridges a pocket and leaves the cutter visible. Keep its bearing surfaces on stable wood; a narrow recess may need an auxiliary base.
Level a recess from the surrounding surface and understand the base, vertical cutter and depth controls that make the cut repeatable.
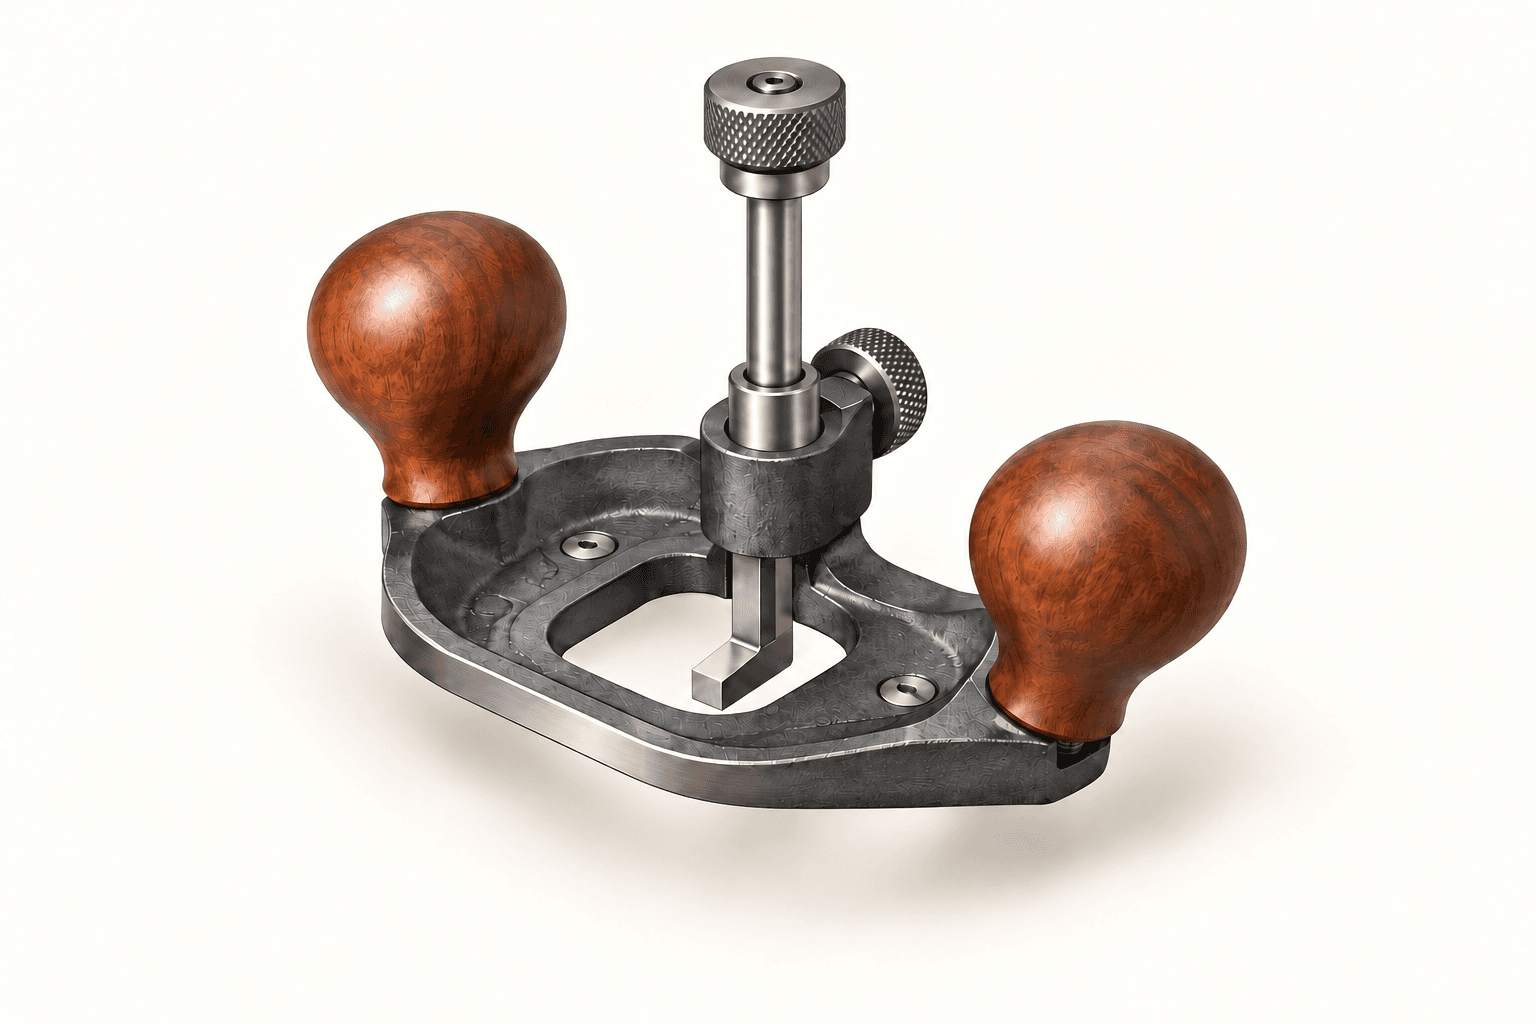
An original educational poster identifies 7 documented construction features. The numbered descriptions remain readable below the artwork on narrow screens.
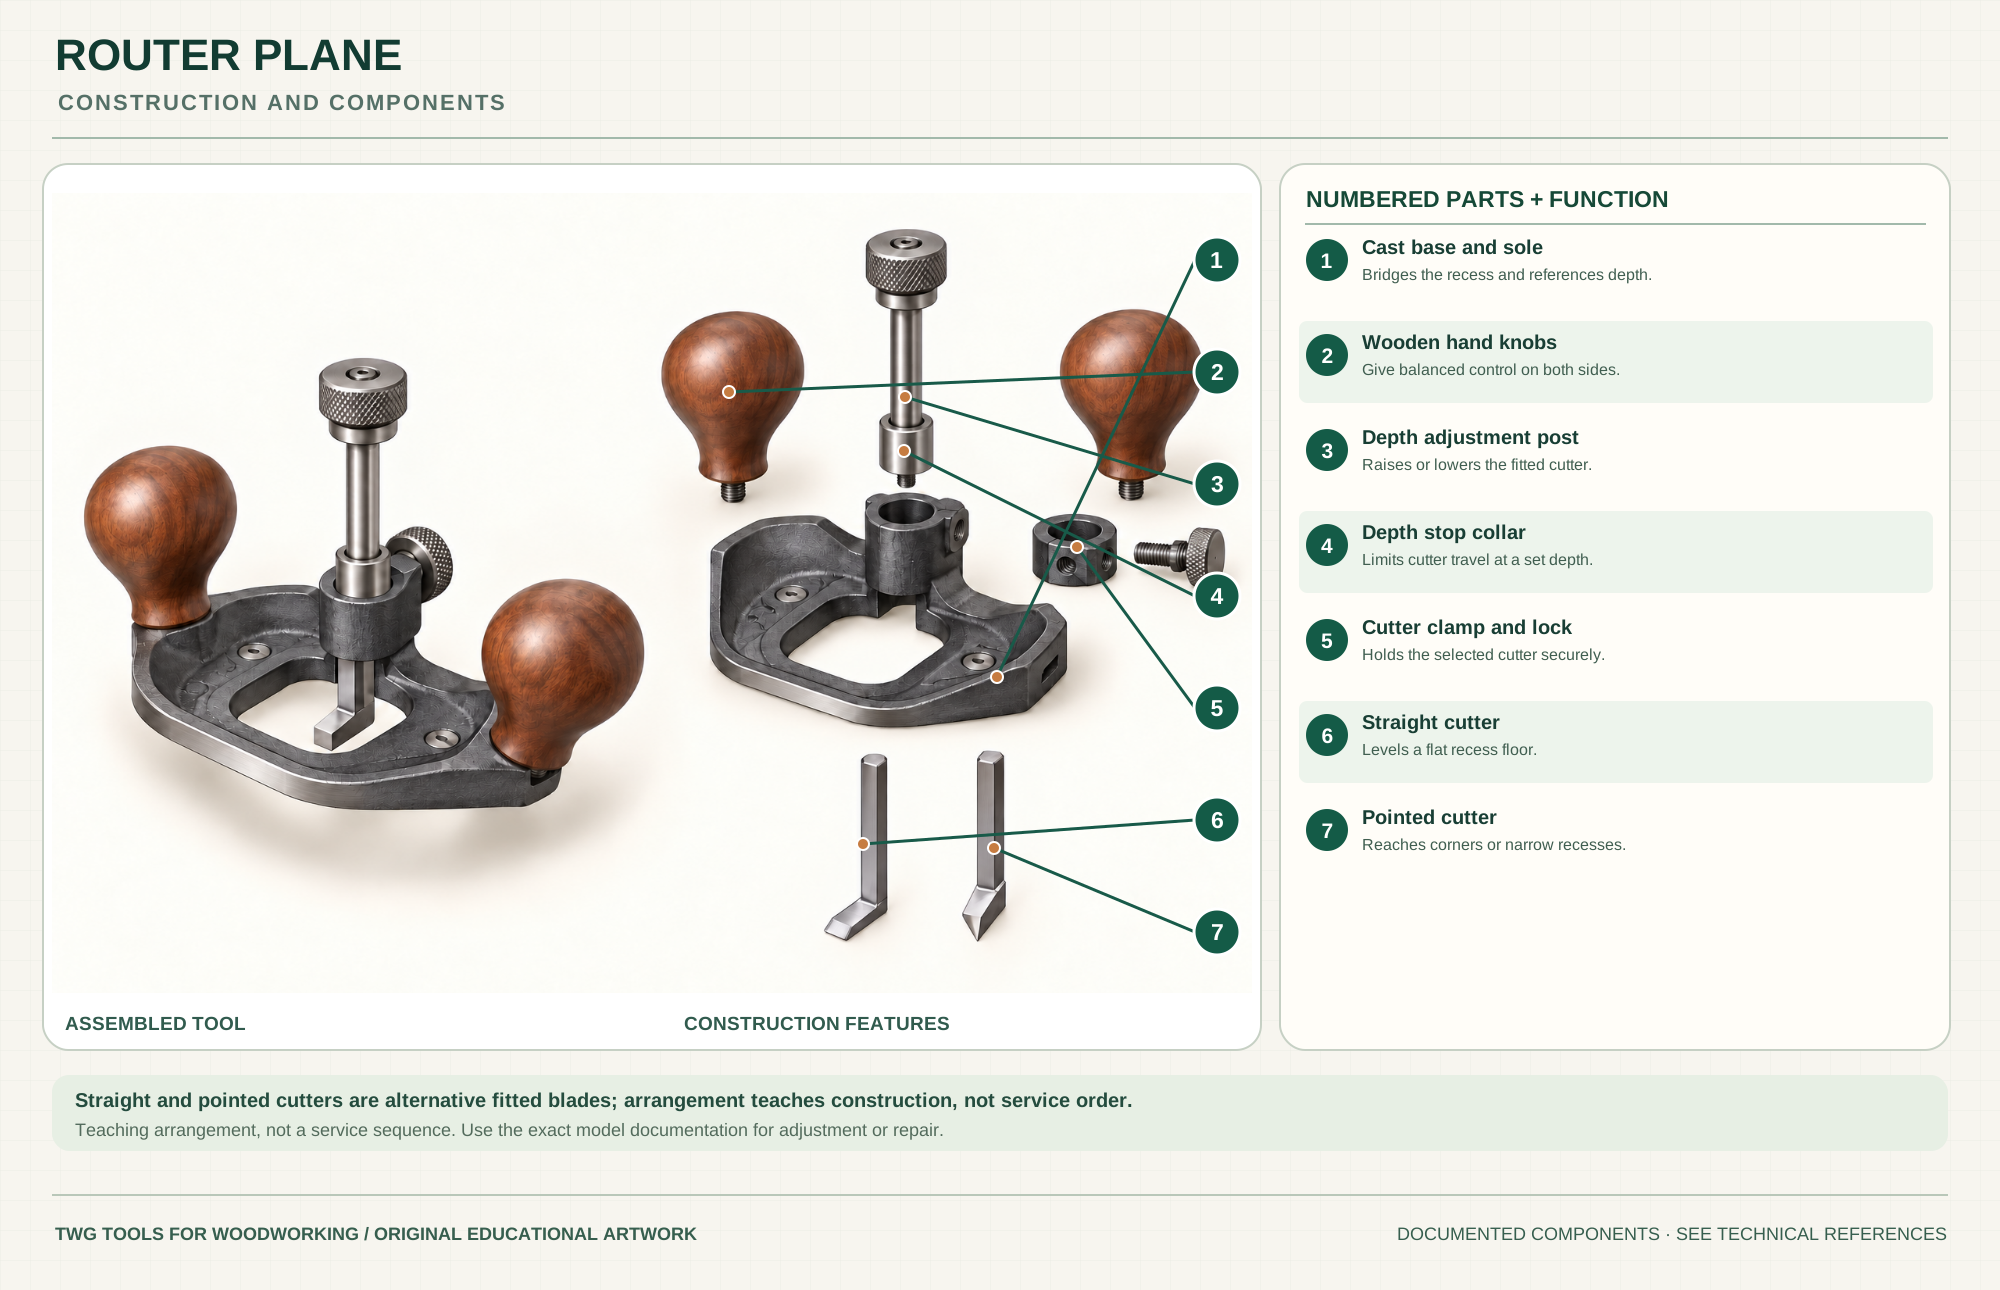
Bridges the recess and references depth.
Give balanced control on both sides.
Raises or lowers the fitted cutter.
Limits cutter travel at a set depth.
Holds the selected cutter securely.
Levels a flat recess floor.
Reaches corners or narrow recesses.
Technical references: Veritas large router plane 05P38.01 · Veritas router plane official instructions. The U-shaped sole, vertical cutter and depth controls are documented for the selected large router plane. Two cutter shapes are alternatives, not simultaneously installed parts. Original educational artwork depicts documented component groups and their relationships; it is not a service sequence or a replacement for the exact model manual.
A hand router plane references its broad sole on the uncut surface while its narrow cutter levels a recess. It refines dado floors, hinge gains and tenon cheeks after waste is removed by saw, chisel or powered router. Unlike a powered router, it removes thin shavings by hand; unlike a shoulder plane, its cutting edge sits below an open base rather than at one full-width side. The selected Veritas large router plane 05P38.01 has a depth adjustment and interchangeable 1/2-inch straight and pointed cutters; those dimensions describe that model, not all router planes.
The two knobs guide the cast base over the reference surface. The cutter projects through the opening; a fine screw sets depth and the lock secures the blade. Take shallow passes so both sides of the sole remain supported. Straight and pointed cutters are alternatives: the poster places both nearby to explain their different work, not to suggest both fit at once or show a service sequence.
The U-shaped casting bridges a pocket and leaves the cutter visible. Keep its bearing surfaces on stable wood; a narrow recess may need an auxiliary base.
A fine adjuster changes cutter projection. The maker specifies 1/32 inch per turn for this model; the stop helps repeat a depth without replacing a test cut.
The lock holds the installed cutter after adjustment. Check that the cutter is seated before making a pass.
A straight blade levels an open floor; the pointed blade reaches tighter corners. Use the blade geometry and orientation described in the exact manual.
These decisions make the mechanism useful at the bench.
Mark the finished floor and leave some waste above it. Secure the work so both edges of the sole can run on a stable surface.
Install a sharp cutter, lock it, then advance the depth only a little. Test on scrap or a noncritical area before approaching the final line.
Guide with both knobs and steady pressure. Work from the stable surface into the recess; use auxiliary support when the base would tip.
Remove bulk waste first, then level the bottom in overlapping light strokes.
Bring a marked shallow recess to a consistent depth while the sole rides on the surrounding face.
Refine small high spots for a controlled fit without changing the shoulder line.
Use the steps for a first pass, then inspect the work before changing the setup.
The cutting depth is measured from the surface the base actually rides on. Rocking the plane produces an uneven floor.
A dull cutter crushes fibers and tempts extra force. Sharpen before reducing the mouth of a small recess.
The straight blade works broad floors; the pointed blade helps in corners. They are alternate setups.
A small router plane can reach tight work; a larger base bridges wider recesses. Cutter mounts and dimensions vary.
A closed throat adds support at the front; an open throat improves visibility. The selected model has an open base.
Some models accept fences for edge-referenced grooves. Do not assume an optional fence is installed in the illustration.
Secure the work, protect sharp edges and release any stored clamping pressure before adjustment or maintenance.
Check sole support, work stability, overlapping strokes and blade projection.
Sharpen the cutter, take a shallower shaving and work with the grain where practical.
Stop, inspect the cutter seat and tighten the lock as described by the maker.
Use the exact model documentation for setup, limits and replacement parts. These lessons, documents and model pages teach relevant techniques or help compare real variations.
These maker-owned links document relevant tools and tool brands. A product brand may use another company's factory; compare the exact model before choosing parts or accessories.
Handles, irons, saw plates, clamping pads and other replacements vary by maker and model. Use the maker's documentation before changing a component.
Compare the Hand Planes family →Continue through the Tools library