Bench Hook
A measured three-part TWG bench hook model for learning workholding orientation and adult-controlled assembly. Actual use needs an adult check.
Finished outcome: A modeled 12 in × 8 in bench hook with an upper stop and opposite underside cleat. Strength and saw-use performance are not established.
Bench hook from two faces
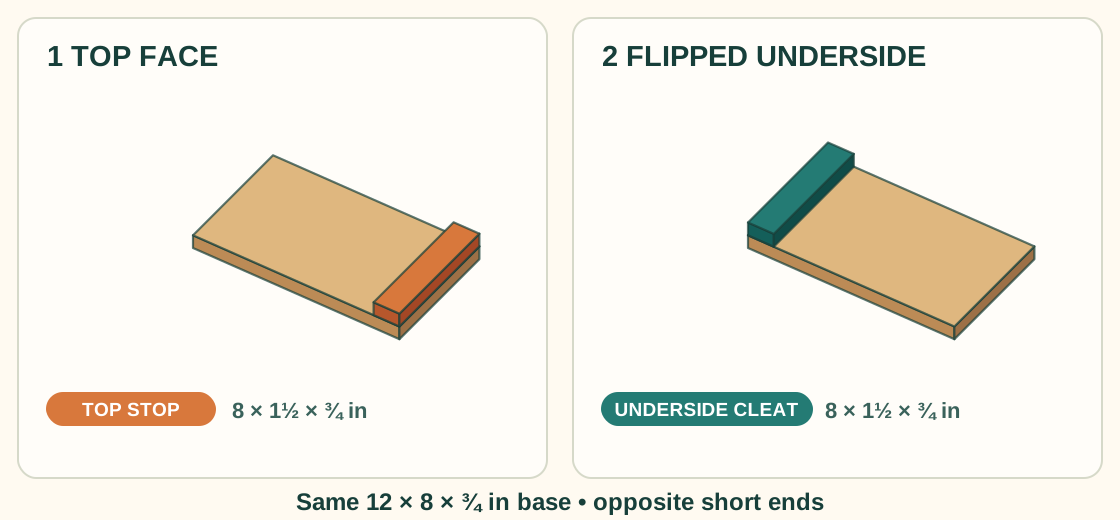
The orange stop gives your work a place to rest on top. The teal cleat meets the bench edge underneath. They sit at opposite ends. An adult checks the real fit before use.
Adult preparation
- Cut the base, upper stop, and underside cleat to the exact sizes below and ease only the learner-safe edges.
- TWG layout decision: put the stop across the full 8 in width at x = 10½–12 in on the top and the cleat across the full width at x = 0–1½ in underneath. Measure x from the cleat end.
- TWG screw layout decision: place two axes in each strip, centered ¾ in from its long edges and 1½ in from either 8 in end. The stop axes are x = 11¼ in; the cleat axes are x = ¾ in. The two width positions are y = 1½ and 6½ in. Stop screws enter upward from the underside through the base; cleat screws enter downward from the top through the base. A 1¼ in screw passes ¾ in of base and enters ½ in of a ¾ in strip, leaving ¼ in to the outer face. Adult checks head style, pilots, actual stock, and no exposed point before drilling.
- Set up a flat bench, non-slip mat, square, clamps, glue, and adult-controlled pilot-hole tools.
Materials
- 3/4 in plywood or straight-grained hardwood
- Wood glue
- Four 1 1/4 in screws
- Pencil and ruler
- 120 grit abrasive
Tools
- Tape measure, ruler, and square
- Hand sanding block
- Clamps
- Adult-controlled drill/driver
- Bench or sturdy work surface
Parts you'll need
- Base: prepare 1 piece measuring 12 in long × 8 in wide × 3/4 in thick.
- Top stop: prepare 1 piece measuring 8 in long × 1 1/2 in wide × 3/4 in thick.
- Underside cleat: prepare 1 piece measuring 8 in long × 1 1/2 in wide × 3/4 in thick.
- Stop placement: centered across the 8 in width at one short end
- Cleat placement: flush with the opposite short end on the underside
Vocabulary
Stop
A fixed piece that resists a board's movement in one direction.
Cleat
A strip attached underneath or behind a panel to register, stiffen, or support it.
Register
To sit against a known edge or reference so a part repeats in the same position.
Before you start: safety
- The adult controls all cutting, drilling, and screw installation.
- The learner tests the hook only with a light hand-sanding or hand-layout task after the adult checks every fastener.
- Do not use the hook for a saw cut until the adult confirms the cleat and stop are secure and the bench edge is stable.
Who does what?
The stage follows the work the learner personally does. Adult-only complexity does not raise the learner's stage.
Child's part
- Match the prepared base, upper stop, and underside cleat to the cut list and name each part's job.
- Mark the short-end stop line and identify the cleat's bench-registration edge.
- Dry-fit the stop at one short end and the cleat flush with the opposite short end underneath; turn the parts over and check orientation.
- Point to the bench edge, underside cleat, base, and upper stop and explain how they hold a board.
- After the adult inspects the fasteners and confirms bench stability, make only the light hand-sanding test described in Step 6.
Try with adult approval
- The mentor may release the light hand-sanding test only after the adult checks every fastener and confirms the hook and bench are stable. Assembly, glue, clamping, drilling, and screw installation remain adult-controlled.
Always adult-controlled / high-risk
- Prepare the stock and control all cutting, pilot holes, glue, clamp setup, and installation of the four screws; inspect the stop and cleat before any use and decide whether later hook use is appropriate.
Teacher / mentor introduction
Place a loose board on the bench and show how it can slide. Add a stop and cleat without fastening and ask which direction each piece controls.
Demonstration
- Use a square to show a centered stop line and a flush underside cleat.
- Dry-fit the stop and cleat, then turn the assembly over so the orientation is visible.
- Model a gentle hand-pressure test instead of pushing hard on an unverified hook.
Build steps
1. Identify the three parts
Match the base, top stop, and underside cleat to the cut list and name the job of each.
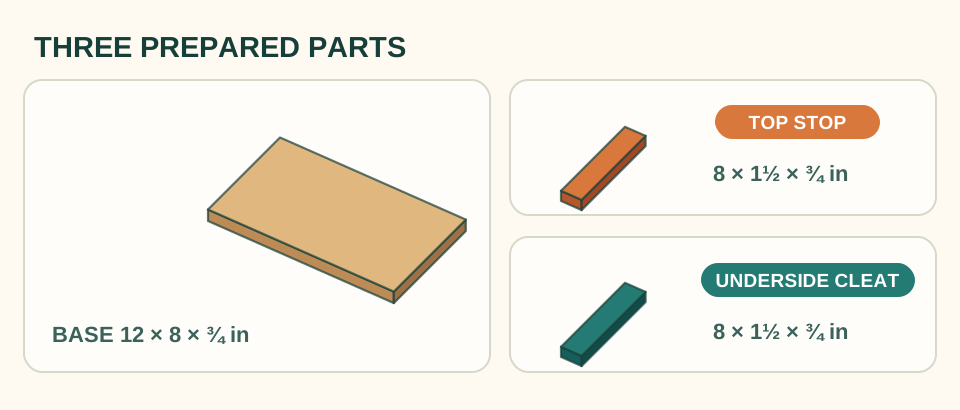
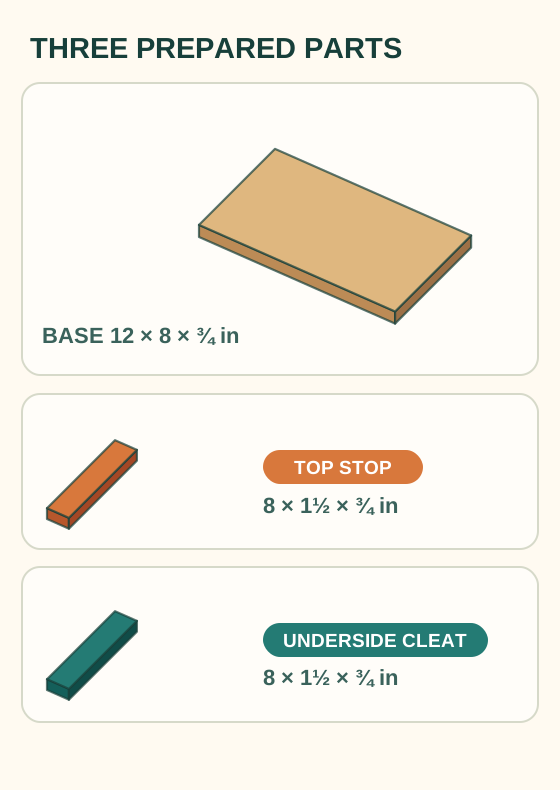
Three prepared partsOne 12 × 8 × ¾ in base and two 8 × 1½ × ¾ in strips. 2. Mark the reference edges
Mark the short-end stop line on the base and underline the cleat's bench-registration edge.
3. Dry-fit the hook
Place the stop at one short end and the cleat flush with the opposite short end underneath. Turn it over and check the orientation.
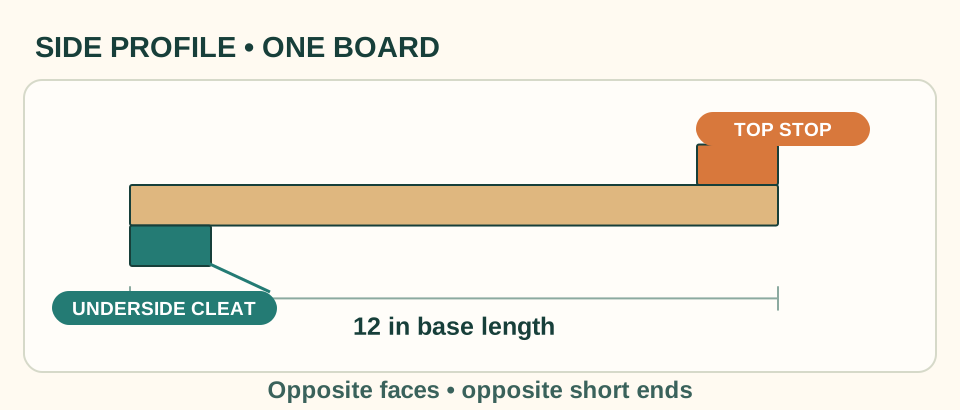
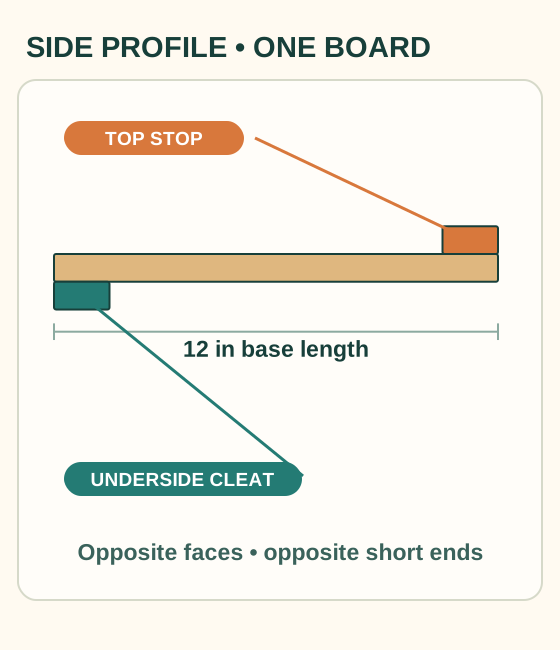
One side profileSee the stop above one end and cleat below the opposite end before the adult joins the pieces. 4. Explain the force path
Point to the bench edge, underside cleat, base, and upper stop, then explain how a board will be held between the reference points.
5. Adult-controlled assembly
The adult glues and clamps the strips, checks the TWG four-axis layout against actual stock, prepares pilots, then drives two screws upward into the stop and two downward into the cleat. Each passes through the base and enters only its intended strip.
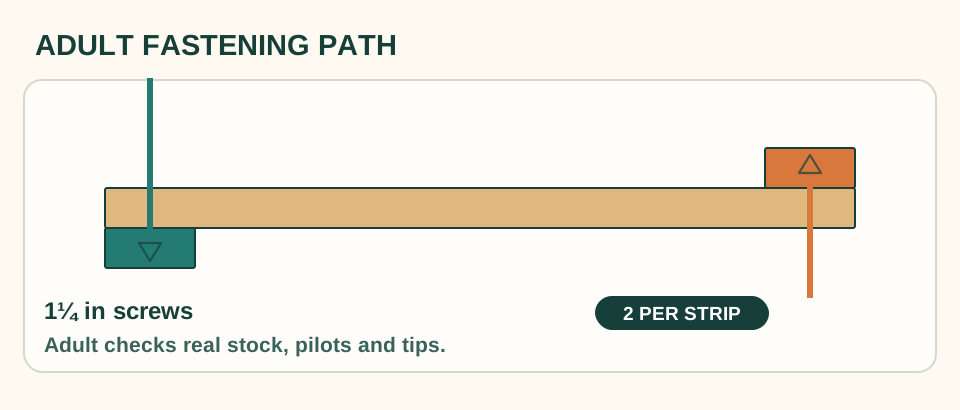
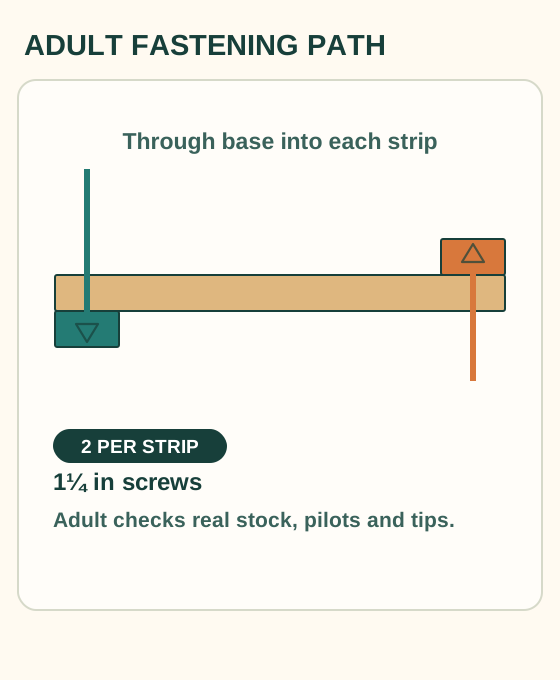
TWG adult fastening layoutTwo 1¼ in screws per strip pass through the ¾ in base and enter the strip by ½ in. The adult verifies real stock, pilots and heads. 6. Light use test
After adult inspection, place the hook against a bench edge and make a light hand-sanding pass on a scrap board.
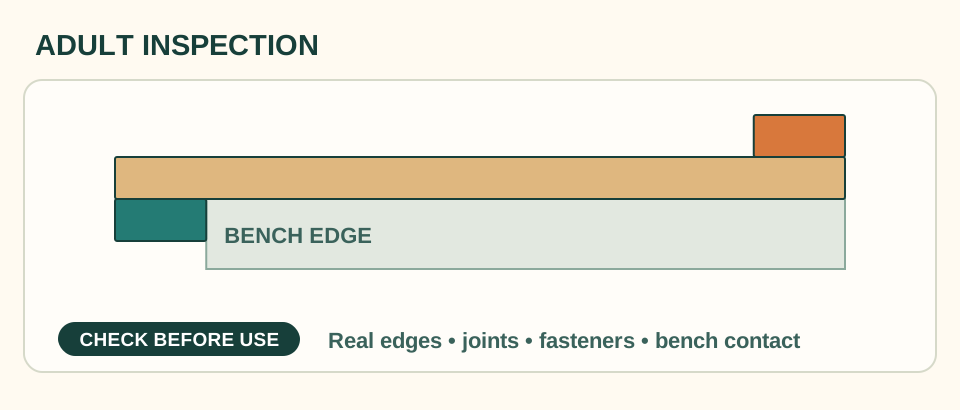
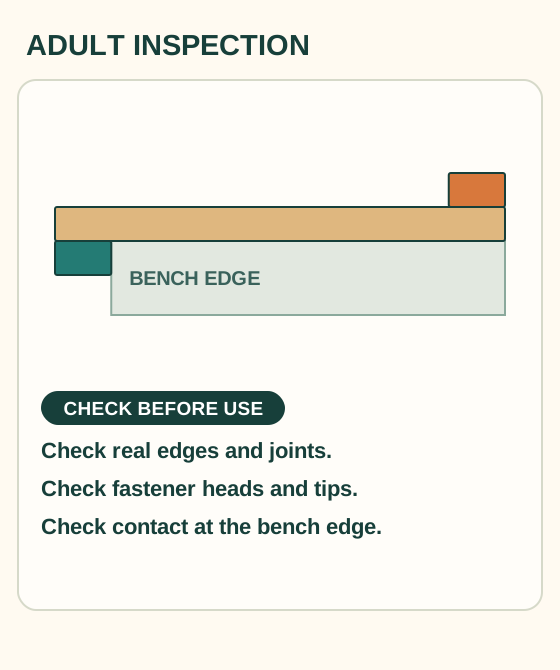
Inspect before useThe adult checks the actual glue joints, fastener tips and bench registration before any light task.
What learners should observe
- The underside cleat resists movement toward the user while the upper stop resists movement away.
- A straight base makes the workholding feel more predictable.
- A tool can be a project outcome when it solves the next safe shop problem.
Discussion questions
- Which part touches the bench edge?
- What would happen if the cleat were placed on the wrong end?
- Which later hand-saw or sanding task could this tool support?
Assessment and reflection
Learner can orient the hook, identify the two opposing registration points, and explain why the adult checks it before use.
Optional extension / challenge
- Draw a side view with arrows showing the two opposing forces.
- Use the hook to hold a larger scrap while comparing sanding strokes.
- Measure the hook again after cure and record any change.
Cleanup
- Return the square, clamps, and driver to safe storage.
- Brush the bench and store the hook flat while glue cures.
- Label the hook with its finished dimensions and intended light-duty use.
Adapt the lesson
One-on-one
Let the learner demonstrate the force path with a finger-pointing explanation before the adult fastens anything.
Group or classroom
Use one completed hook as a demonstration model; learners inspect labeled parts and practice the orientation check before the adult assembly station.