Birdhouse Build: Read and Dry-Fit the Plan
Use The Home Depot's seven-piece birdhouse plan to practice part matching, dry-fit, and habitat questions before an adult controls any construction.
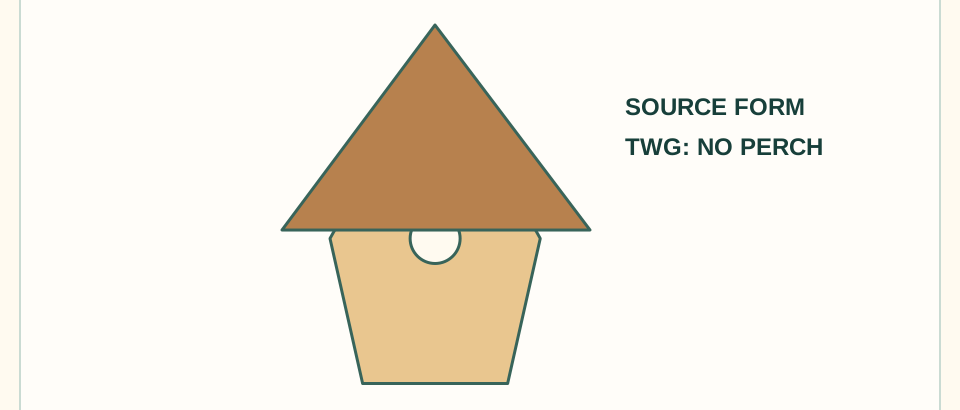
Finished outcome: The linked source describes an approximately 7 in wide, 14 in tall birdhouse with a centered 1 1/2 in entry. TWG has not physically built or assessed this lesson's assembly or outdoor suitability.
Home Depot form, TWG no-perch companion
Adult preparation
- Read the linked Home Depot birdhouse source and adapt the project to local species, climate, and responsible placement guidance.
- Use the source's 1 × 12 board and seven-piece cut list below, including the two unequal roof lengths and 31-degree bevels. Cut and label parts before the learner arrives; keep every saw and the entry-hole tool adult-controlled.
- Check that the lumber is clean, untreated, and free of unknown coatings. Prepare a stable assembly surface, clamps, eye protection, and a safe storage location while glue cures.
- Decide the final placement before building: an adult owns mounting height, structural attachment, access for cleaning, and any wildlife-specific guidance.
- The Home Depot source includes an outside perch. This TWG lesson omits it: Cornell NestWatch says outside perches are unnecessary and can help predators. Check its species-specific nest-box guidance before any outdoor use.
Materials
- One clean 1 × 12 in pine board, 6 ft long, as specified by the linked source; verify actual stock before layout
- 1 1/2 in finishing nails specified by the linked source; adult selects suitable hardware for actual stock and conditions
- Wood glue, if selected by the adult after reading its current label
- Pencil, labels, sandpaper, and a source printout
Tools
- Tape or rule
- Combination square
- Hand sanding block
- Clamps or a bench stop
- Adult-controlled drill/driver and hole saw
- Dust brush
Parts you'll need
- Floor: 1 piece, 5 in × 7 in
- Sides: 2 pieces, 5 in × 5 1/2 in
- Front and back: 2 blanks, 7 1/4 in × 11 1/2 in; source trims each to a 5 in lower edge and a centered roof peak
- Roof: 2 pieces, source marks 9 1/2 in and 8 3/4 in lengths with 31-degree bevels; each is cut to 8 1/2 in width
- Entry: adult drills a centered 1 1/2 in opening, 5 in above the front panel's bottom edge
Vocabulary
Cut list
A written list of part names and finished dimensions used to prepare the project before assembly.
Dry-fit
Putting the parts together without glue or fasteners so alignment and order can be checked.
Overhang
The amount a roof or other part extends beyond the wall or edge below it.
Entry diameter
The width across the round entrance; the adult verifies the appropriate size for the intended habitat.
Before you start: safety
- The adult completes the saw cuts, 31-degree roof bevels, entry hole, drilling, fastening, mounting, and any finish decision.
- Use only clean, untreated, known wood; stop if a board has a coating, odor, splintering, or unknown history.
- Keep the entry-hole setup clamped and adult-controlled. The learner observes the setup from a safe position.
- Use eye protection, control dust, keep fasteners sorted, and leave the assembly in a clearly labeled cure location.
Teacher / mentor introduction
Show the source image, then place the labeled parts on the bench. Ask the learner to predict which part protects the floor, which parts make the walls, and why the roof needs an overhang. Explain that the goal is a thoughtful, well-checked habitat rather than a rushed assembly.
Demonstration
- Read the cut list from top to bottom and match each dimension to a labeled part.
- Show how to make a short, controlled hand-sanding pass on a supported edge.
- Dry-fit the floor, sides, front, and back against the source drawing before the adult introduces fasteners or glue. The learner does not infer joint positions from a generic birdhouse photo.
- Point out the entry diameter, roof overhang, access/cleanout decision, and the adult's mounting plan.
Build steps
1. Match parts to the cut list
Read each line aloud, find the labeled part, and place it in a simple floor, wall, or roof group.
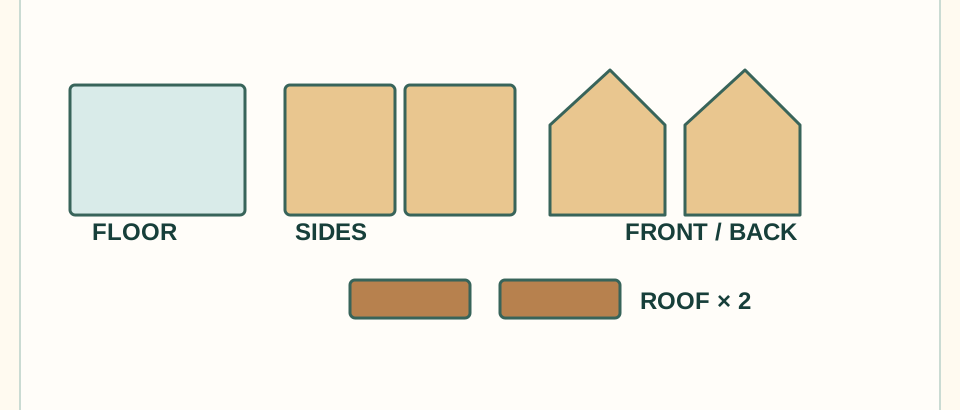
Seven main wood piecesMatch one 5 × 7 in floor, two sides, two trimmed front/back panels, and two unequal beveled roof panels.Swipe the drawing to see every part, or tap to open it full size. 2. Sand the learner-safe edges
Use a hand block on the edges selected by the adult. Compare a sanded and unsanded edge by sight and touch.
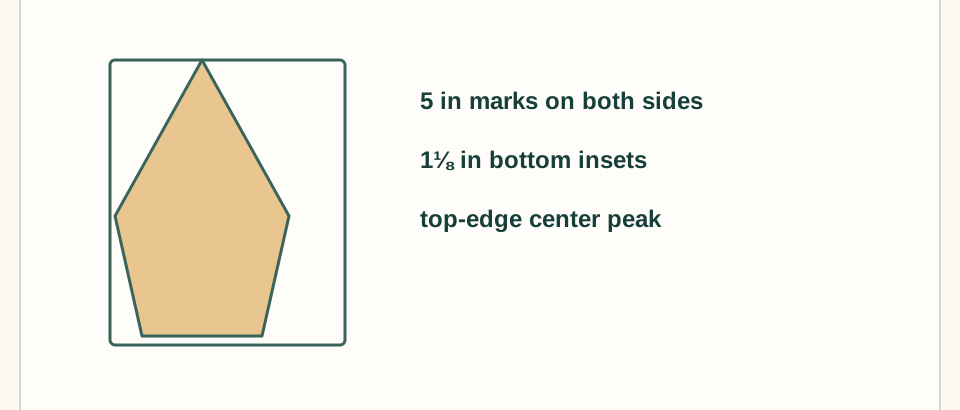
Front and back trimBoth 7¼ × 11½ in blanks receive 5 in side marks, 1⅛ in bottom insets, and a centered top peak.Swipe the drawing to see every part, or tap to open it full size. 3. Dry-fit the walls
Place the source's floor, two side pieces, and trimmed front and back together without glue. Check that the entry faces out and that the 5 in side height aligns with the source's front and back shaping.
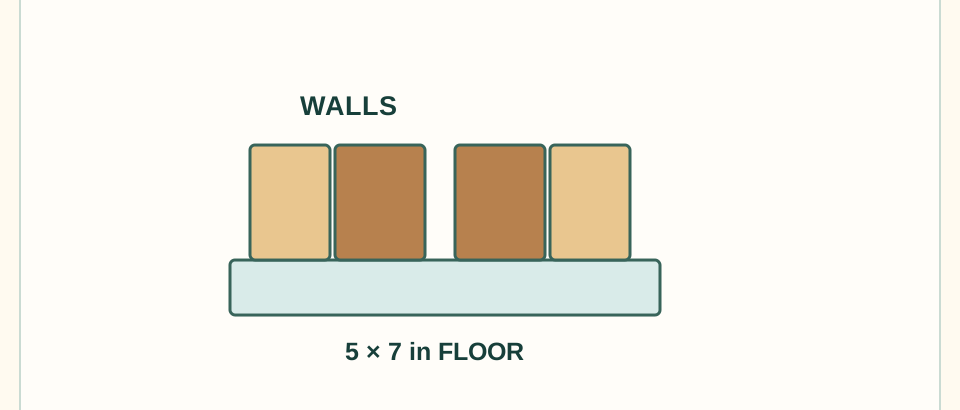
Dry-fit floor and wallsThe source joins front/back to sides, then the floor to that wall assembly; actual joint alignment is checked on the source and stock.Swipe the drawing to see every part, or tap to open it full size. 4. Explain the habitat details
Point to the 1 1/2 in entry marked 5 in above the front bottom, the two beveled roof pieces, the floor, and the adult's separate cleanout and mounting decisions. The source does not detail a cleanout door.
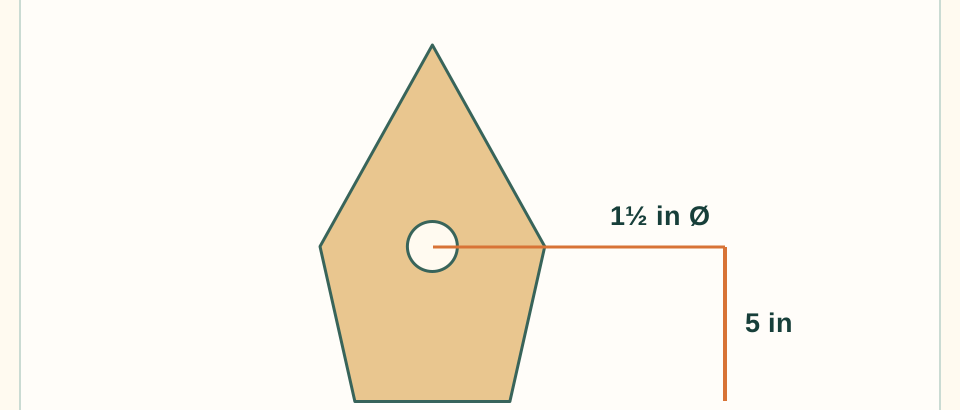
Entry locationThe adult cuts a centered 1½ in opening 5 in above the front bottom. The TWG companion has no perch hole.Swipe the drawing to see every part, or tap to open it full size. 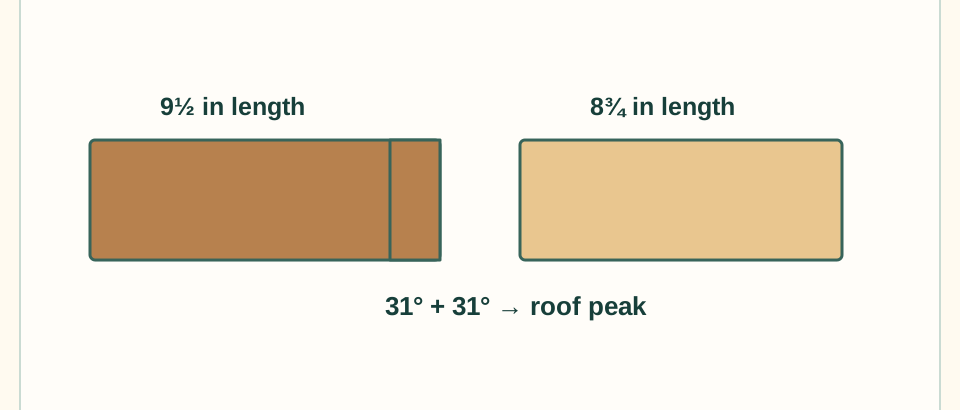
Two roof piecesThe 8½ in wide panels have unequal 9½ and 8¾ in lengths and 31° beveled ends.Swipe the drawing to see every part, or tap to open it full size. 5. Adult-controlled assembly
The adult applies glue or drives the selected fasteners while the learner calls out the next labeled part and watches the square/alignment check.
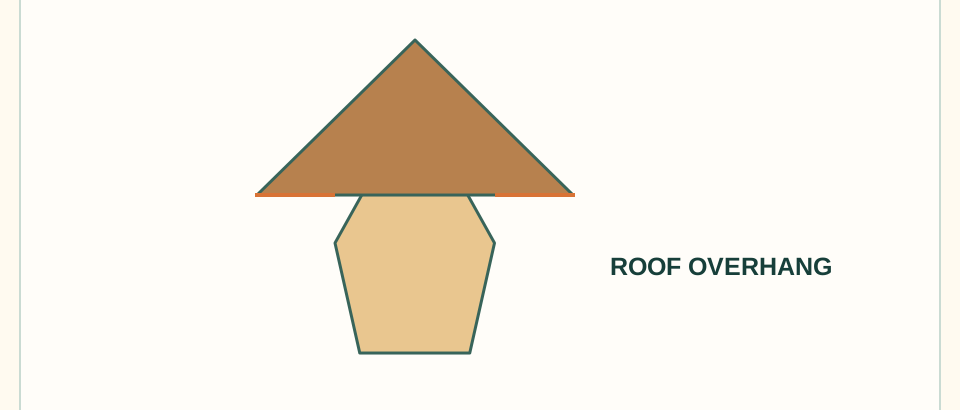
Roof peak and overhangThe source glues and nails both roof pieces with bevels meeting at the peak; it gives no nail coordinates.Swipe the drawing to see every part, or tap to open it full size. 6. Inspect before cure
Compare the floor-to-wall joint and both roof bevels with the source, then check that the entry is clear and no fastener point is exposed.
7. Label the next step
Write the build date, cure/inspection reminder, and one question about placement or cleaning on the project card.
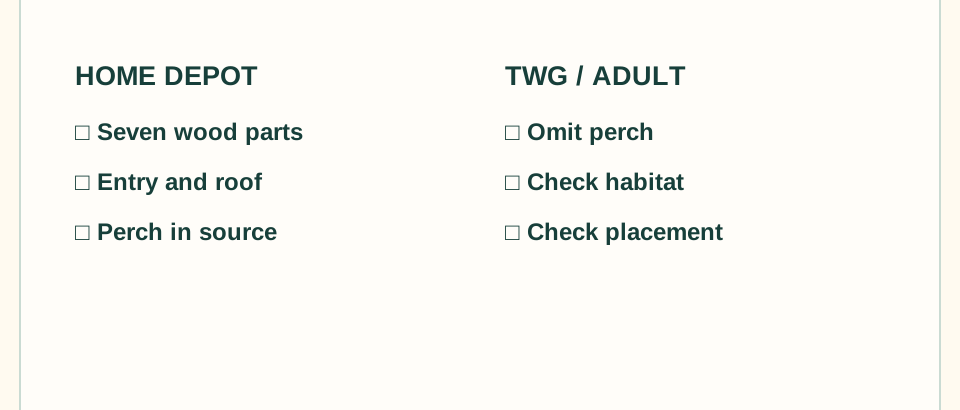
Adult habitat and placement checkSource construction and TWG's no-perch decision remain separate; no wildlife or mounting result is claimed.Swipe the drawing to see every part, or tap to open it full size.
What learners should observe
- The cut list turns a project picture into named, checkable parts.
- Dry-fitting exposes a swapped wall or roof problem before glue or fasteners make it harder to correct.
- Small details such as entry size, overhang, access, and mounting change how the habitat works outside.
- A useful build ends with a safe cure and placement plan, not only an assembled object.
Discussion questions
- Which dimension was easiest to verify, and which needed the adult's explanation?
- Why does the roof extend past the walls?
- What should an adult check before the birdhouse is mounted?
- How would you change the project if the source or local habitat guidance called for a different entry size?
Assessment and reflection
The learner can match at least five parts to the cut list, explain dry-fit before assembly, identify the entry and overhang decisions, and state which steps belong to the adult.
Optional extension / challenge
- Make a paper side view and label floor, entry, roof, and overhang.
- Create a maintenance card with an adult: inspect, clean, and check mounting without disturbing active wildlife.
- Compare the source plan with the finished object and record one dimension or sequence choice that changed.
Cleanup
- Return unused fasteners, abrasives, and labels to their containers.
- Brush dust into the approved collection point and wipe the assembly surface.
- Label the cure location and store the source printout with the project card.
- Leave mounting and outdoor placement for a separate adult check.
Adapt the lesson
One-on-one
Give the learner the labeled cut list and one choice about the project card or roof overhang explanation; keep all tool and mounting decisions adult-controlled.
Group or classroom
Prepare one labeled kit per small group, rotate only through matching, sanding, dry-fit, and observation stations, and keep drilling, fastening, glue, and mounting at one adult-led station.