Flower Box
An illustrated, adult-led path through the Illinois 4-H Flower Box activity. Source directions and TWG clarifications are labeled separately.
Finished outcome: A five-part open box with three approximately 1/2 in drainage holes, built with the source-listed 8d finishing nails after an adult checks actual stock, joints, and product instructions.
Illinois 4-H page 1 supplies the cut sizes, three-hole bottom, butt-joint sequence, 8d finishing nails, and finish steps. The page does not state actual thickness for the nominal 1 × 6 stock, hole spacing, nail quantity, or nail positions. The TWG model uses 3/4 in thickness only as a conditional fit inference: if the ends sit outside the 10 1/2 in bottom and the 12 in sides span the outside length, 12 = 10 1/2 + 2t. The adult checks actual stock and fit. Model hole positions are illustrative, not construction marks.
Adult preparation
- Open Illinois 4-H page 1. Check the nominal 1 × 6 × 48 in softwood board for squareness and inspect actual thickness; the source does not state actual thickness.
- Prepare and label the five listed lengths: two 12 in sides, one 10 1/2 in bottom, and two 5 1/2 in ends. Plan actual layout and cutting for the stock and saw kerf; the source does not give a cut-layout drawing.
- Control all cutting and make the source-specified three approximately 1/2 in drainage holes in the 10 1/2 in bottom. The source gives no hole spacing or construction marks.
- Dry-fit all parts before nails or glue. Check the TWG end-outside/bottom fit interpretation against actual stock; do not treat the model's conditional 3/4 in thickness as a stock specification.
- Select the source-listed 8d finishing nails and any optional wood glue. Check actual joint locations and select a suitable adult-controlled nail method; do not infer nail count or coordinates from the illustration.
- For paint and any optional top finish, check current product labels for surface preparation, compatibility, ventilation, handling/cure timing, and intended use. Do not assume a universal drying or cure time.
Materials
- Source stock: one nominal 1 × 6 softwood board, 48 in long
- Source-listed 8d finishing nails
- Wood glue (optional in the source directions)
- Paint of choice (source wording)
- 80–120 grit sandpaper (source list)
Tools
- Pencil, ruler/tape, and square for adult-led layout and squareness checks
- Adult-selected saw and stable workholding for all cuts
- Adult-selected drill setup for the three source-specified drainage holes
- 80–120 grit abrasive and a hand sanding block for supported, released sanding
- Adult-selected hammer/nail-setting tools and finish-application tools
Parts you'll need
- Side boards: 2 pieces at 12 in long × 5 1/2 in wide; actual thickness is not stated by the source.
- Bottom: 1 piece at 10 1/2 in long × 5 1/2 in wide; drill 3 holes approximately 1/2 in diameter. The source does not specify their spacing.
- End boards: 2 pieces at 5 1/2 in × 5 1/2 in; actual thickness is not stated by the source.
Vocabulary
Butt joint
A joint where the end or edge of one piece meets the face or edge of another.
Drainage hole
An opening through the bottom that lets water leave the box; this plan does not dimension hole spacing.
Fit inference
A measurement reasoned from an assumed arrangement; it is not the same as a dimension stated by the source.
Before you start: safety
- The adult controls stock selection, cutting, drilling all three drainage openings, nail placement and fastening, and any structural correction.
- The adult selects stable support and workholding for each operation. The learner does not hold a part in a cutting, drilling, or nail-driving path.
- Glue, paint, and optional finish require current label review for safe handling, ventilation, compatibility, readiness, and intended use. No universal cure time is assumed.
Who does what?
The stage follows the work the learner personally does. Adult-only complexity does not raise the learner's stage.
Child's part
- Point to the board's reference edge and describe what the square check shows.
- Read or check the marked lengths against the five-piece cut list.
- Compare each prepared cut end with its board face using a square; report any gap or mismatch.
- Identify the bottom and, after drilling is complete, check that its three drainage openings pass through.
- Hand-sand only supported edges or faces explicitly released for the task, using the source-listed 80–120 grit range as directed.
- Dry-fit the five prepared parts around the bottom, identify the corner and bottom-to-wall connections, and report a mismatch without forcing it closed.
Try with adult approval
- The mentor may release supported hand-sanding, optional glue application, or a specific Step 10 paint area only after an adult confirms the setup; glue/paint application is directly supervised and the adult selects products and decides whether to use optional glue or finish. No clamping, nail placement, nail driving, nail setting, or countersinking task is released.
Always adult-controlled / high-risk
- Check actual stock, plan and make every cut, and drill the three drainage holes.
- Select actual nail placement and control installation of every 8d finishing nail, including any nail setting or countersinking.
- Select the glue and paint products, decide whether to release glue or a specific paint area, and control any optional top finish; verify label directions, readiness, and intended use.
Teacher / mentor introduction
Open the Illinois activity to page 1. Point out that the printed cut sizes and named 8d finishing nails are source instructions, while the thickness and fastener positions are not fully dimensioned. Ask the learner to identify the bottom and the three drainage openings before looking at the joints.
Demonstration
- Adult checks the board for squareness and explains the reference edge before measuring. The source says to measure/mark the lengths and cut; the TWG lesson keeps actual cutting adult-controlled.
- Show the five prepared pieces after adult-controlled cutting. Check each cut for squareness as the source directs.
- Identify the 10 1/2 in bottom and three approximately 1/2 in drainage holes; the source supplies no hole-spacing marks.
- Dry-fit the end/bottom and side relationships. Explain that the model's 3/4 in thickness is only the conditional result of its stated fit assumption, not a dimension given for the board.
- Explain that the source specifies 8d finishing nails and optional glue beads but no nail quantity or coordinates. The adult chooses a real placement only after checking the physical parts.
Build steps
1. Check the lumber for square
Source step 1: before laying out cuts, the adult checks the board's edges and ends with a square. The learner points to the reference edge and describes what the square check shows; the adult decides whether the actual stock is suitable.
2. Measure and mark the five lengths
Source step 2: the cut list is two 12 in pieces, one 10 1/2 in piece, and two 5 1/2 in pieces. The source says to measure twice and cut once. The adult plans layout on the actual board, accounting for the real cutting setup; the learner may read or check the marked lengths from a reference edge. The adult makes every cut.
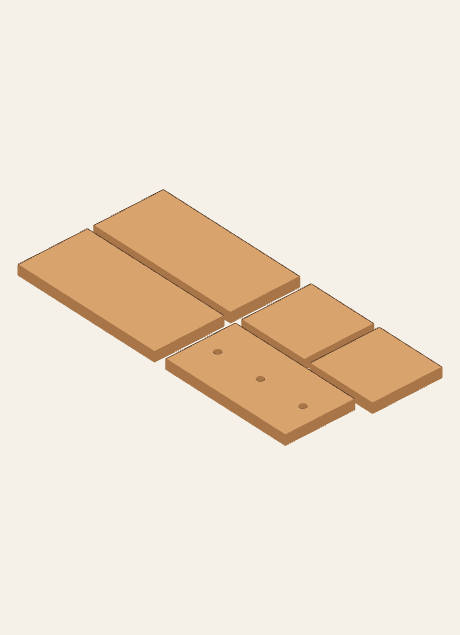
TWG model view · parts after adult preparationThe source dimensions are written in the cut list. The view does not show board layout, saw setup, or a cut template. 3. Check each cut for square
Source step 3: the adult and learner check the prepared cuts with a square before assembly. Compare each cut end to its board face and report any visible gap or mismatch; the adult decides whether a part needs correction.
4. Prepare and identify the drainage holes
Source step 4 calls for three drainage holes, approximately 1/2 in diameter, in the 10 1/2 in bottom. The adult selects the actual drilling setup and makes all three holes; no spacing or center locations are supplied. The learner identifies the bottom and checks that three openings pass through it after the tool is put away.
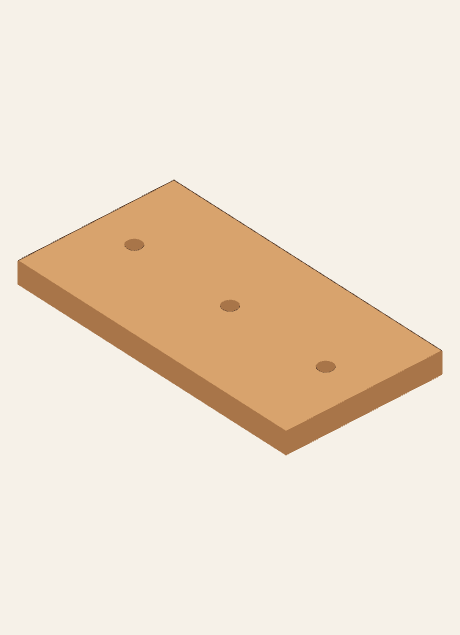
TWG model view · bottom drainageThe source gives hole count and approximate diameter, but no spacing or drilling marks. 5. Sand the cut parts
Source step 5 says to sand the cut pieces smooth. The adult releases supported edges or faces for hand sanding; the learner uses the source-listed 80–120 grit range as directed and brushes away dust before inspection.
6. Dry-fit the butt joints
Source step 6 identifies the 10 1/2 in piece as the bottom and asks that the other boards be fitted around it. In this TWG model interpretation, the two ends sit outside the bottom ends and the two 12 in sides close around the assembly. The source drawing supports the teaching arrangement, but it does not state actual stock thickness. Adult checks that prepared parts fit before fastening.
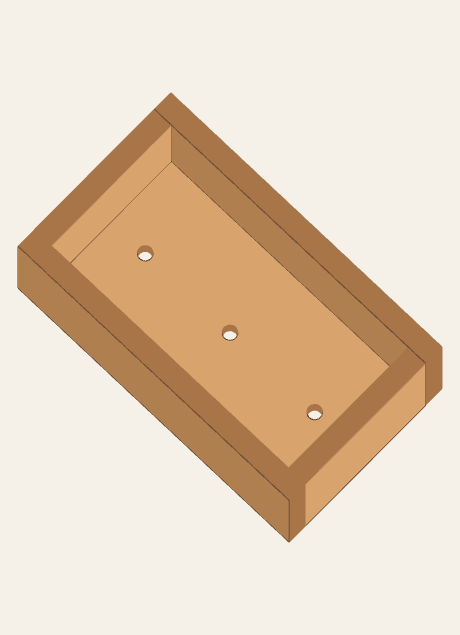
TWG model view · dry-fit arrangementThis view explains the interpreted fit only. Check actual stock and joints; the 3/4 in thickness is not specified by Illinois 4-H. 7. Fasten the two ends to the bottom
Source step 7 says to nail the ends to the outside of the bottom; a bead of wood glue may be used between joints before nailing. The adult confirms the actual joint and selects nail placement. The learner may apply optional glue only if released and supervised. Neither nail count nor coordinates are stated by the source or shown here.
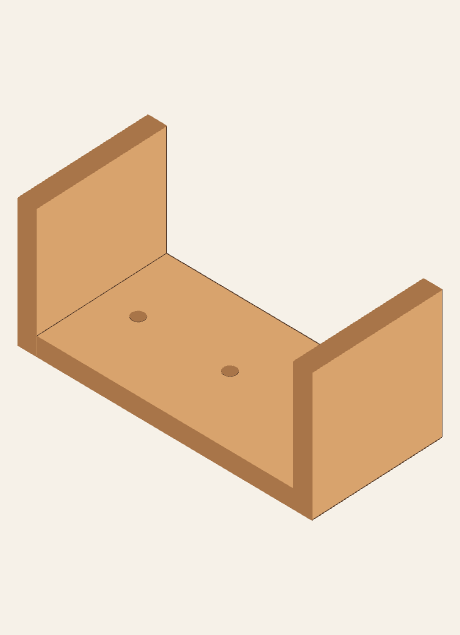
TWG model view · ends at the bottomThe view shows the source joint relationship, not a nail count, position, or spacing instruction. 8. Join the side pieces
Source step 8 says to nail the side pieces together and notes that a bead of glue may be used between joints. TWG interprets the drawing as the two 12 in sides closing the long edges around the bottom and ends. The adult checks this fit and chooses actual nail placement; the learner identifies the long-side joints without marking coordinates.
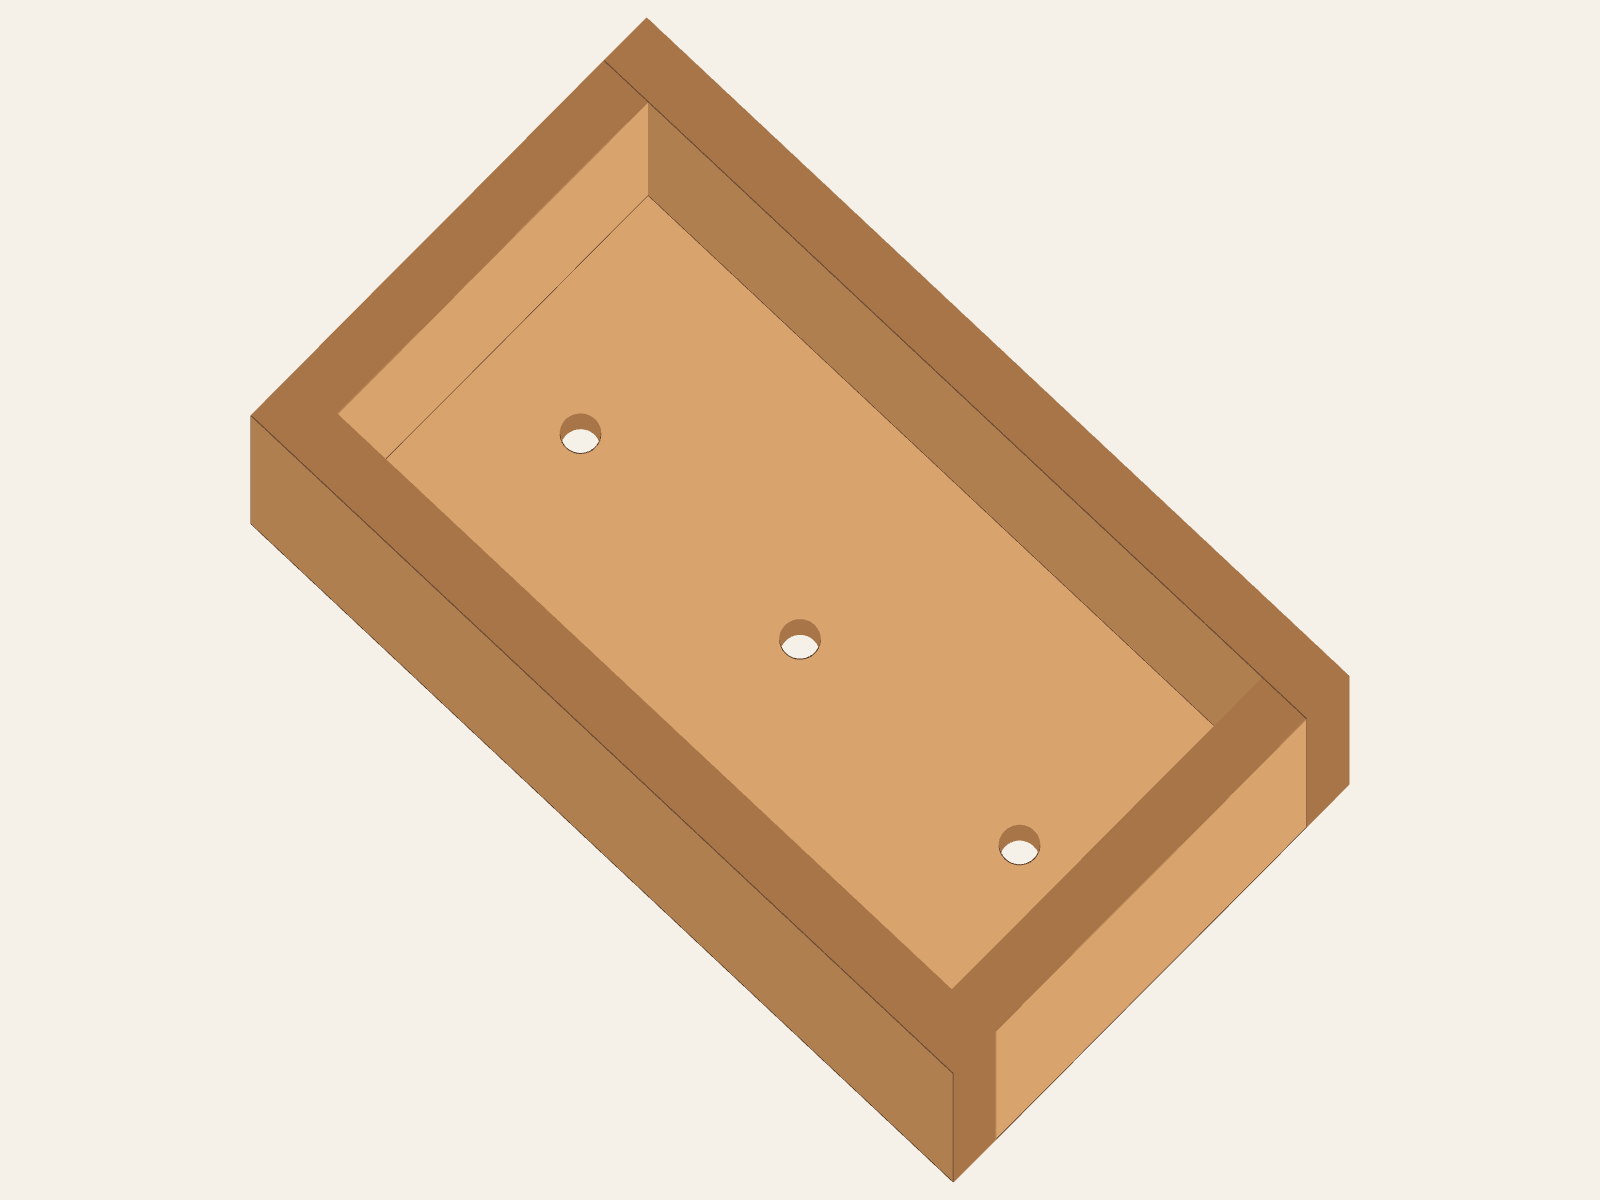
TWG model view · five boards fittedThe Illinois activity specifies 8d finishing nails. No nail count or positions are depicted because the source does not provide them. 9. Check the nail finish and sand smooth
Source step 9 makes countersinking optional: it says, ‘You can countersink the nails’ and sand them smooth. The adult decides whether setting is needed and selects the suitable method for each actual nail. After tools are put away, the learner may inspect released surfaces and hand-sand as directed. Do not continue over a proud, loose, split, or damaged joint.
10. Paint inside and outside
Source step 10 calls for painting both inside and outside; the page says interior paint helps protect from water and soil. That source statement is not a waterproofing or durability rating. The adult selects a product suitable for the intended use and follows its current label; a learner paints only a released area under supervision.
11. Decide whether to add another finish
Source step 11 leaves a choice about putting another finish over the paint. The adult checks the paint and finish manufacturers' current compatibility and use instructions before choosing. Do not add a topcoat merely because the box is intended for outdoor or wet use.
12. Inspect before filling or planting
Source step 12 ends by filling the box and planting flowers. Before that use, the adult checks actual joints, surface condition, clear drainage openings, and the labels' readiness and intended-use directions for the selected products. This lesson makes no load, weather, waterproofing, or service-life claim.
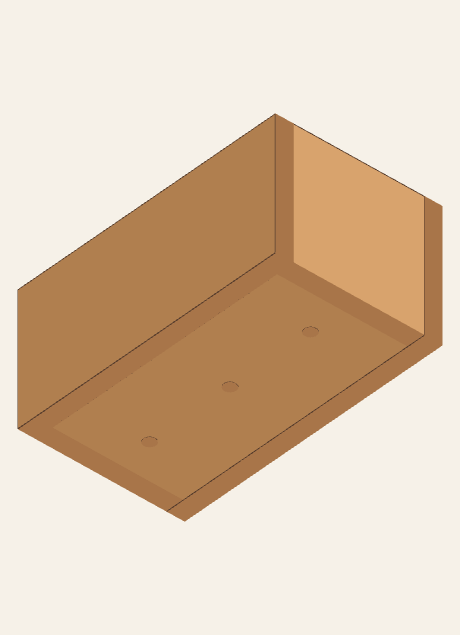
TWG model view · final drainage checkCheck the real box for three clear openings; their spacing is not specified by the source.
Finishing
- Source page 1 says to paint the inside and outside and decide whether to add another finish over the paint. The adult checks current product compatibility, handling, ventilation, and intended-use directions.
- No universal drying or cure period is assigned. The adult follows the selected products' labels and checks readiness before filling or planting.
Final inspection
- Check every wall-to-wall corner and each wall-to-bottom connection for gaps, looseness, splits, or damage.
- Confirm the bottom has exactly three clear through-holes; the source gives no spacing dimension.
- Check that no nail point or sharp edge is exposed and that any nail setting has not split the wood.
- Adult verifies paint/finish readiness and intended-use directions before filling or planting; no load or weather rating is claimed.
Common mistakes
- Treating the model's conditional 3/4 in thickness as a source-stated dimension.
- Inventing hole-spacing marks or nail count/coordinates from an illustration.
- Changing the source's 8d finishing nails to screws.
- Assuming paint makes the box waterproof or assigning a universal cure time.
What learners should observe
- The source names five cut parts and the 10 1/2 in bottom.
- The bottom has three actual drain openings; hole spacing is not given.
- The source specifies 8d finishing nails, not screws, but does not state how many or where each goes.
- The picture's 3/4 in thickness follows a conditional fit assumption; check actual stock.
Discussion questions
- Which piece is the bottom, and how can you tell?
- What does the plan say about the three drain holes, and what does it leave unspecified?
- Which views are TWG explanations rather than source dimensions?
- What must the adult check on a product label before finishing or using the box?
Assessment and reflection
Learner can match the five parts to page 1, identify the three-hole bottom, explain the dry-fit relationship as a TWG interpretation, name 8d finishing nails as the source fastener, and identify the hole-spacing, nail-count, and nail-position gaps without guessing them.
Optional extension / challenge
- Compare the cut list with the five prepared pieces and circle which details come from the plan versus the TWG model.
- On paper, draw a side view of the bottom and two ends without adding nail marks the plan does not provide.
Cleanup
- Return the square, abrasives, and adult-controlled tools to their safe storage places.
- Brush sanding dust away and follow the paint/finish label for cleanup and disposal.
- Store the box on an adult-selected protected surface until product instructions permit the next step.
Adapt the lesson
One-on-one
Let the learner label one prepared part at a time and call the next inspection while the adult controls cutting, drilling, fastening, and products.
Group or classroom
Use prepared, labeled parts; keep the three-hole bottom and source sheet at one supervised station, and do not circulate loose nails or open finish products.