Pencil Holder / Desk Organizer
A small open organizer that teaches a complete four-wall assembly, a measured base, and a useful final object for a desk or shop bench.
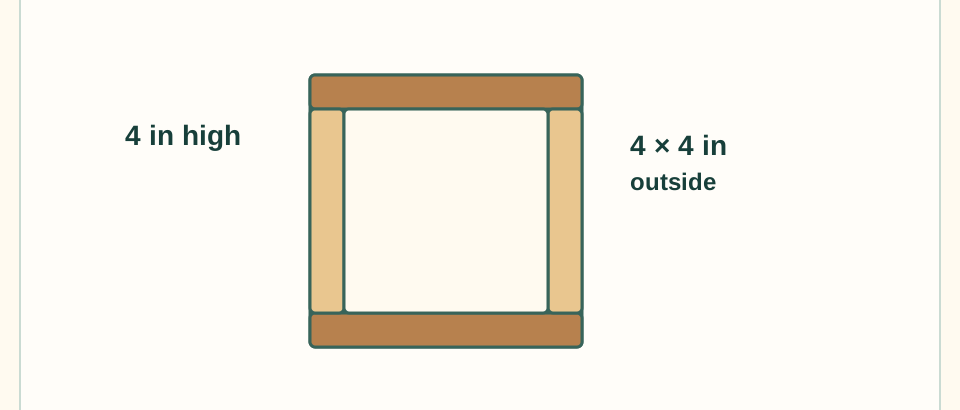
Finished outcome: A modeled 4 in × 4 in × 4 in open-top organizer with a 3 × 3 in inside base. Actual glue-joint fit and readiness for contents require adult inspection.
Open organizer model
Adult preparation
- Prepare four wall parts and one base from 1/2 in stock; label inside faces and remove sharp edges.
- Canonical TWG glue-only variant: the 3 in end-wall edges meet the inner faces of the 4 in long walls. The 3 × 3 in base fits inside all four walls with its bottom flush to their bottom edges. Adult glues four corner seams and four inner base contacts, then clamps; no screws or brads belong to this illustrated variant.
- Set a square surface with a non-slip mat, small clamps, glue, and a ruler.
- Choose a water-based finish only if the adult will handle ventilation, labels, and final application.
Materials
- 1/2 in pine or poplar
- Wood glue for the illustrated adult-controlled glue-only variant
- Pencil and painter tape
- 120 and 180 grit abrasive
- Optional adult-applied water-based finish
Tools
- Ruler and square
- Hand sanding block
- Adult-controlled clamps
- Dust brush
Parts you'll need
- Base: prepare 1 piece measuring 3 in long × 3 in wide × 1/2 in thick. Fits inside the four walls
- Long walls: prepare 2 pieces measuring 4 in long × 4 in wide × 1/2 in thick.
- End walls: prepare 2 pieces measuring 3 in long × 4 in wide × 1/2 in thick. Fit between the long walls
- Finished outside size: 4 in × 4 in × 4 in
Vocabulary
Inside face
The face directed into the organizer cavity.
Base
The bottom panel that gives the organizer its footprint.
Squeeze-out
Glue pushed from a joint when parts are clamped together.
Before you start: safety
- Adult controls all cutting, glue, clamping, and finish decisions.
- Keep the cavity empty while the adult glues and clamps the walls; keep fingers out of clamp paths.
- No finish is applied until the adult reads the label, plans ventilation, and owns disposal of rags.
Who does what?
The stage follows the work the learner personally does. Adult-only complexity does not raise the learner's stage.
Child's part
- Identify the two long walls, two end walls, and base and point to each inside face.
- Use a hand block on adult-selected, learner-safe edges while keeping cavity-side labels visible.
- Dry-fit all four walls around the base and check the listed 4 in × 4 in outside footprint.
- Look from above to check that the walls meet, the base is inside the walls, and the organizer sits flat.
- Choose pencils, brushes, or layout tools as a proposed first use and write down the adult's cure/finish reminder.
Try with adult approval
- No assembly, glue, clamping, or fastening task is released; the learner does the listed part-identification, supported sanding, dry-fit, inspection, and use-planning work.
Always adult-controlled / high-risk
- Prepare and cut the parts; control the canonical glue-only wall and base assembly and all clamps; select any finish and verify product-label handling, cure/readiness, disposal, and final-use conditions.
Teacher / mentor introduction
Ask what belongs in an organizer and how the base keeps small items from falling through. Compare the two long walls and two end walls before the dry-fit.
Demonstration
- Show how a reference mark keeps inside faces oriented toward the cavity.
- Dry-fit the two 3 in end walls between the 4 in long walls, then fit the 3 in square base inside them. Check the 4 in outside footprint.
- Model wiping glue squeeze-out with a damp, adult-held cloth before it hardens.
Build steps
1. Sort repeated parts
Find the two long walls, two end walls, and base, then point to each inside face.

Five prepared piecesTwo 4 in long walls, two 3 in end walls, and one 3 × 3 in inside base, all from ½ in stock.Swipe the drawing to see every part, or tap to open it full size. 2. Sand learner-safe edges
Use the hand block on the adult-selected edges and keep the cavity side labels visible.
3. Dry-fit the organizer
Place all four walls around the base and check that the outside footprint is 4 in × 4 in.
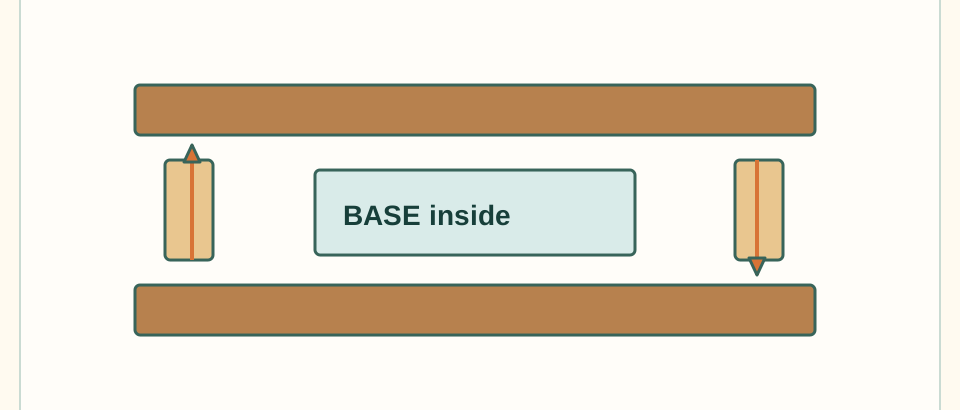
Dry-fit orderThe short end walls fit between the long walls; check the 4 × 4 in outside footprint.Swipe the drawing to see every part, or tap to open it full size. 4. Inspect the cavity
Look from above and confirm the walls meet, the base is inside the walls, and the organizer sits flat.
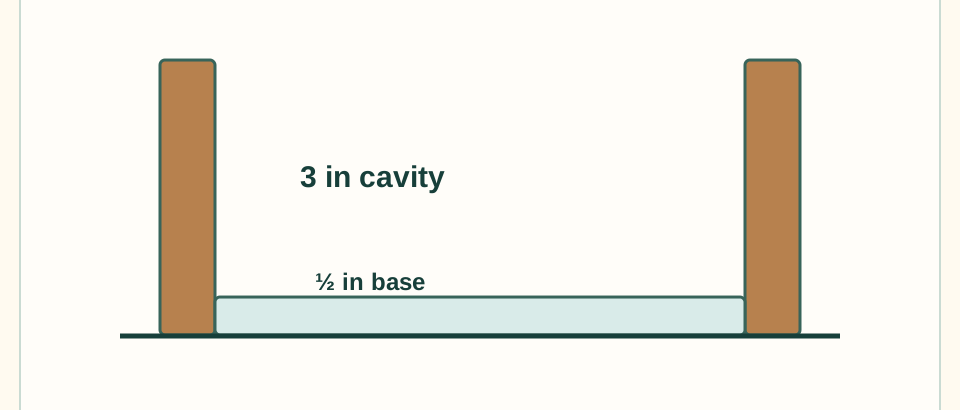
Base and wall contactThe base contacts the inner faces of all four walls and sits flush with their bottom edges.Swipe the drawing to see every part, or tap to open it full size. 5. Adult-controlled assembly
The adult glues four end-to-long-wall seams and four base-to-inner-wall contacts, then clamps while the learner calls out inside faces and the flat-base check. This illustrated variant uses no screws or brads.
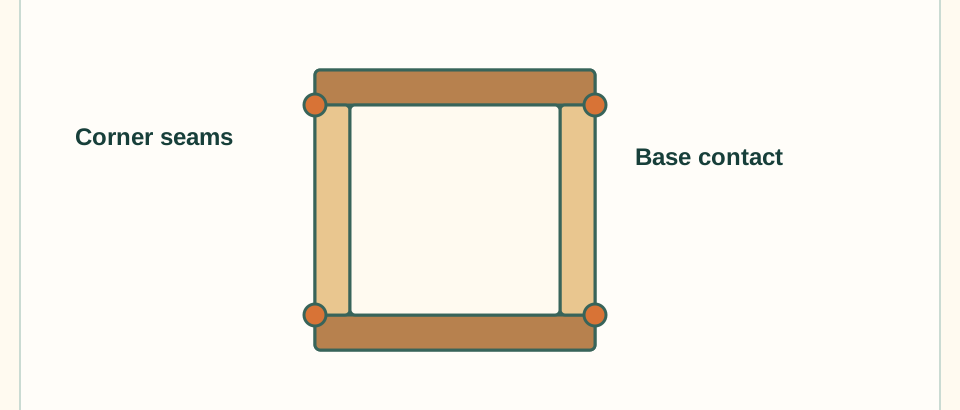
Canonical glue-only assemblyThe adult glues and clamps four corner seams and the four inner base edges; no fastener path is illustrated.Swipe the drawing to see every part, or tap to open it full size. 6. Plan the use
Choose pencils, brushes, or layout tools for the first use and write the cure/finish reminder on the project card.
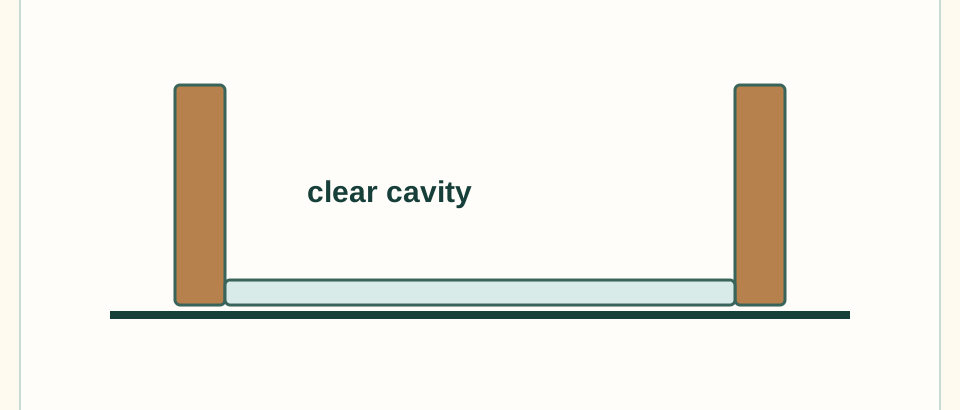
Flat-base checkCheck all bottom edges against a flat reference before cure and later use.Swipe the drawing to see every part, or tap to open it full size.
What learners should observe
- Repeated parts make a project easier to sort but easier to swap if reference faces are not marked.
- A flat base matters more than a decorative finish for a useful organizer.
- A clean cavity makes later use and cleanup easier.
Discussion questions
- Why are the end walls shorter than the long walls?
- Which face points into the organizer?
- What makes a desk object useful every day?
Assessment and reflection
Learner can identify repeated parts, explain the 4 in × 4 in footprint, and describe the inside-face check before assembly.
Optional extension / challenge
- Add dividers on paper and decide where they would fit without cutting them.
- Compare an unfinished and finish-sample scrap under side light.
- Label the organizer for a real desk or bench job.
Cleanup
- Return clamps to safe storage.
- Brush and wipe the work area without spreading glue or dust.
- Store the organizer on a flat cure surface with the finish decision clearly labeled.
Adapt the lesson
One-on-one
Let the learner choose the organizer's job and make the inside-face callouts before the adult assembly.
Group or classroom
Prepare color-labeled kits and let learners sort, sand, and inspect while one adult owns the glue-and-clamp station.