Phone / Tablet Stand
A complete cardboard stand study using four proposed parts, two support-angle options and a same-size device mockup. A wood construction plan remains a separate adult decision.
Finished outcome: A labeled cardboard design, two support-angle options, a device mockup comparison and a revision note. No wooden stand or real-device readiness is established.
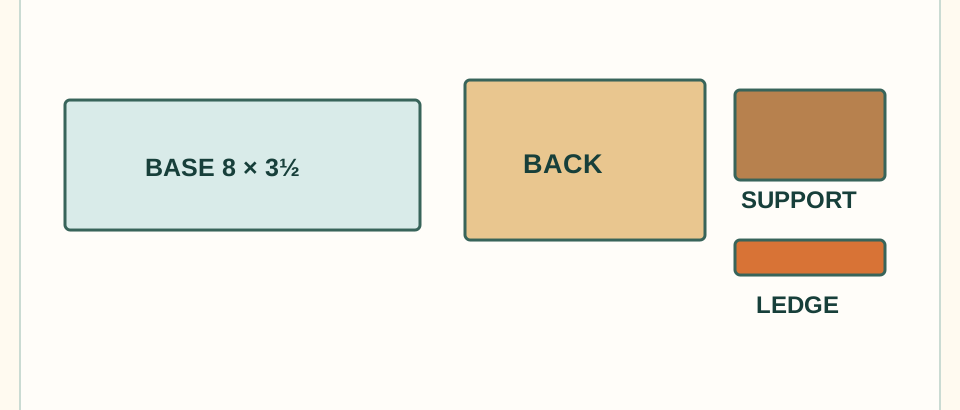
Four proposed parts
Adult preparation
- Prepare cardboard shapes from the four proposed dimensions and a same-size cardboard device outline.
- Mark at least two support-angle options and the mockup's control area; keep real devices away from the study.
- Use a flat mat and square. Record unresolved support contact, retention and stability for any future adult wood plan.
Materials
- Cardboard for four proposed parts
- Same-size cardboard device outline
- Pencil, painter tape and a design card
Tools
- Ruler and square
- Scissors or craft cutting controlled according to learner readiness
- Flat table for cardboard mockup
Parts you'll need
- Proposed base: prepare 1 piece measuring 8 in long × 3 1/2 in wide × 3/4 in thick.
- Proposed back: prepare 1 piece measuring 6 in long × 4 in wide × 3/4 in thick.
- Proposed support: prepare 1 piece measuring 6 in long × 2 in wide × 3/4 in thick.
- Proposed front ledge: prepare 1 piece measuring 6 in long × 3/4 in wide × 3/4 in thick.
- Proposed stand width: 8 in; device area depends on the adult-checked angle and ledge
Vocabulary
Ledge
A proposed front edge whose position can change control clearance and retention.
Support angle
A possible back lean to compare in the cardboard study; no final angle is selected.
Mockup
A size-matched cardboard stand-in used to compare positions before a separate construction plan.
Before you start: safety
- Adult controls any sharp cardboard cutter.
- Use a cardboard device outline; keep real devices away from loose parts.
- A paper fit does not establish real-device stability or any permission to build in wood.
Who does what?
The stage follows the work the learner personally does. Adult-only complexity does not raise the learner's stage.
Child's part
- Identify the proposed cardboard base, back, support and front ledge from the list.
- Compare at least two cardboard support-angle options.
- Use a same-size cardboard device outline to check proposed viewing and control clearance.
- Move the paper ledge, record the effect, and revise one variable.
- Explain why the mockup does not prove real-device stability.
Try with adult approval
- No assembly, glue, clamping, fastening, or real-device use task is released by this lesson; use the cardboard mockup for learner fit checks.
Always adult-controlled / high-risk
- Select and prepare the cut and support geometry; control glue and clamp assembly, any finish, stability correction, and the final decision about readiness for a real device.
Teacher / mentor introduction
Place the cardboard device outline against the loose paper parts. Ask how back angle and ledge position might change viewing, controls and possible sliding; do not claim the mockup proves retention.
Demonstration
- Show the four proposed parts in a paper side profile.
- Compare support-angle options A and B with the same-size device outline.
- Move the ledge, mark control clearance, and record one revision without placing a real device.
Study steps
1. Match proposed parts
Read the four dimensions and label cardboard base, back, support and front ledge.
2. Prepare the mockup
Cut or receive a cardboard outline matching the intended device; mark its control area.
3. Compare angles and device
Set two loose side-profile options and compare the same-size cardboard device outline in each.
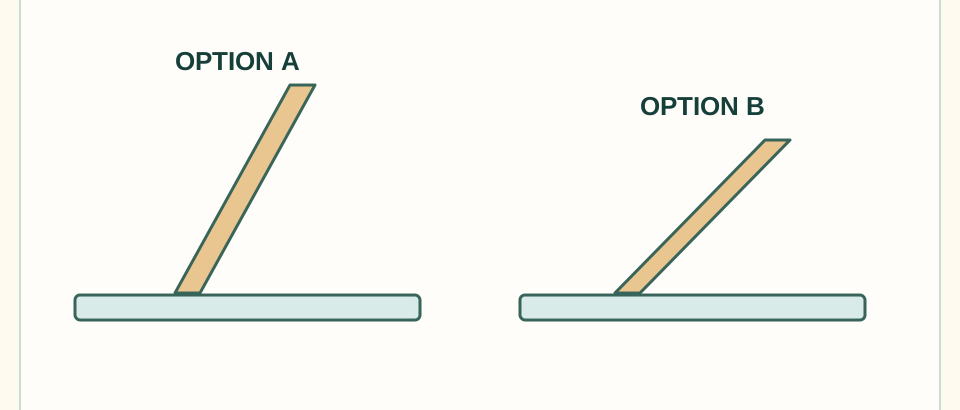
Two support-angle optionsCompare two loose cardboard side profiles; neither is a fixed wood joint or approved angle.Swipe the drawing to see every part, or tap to open it full size. 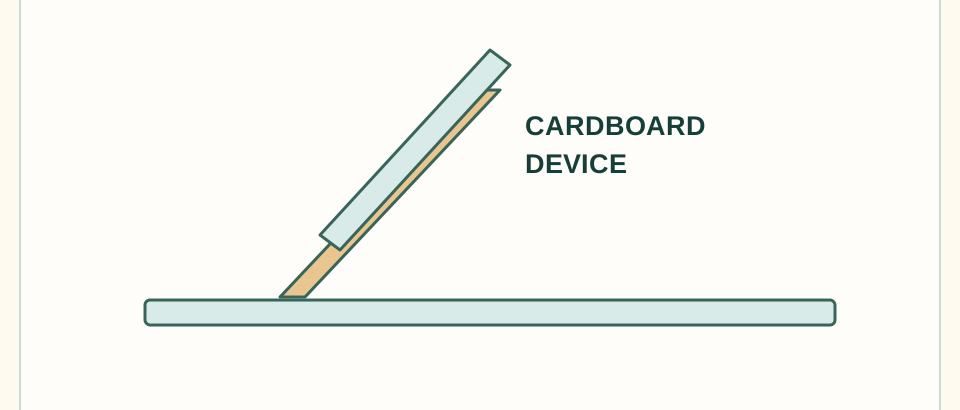
Same-size device mockupPlace a cardboard outline matching the intended device against each loose profile.Swipe the drawing to see every part, or tap to open it full size. 4. Check ledge and controls
Move the paper ledge, then mark where it might cover controls or change retention. Check the paper base lies flat.
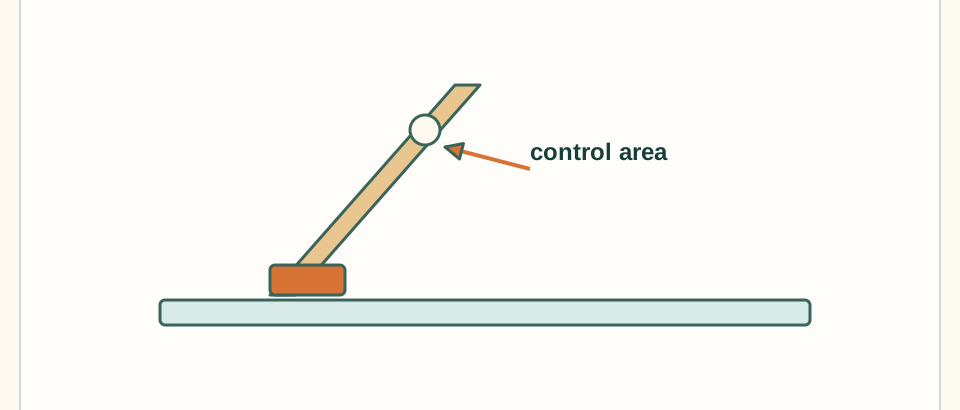
Ledge and controlsMove the paper ledge and check whether the mockup's proposed controls remain clear.Swipe the drawing to see every part, or tap to open it full size. 5. Revise one choice
Change one paper position, record why, and repeat the cardboard check. List support contacts and stability for later adult design.
Revise after mockupMark one proposed change, retest the cardboard layout, then record what remains unresolved.Swipe the drawing to see every part, or tap to open it full size. 6. Save or defer
Store the parts, two options and revision note as the completed study; any wooden version needs a separate checked adult construction plan.
What learners should observe
- A small ledge shift can change control clearance in the cardboard mockup.
- Back angle changes viewing and possible contact points.
- A mockup reveals questions but cannot establish stability for a real device.
Discussion questions
- What keeps the device from sliding?
- How did the mockup change the design decision?
- What would make this stand unsafe to load?
Assessment and reflection
Learner identifies four proposed parts, compares two support-angle options, checks mockup controls and records one revision plus an unresolved stability question.
Optional extension / challenge
- Make a paper version with a different back angle.
- Add a cable-clearance note to the project card.
- Compare the stand with and without a front ledge using the mockup.
Cleanup
- Return ruler, square and scissors to safe storage.
- Keep the cardboard parts and device outline with the design card.
- Record the unresolved support and stability questions.
Adapt the lesson
One-on-one
Let the learner draw both cardboard side profiles and record which control clearance changes.
Group or classroom
Use cardboard mockups at one station and a design-note station for the adult questions.