Small Wall Shelf
A complete paper/cardboard shelf design study: compare four proposed parts and support options, then record the unanswered wood-joint, wall, hardware and load questions.
Finished outcome: A labeled cardboard mockup, two support options and an adult decision checklist. No wooden shelf is produced by this study.
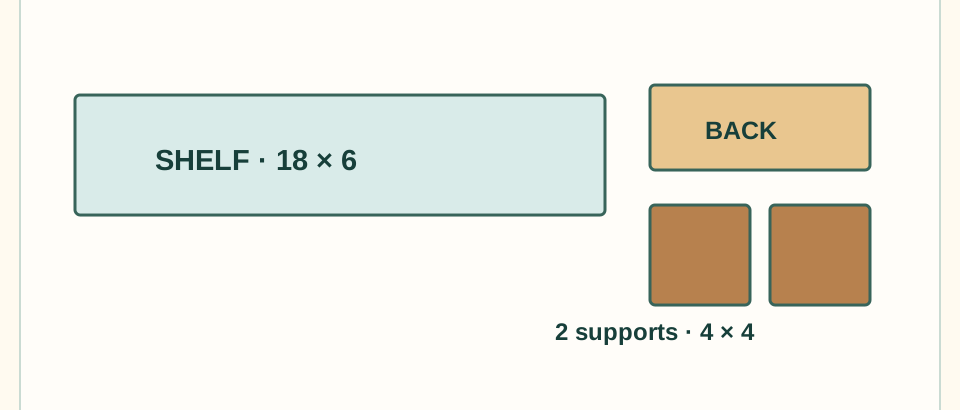
Proposed cardboard parts
Adult preparation
- Prepare paper or cardboard shapes from the proposed dimensions; label them as a study, not wood construction parts.
- Prepare a flat surface, ruler, square and two paper support-option sketches.
- Keep hardware and powered tools outside this activity. List the joint, wall, hardware and load decisions an adult would need before a separate wood plan.
Materials
- Paper or cardboard
- Pencil and painter tape
- Design card for questions and options
Tools
- Ruler and square
- Scissors or craft cutting controlled according to learner readiness
- Flat table for paper mockup
Parts you'll need
- Proposed shelf: prepare 1 piece measuring 18 in long × 6 in wide × 3/4 in thick.
- Proposed back: prepare 1 piece measuring 18 in long × 4 in wide × 3/4 in thick.
- Proposed side supports: prepare 2 pieces measuring 4 in long × 4 in wide × 3/4 in thick.
- Proposed shelf width and depth: 18 in × 6 in
- Adult mounting height and load: determined only after joint, wall, and hardware checks
Vocabulary
Back
The vertical panel that helps locate and stiffen the shelf assembly.
Load
The weight an object or mounting system must safely carry.
Stud
A structural framing member behind many finished walls; the adult confirms what the wall actually contains.
Before you start: safety
- Adult controls any sharp cardboard cutter.
- Do not load or mount a paper mockup.
- A future wood and wall installation needs its own adult review of hidden services, wall construction, hardware and load.
Who does what?
The stage follows the work the learner personally does. Adult-only complexity does not raise the learner's stage.
Child's part
- Match four paper/cardboard pieces to the proposed dimensions and mark the 18 in × 6 in shelf outline.
- Compare side and front relationships without assuming a wood joint.
- Mock up two support arrangements and label both OPTIONS.
- Choose a proposed object and explain why the wall material, mounting hardware and load need adult design work.
- Record the unresolved questions on a design card.
Try with adult approval
- No assembly, glue, clamping, fastening, drilling, wall-mounting, or load task is released; learner work is limited to the listed part checks, dry-fit, edge easing, and discussion.
Always adult-controlled / high-risk
- Prepare and cut the parts; control drilling, fasteners, glue/clamp assembly, structural corrections, mounting hardware, actual wall and hidden-service checks, installation, load approval, and final-use decisions.
Teacher / mentor introduction
Lay out the paper shelf, back, and side supports and ask what a future shelf might hold. Explain that a drawing does not establish joint strength, wall hardware, or an allowed load.
Demonstration
- Lay paper shelf, back and support shapes in side and front views; leave contacts labeled as possibilities.
- Compare two cardboard support placements and record what each would require from a future joint design.
- Write the adult questions: what wall, which mounting hardware, what load, and which actual joints?
Study steps
1. Read proposed parts
Match the shelf, back and two support shapes to the proposed dimensions; mark them as cardboard study pieces.
2. Make the cardboard parts
Cut or receive the four paper/cardboard shapes and label their faces and dimensions.
3. Compare relationships
Arrange side and front paper views and identify where the shelf, back and supports might meet. Mark these as possible contacts, not wood joints.
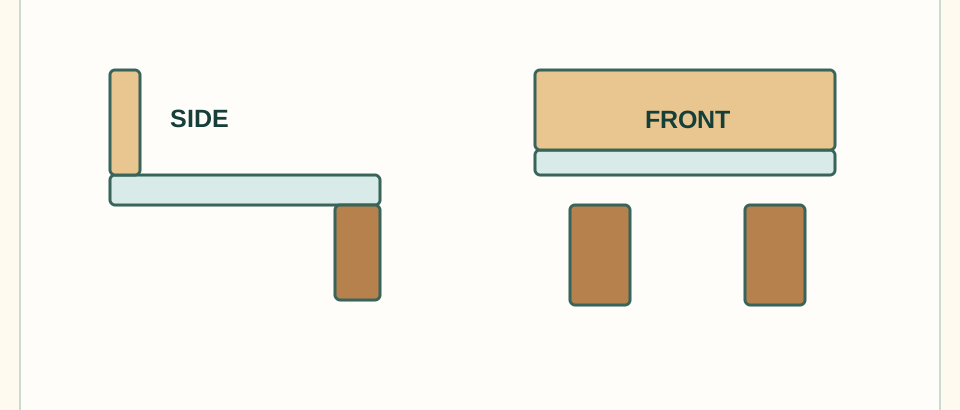
Side and front relationshipsMock up how shelf, back and supports might meet; the drawing does not specify a wood joint.Swipe the drawing to see every part, or tap to open it full size. 4. Compare support options
Place the two supports in at least two possible paper arrangements. Name one question each option leaves for a future wood design.
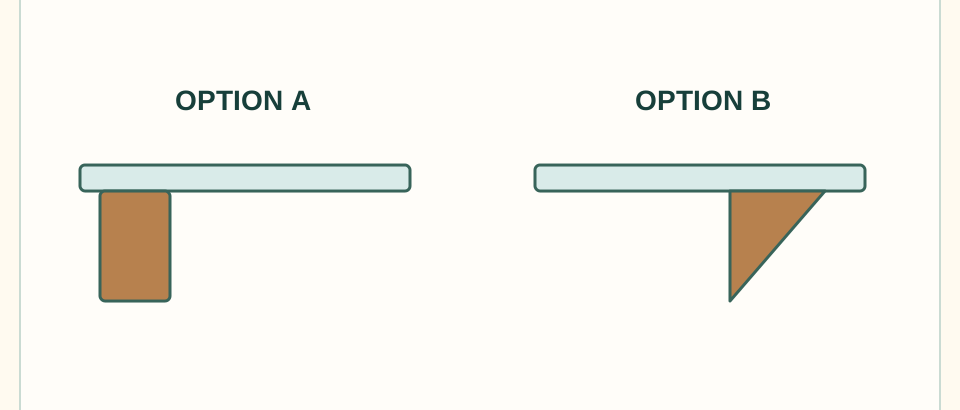
Two support optionsCompare two paper support placements as options, without treating either as a checked construction detail.Swipe the drawing to see every part, or tap to open it full size. 5. Complete the adult checklist
Record unresolved joints, fastener paths, actual stock, wall structure, mounting hardware and intended load.
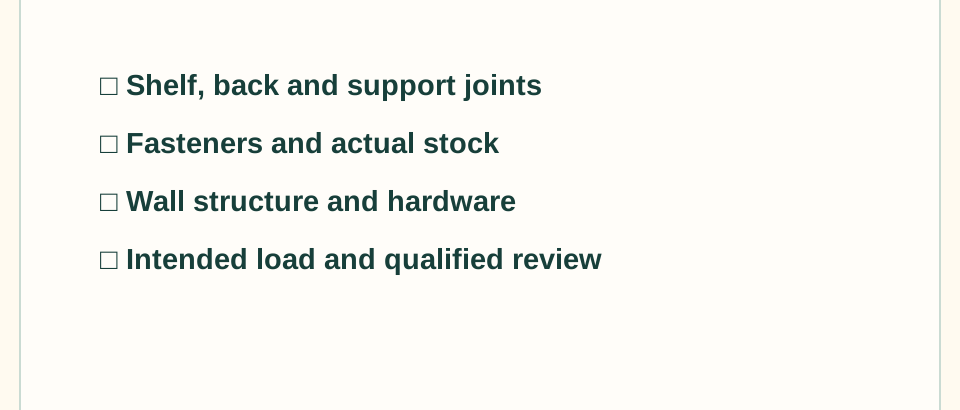
Adult decision checklistA future wood design needs checked joints, fasteners, wall structure, hardware and intended load.Swipe the drawing to see every part, or tap to open it full size. 6. Save the design study
Label and store the cardboard mockup with the option sketches and adult questions.
What learners should observe
- A back and support shapes suggest different contact arrangements, but paper does not establish structural strength.
- Side and front comparisons reveal where a future joint would need to be specified.
- Intended load changes the adult's wall, hardware and placement decisions.
Discussion questions
- Which parts keep the shelf from tipping?
- Why is a wall not just a flat piece of material?
- What information would the adult need before mounting?
Assessment and reflection
Learner names all four proposed parts, compares two support options, and explains at least three unresolved adult design decisions.
Optional extension / challenge
- Draw a side view with a proposed object and label its load as unknown.
- Compare two possible wall locations on paper only.
- Write a question list for a future adult-designed shelf.
Cleanup
- Return scissors, ruler and square to safe storage.
- Keep the mockup and option sketches with the design card.
- Leave the wall area untouched.
Adapt the lesson
One-on-one
Let the learner choose a proposed display object and draw the load question.
Group or classroom
Rotate learners through paper parts, two support options and the adult-decision checklist.