
Grinding wheel
The T-8 Original uses the SG-250 stone. Grade or true it with compatible Tormek tools when the operation calls for it; wheel diameter changes as it wears.
Trace the water-cooled stone, adjustable support and leather honing wheel from rough bevel to finished edge.
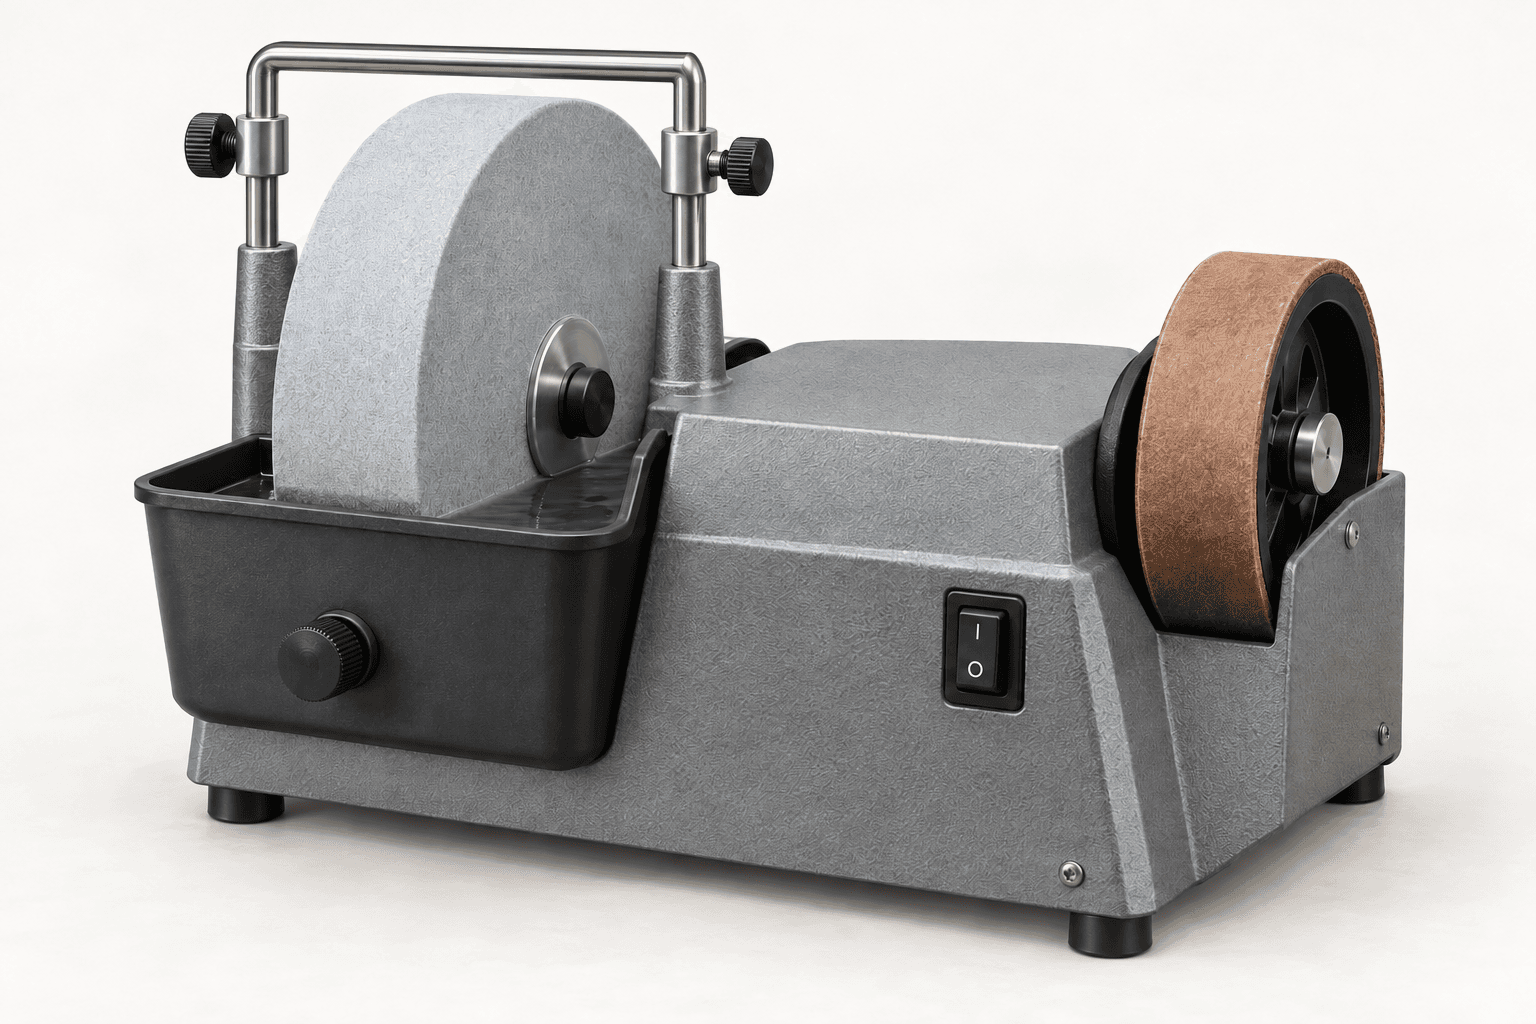
An original educational poster identifies 8 documented construction features. The numbered descriptions remain readable below the artwork on narrow screens.
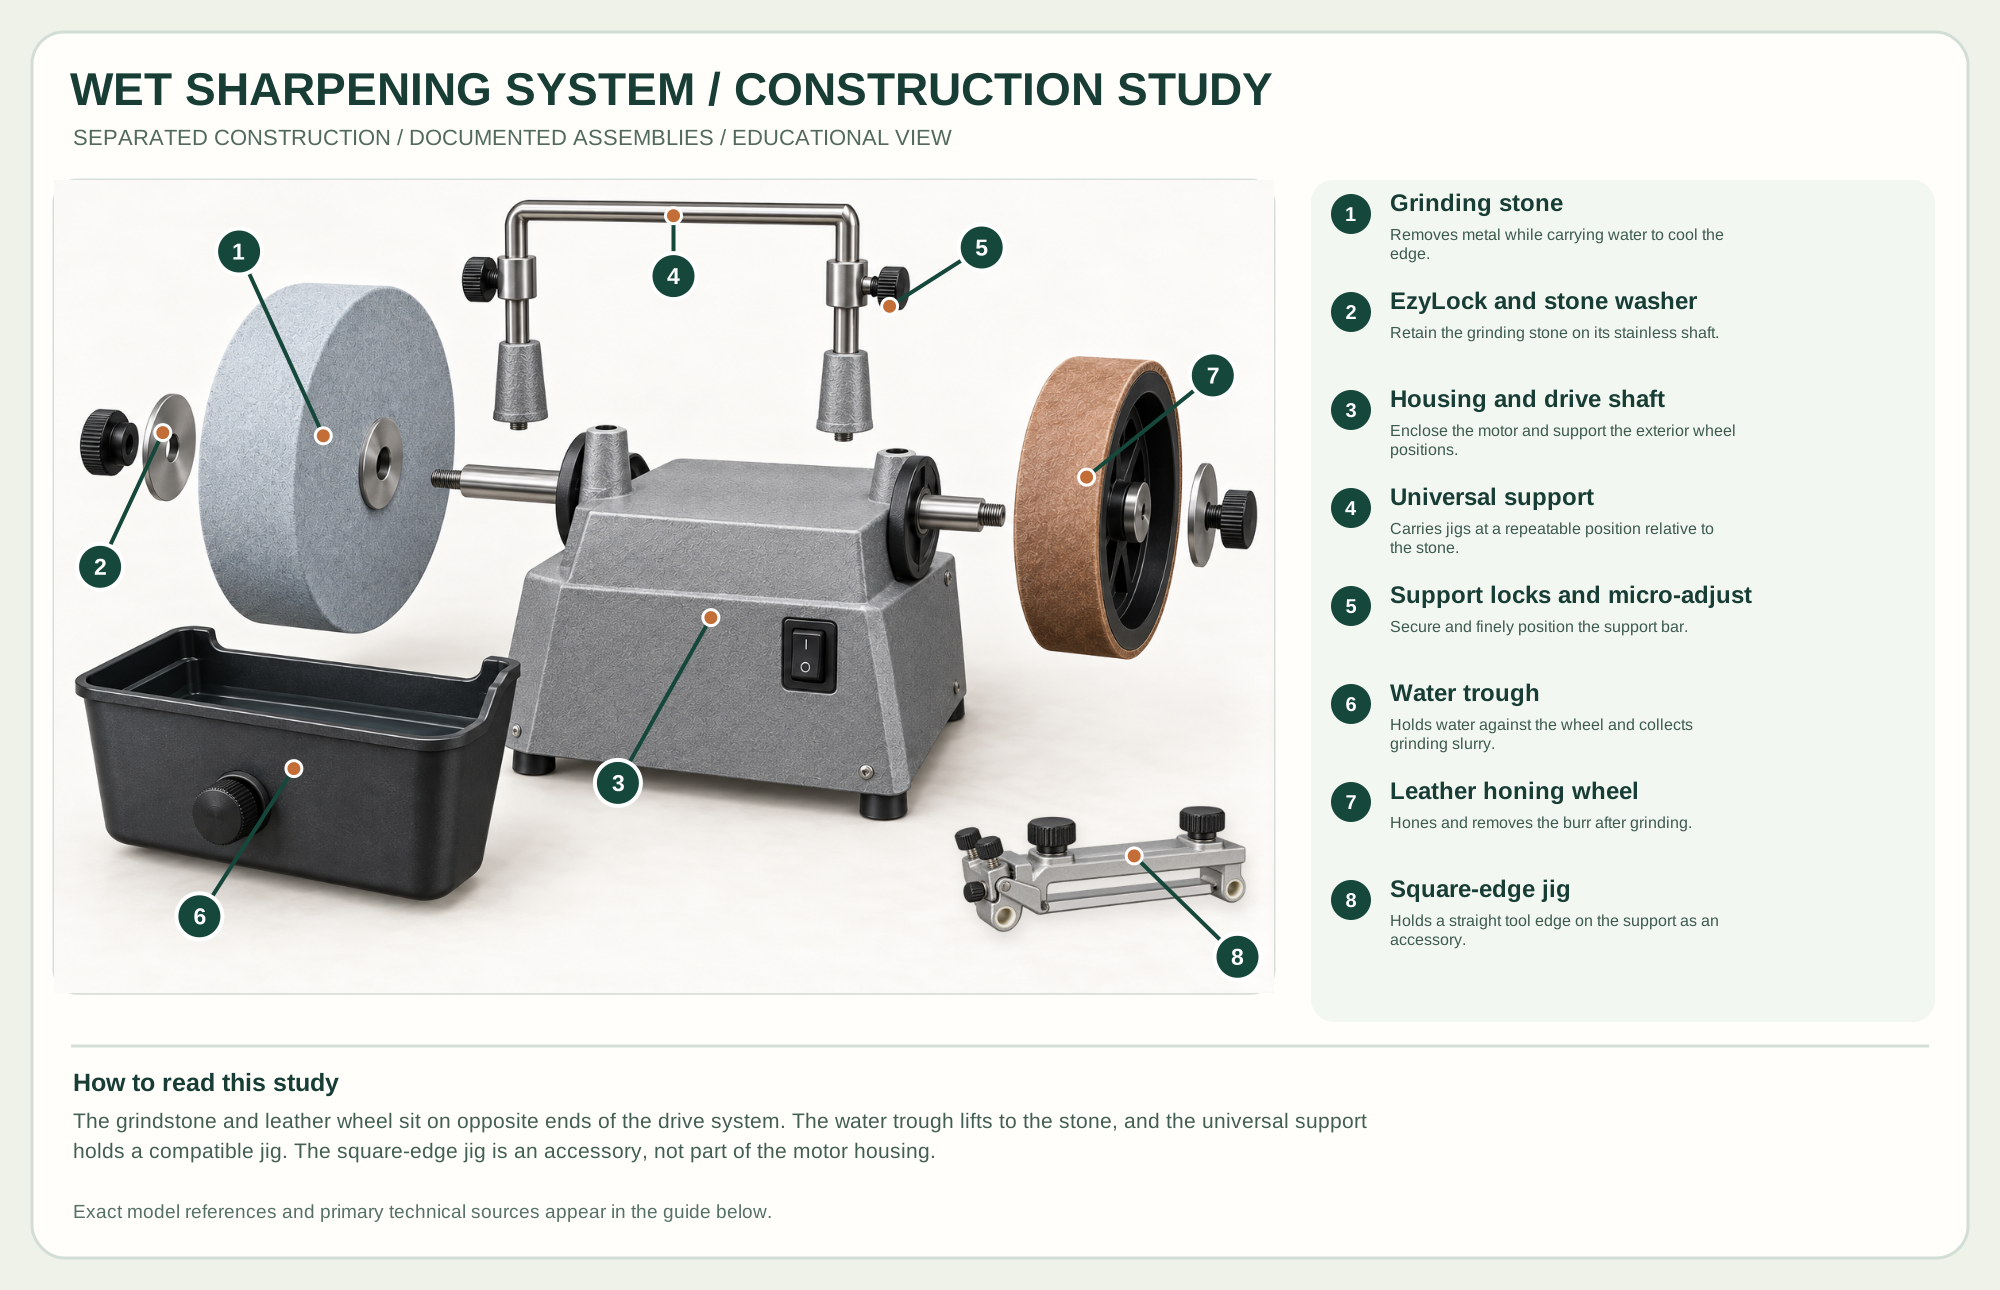
Removes metal while carrying water to cool the edge.
Retain the grinding stone on its stainless shaft.
Enclose the motor and support the exterior wheel positions.
Carries jigs at a repeatable position relative to the stone.
Secure and finely position the support bar.
Holds water against the wheel and collects grinding slurry.
Hones and removes the burr after grinding.
Holds a straight tool edge on the support as an accessory.
Technical references: Tormek T-8 official parts breakdown · Tormek T-8 Original product and accessories · Tormek SE-77 official parts breakdown · Tormek SE-77 official instructions · Tormek SE-77 official product page. The T-8 Original's documented outer assemblies and a separate compatible jig are spaced to show how water-cooled grinding and honing work. The motor housing stays closed; the image is not an exact service breakdown. Original educational artwork depicts documented component groups and their relationships; it is not a service sequence or a replacement for the exact model manual.
A wet sharpening system runs a grinding wheel slowly through a water trough, reducing heat while a support and jig hold a repeatable edge angle. The Tormek T-8 Original is the technical reference. It includes a grindstone, leather honing wheel, universal support and water trough; the separate square-edge jig in the study is an accessory, and other grinding systems use different stones or drives.
The enclosed motor drives a stainless shaft. Water carried by the stone cools and flushes the grind. The universal support sets the jig's relation to wheel diameter and edge projection; the micro-adjust changes its height. After grinding, the leather wheel with the specified compound removes the burr and refines the edge. The drawing shows exterior assemblies, not hidden motor construction or a disassembly order.
The T-8 Original uses the SG-250 stone. Grade or true it with compatible Tormek tools when the operation calls for it; wheel diameter changes as it wears.
The stainless shaft carries the grinding wheel; EzyLock retains it. Use the maker's wheel-change method rather than forcing the lock.
A height-adjustable trough maintains water contact and catches swarf. Drain and clean it after use.
The U-shaped bar, locking knobs and micro-adjust establish a repeatable jig position. The stop collars prevent a jig sliding off the bar.
The separate wheel hones after grinding. Prepare and charge it with the maker-recommended oil and compound.
These decisions make the mechanism useful at the bench.
Choose the appropriate jig and projection; use the Tormek angle method for the actual stone diameter and desired edge geometry.
Fill only to the manual's level; raise the trough for wheel contact, and account for absorbent stone taking up water.
Use light even pressure, inspect the bevel and burr, then move to the leather wheel with the correct orientation and compound.
A square-edge jig can register straight blades consistently while the stone establishes or renews a bevel.
Profile-specific jigs can repeat gouge and scraper shapes; the illustrated square-edge jig does not serve every turning tool.
Other compatible jigs and support methods serve curved or narrow edges; consult the correct accessory instructions.
Use the steps for a first pass, then inspect the work before changing the setup.
The water film helps protect the tool edge, but does not make heavy pressure or poor jig control harmless.
Projection, support position and current stone radius affect the bevel. Record a repeatable setup for frequently sharpened tools.
The leather wheel refines an already established bevel; it cannot quickly correct a badly shaped or chipped edge.
Stone, diamond and other compatible wheels differ in cutting behavior and maintenance; follow the selected wheel's instructions.
Dry bench grinders remove metal quickly but need different heat and rest practices; do not transfer settings directly.
Square-edge, knife, turning and carving jigs hold different shapes. Confirm the exact accessory fits the tool and machine.
Stop the tool and disconnect power before investigating a fault or changing a part.
Check jig clamping, edge squareness, wheel trueness and support position.
Check trough height, water level and stone absorption.
Confirm a complete ground edge, honing orientation and leather-wheel preparation.
Use the exact tool manual for setup, limits and replacement parts. These lessons, documents and model pages teach relevant techniques or help compare real variations.
Official labeled exterior and internal component list for the selected machine.
Official specifications, wheel and accessory documentation.
These maker-owned links document relevant tools and tool brands. A product brand may use another company's factory; compare the exact model before choosing parts or accessories.
Cutters, abrasives, guards, guides, dust fittings and service parts vary by tool. Check the model plate and manufacturer manual before ordering or changing a component.
Compare the Powered Sharpening Systems family →Continue through the Tools library