
Fixed and sliding housings
The fixed casting transfers load into the bench; the mobile jaw presses the work. Both need secure mounting and appropriate liners.
Hold work safely and repeatably by understanding the jaws, guide rods, leadscrew and quick-release mechanism.
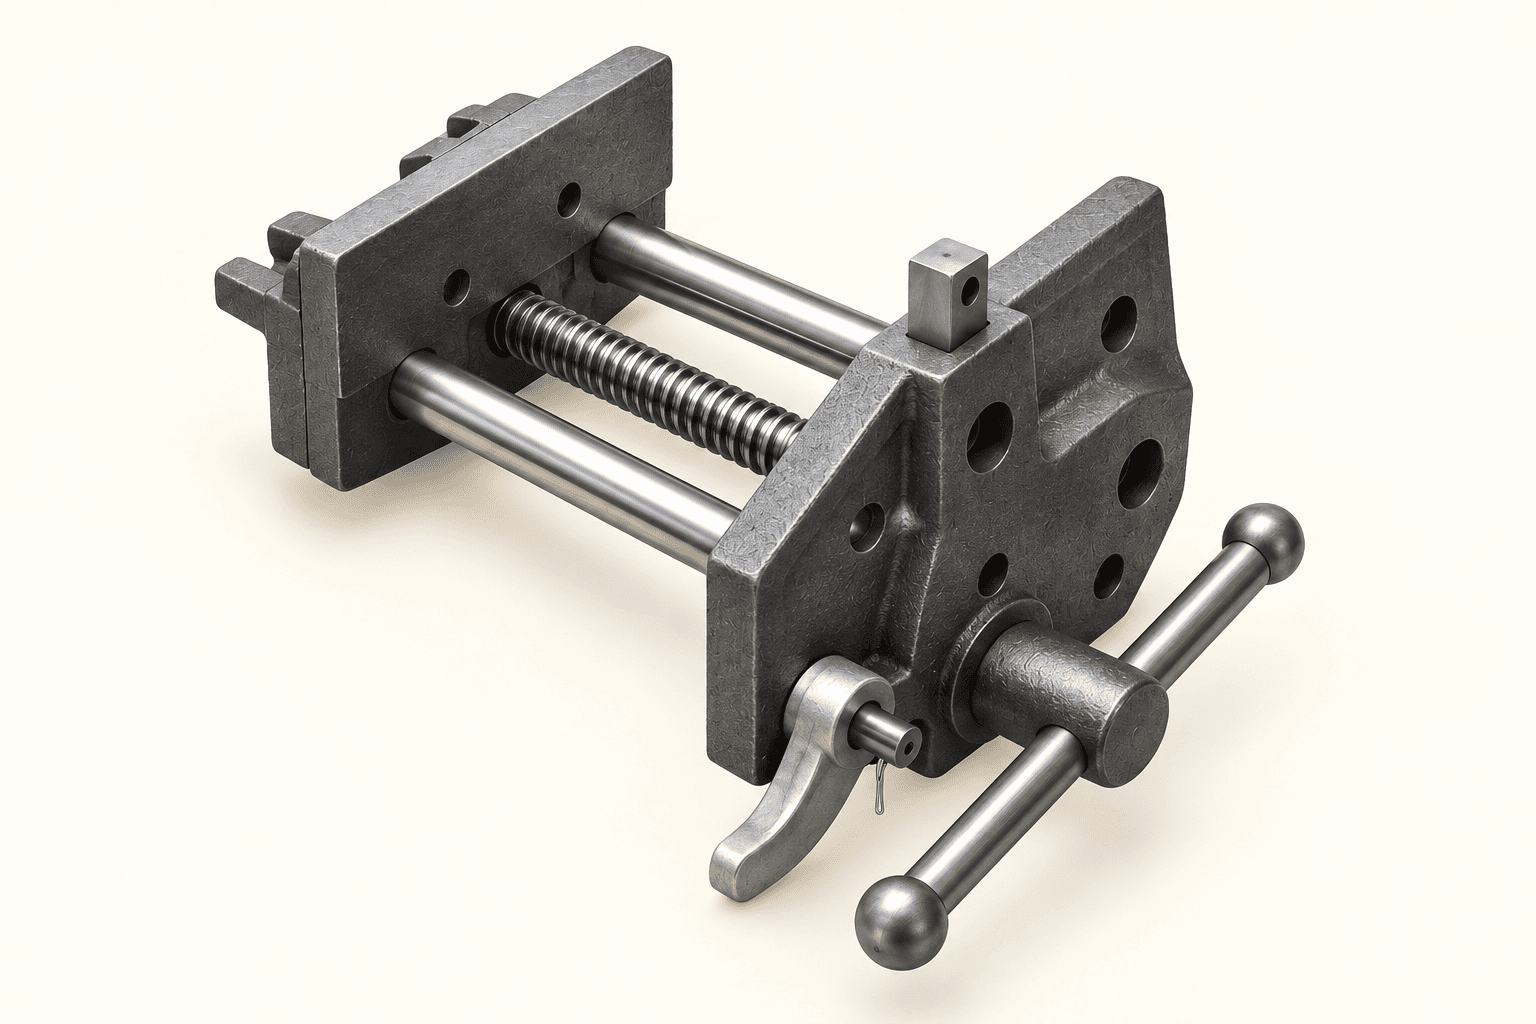
An original educational poster identifies 8 documented construction features. The numbered descriptions remain readable below the artwork on narrow screens.
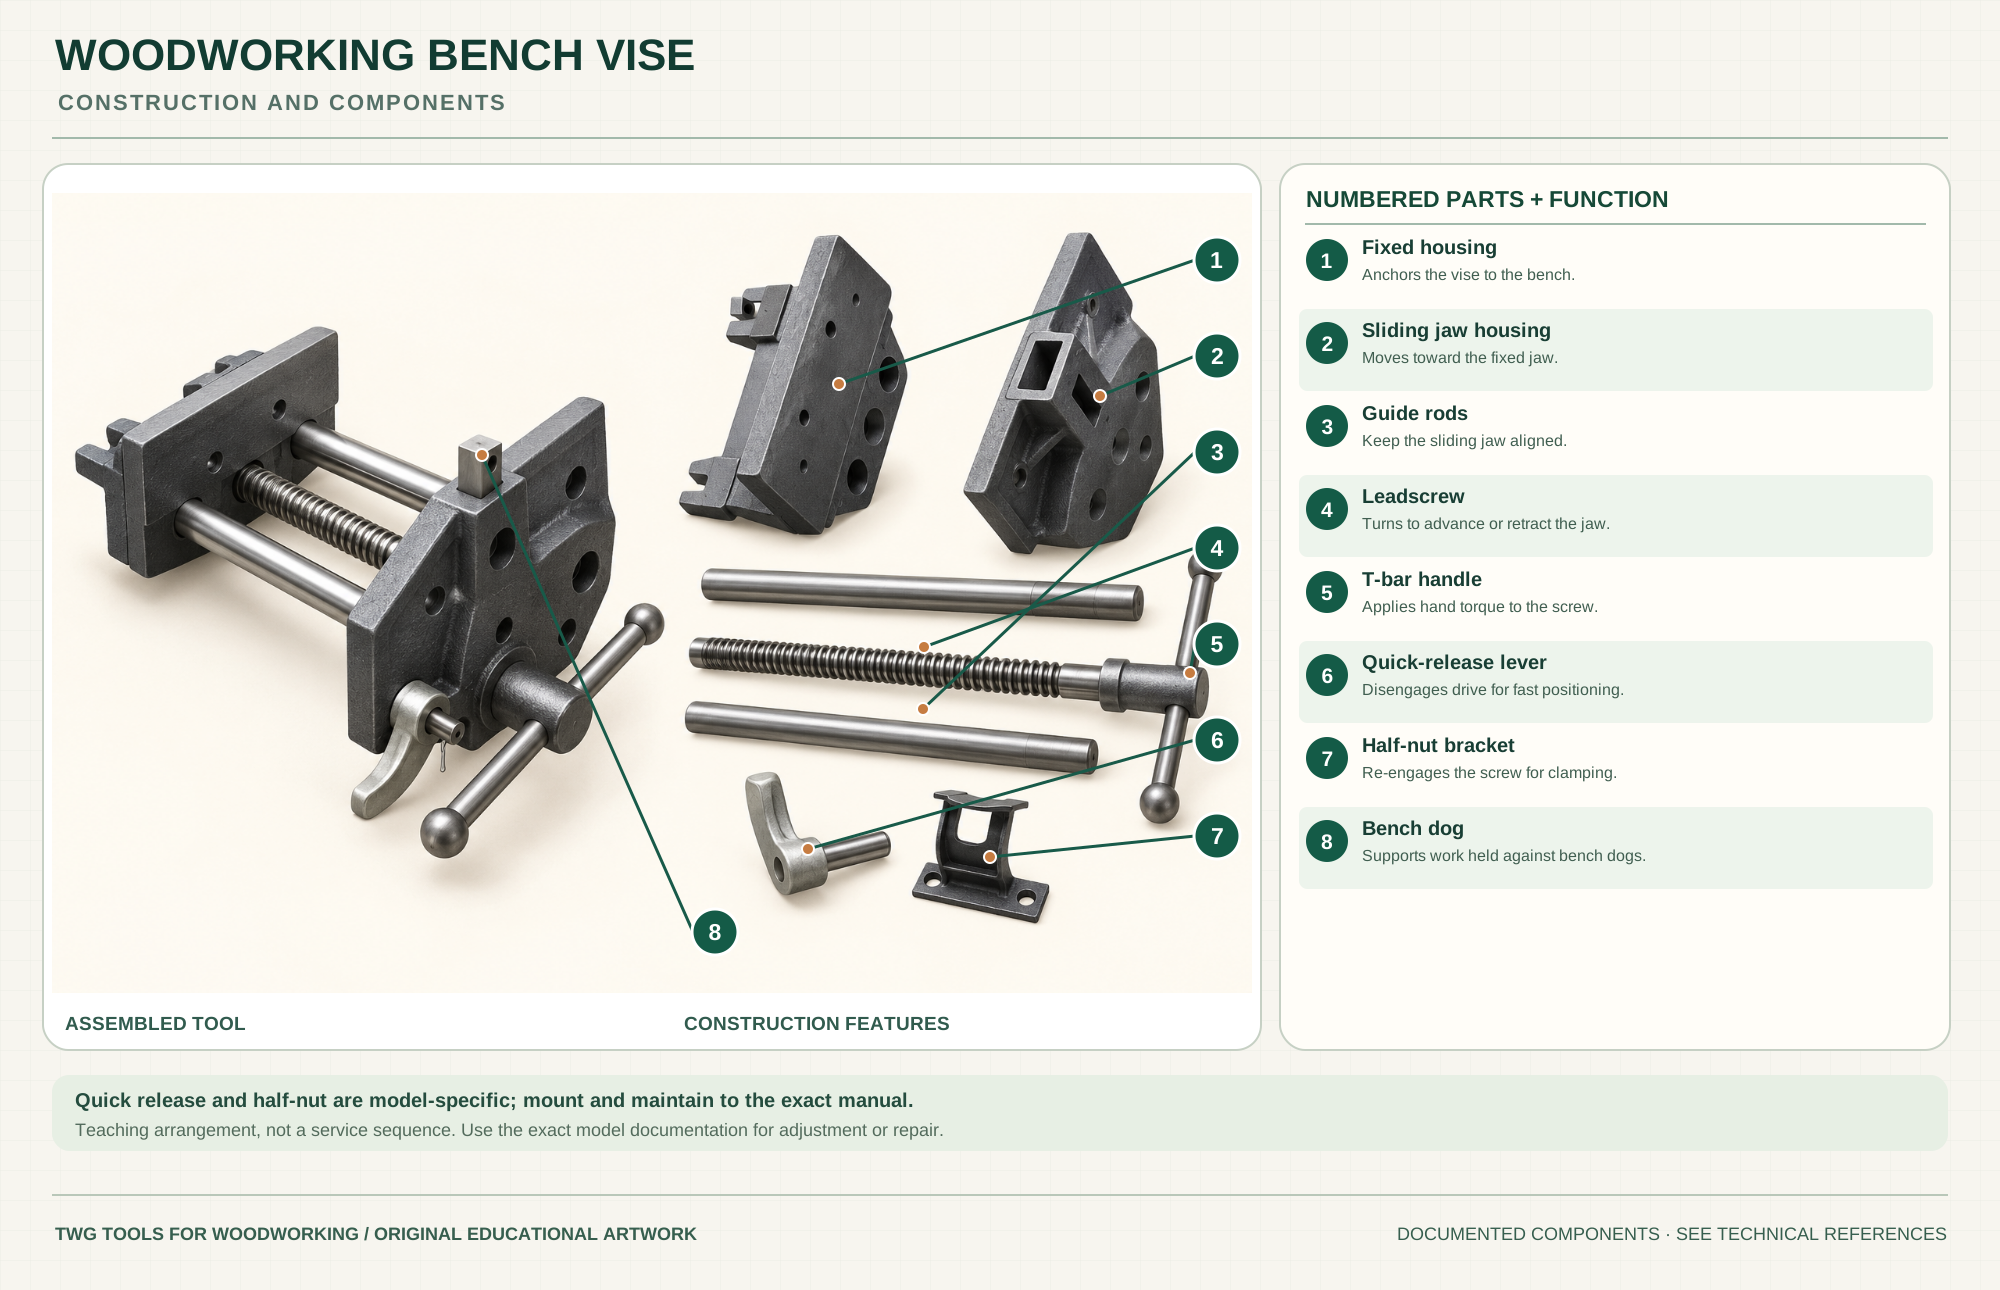
Anchors the vise to the bench.
Moves toward the fixed jaw.
Keep the sliding jaw aligned.
Turns to advance or retract the jaw.
Applies hand torque to the screw.
Disengages drive for fast positioning.
Re-engages the screw for clamping.
Supports work held against bench dogs.
Technical references: Shop Fox D4328 9-inch quick-release vise · Shop Fox D4328 official manual and parts list. The selected D4328 vise uses fixed and sliding housings, two guide rods, a central leadscrew and a quick-release mechanism. The illustration is a teaching arrangement, not a service drawing. Original educational artwork depicts documented component groups and their relationships; it is not a service sequence or a replacement for the exact model manual.
A woodworking bench vise fastens to a bench and holds boards or assemblies between broad jaws. The selected Shop Fox D4328 9-inch quick-release vise, in the manual revision for units manufactured since December 2017, has a nominal 10-inch opening, two guide rods, central leadscrew, quick-release lever and bench dog. These dimensions and mechanism are model-specific; leg, wagon and end vises transmit force through different structures. Add suitable wooden jaw liners for work protection and check mounting instructions before drilling the bench.
The fixed housing anchors beneath the bench; the sliding jaw rides on two guide rods. Turning the T-bar rotates the central leadscrew through the engaged half-nut and moves the jaw. The quick-release lever disengages that drive so the jaw can slide rapidly, then must re-engage before clamping. The poster presents documented groups for teaching, not the exact order of service disassembly.
The fixed casting transfers load into the bench; the mobile jaw presses the work. Both need secure mounting and appropriate liners.
Parallel rods carry the jaw's travel and help resist racking. Keep them clean and follow the maker's lubrication instruction.
The screw converts hand rotation into jaw motion. Use normal hand force; adding a pipe for leverage can damage work or hardware.
The lever disengages the half-nut for fast movement. A raised bench dog can hold work against a corresponding stop on the bench.
These decisions make the mechanism useful at the bench.
Follow the exact manual's bench thickness and fastener guidance. Keep the jaw level with the benchtop and verify full travel.
Position long boards so gravity does not twist the jaws; add a support, spacer or opposing batten as needed.
Operate the lever with the work controlled, slide the jaw, release the lever, then turn the handle to clamp.
Hold a board vertically between lined jaws while leaving enough room for the plane.
Clamp a workpiece at a comfortable height for sawing, chopping or fitting.
Use the vise dog and matching bench dog to restrain a face for planing without clamping across it.
Use the steps for a first pass, then inspect the work before changing the setup.
A strong casting cannot make a thin or poorly fastened benchtop rigid. Follow the manual's reinforcement and shim guidance.
Wood faces spread contact and reduce marking. Replace damaged liners before they become uneven.
An off-center narrow workpiece can twist the moving jaw. Put a same-thickness spacer at the opposite end when necessary.
The bench location and screw arrangement change the workholding workflow. This poster shows a front-mounted quick-release pattern.
Lever and half-nut layouts vary by maker. Do not assume replacement hardware interchanges.
Size determines the workpiece capacity but also the bench structure needed. The stated 9-inch jaws and 10-inch opening belong to the D4328 manual.
Secure the work, protect sharp edges and release any stored clamping pressure before adjustment or maintenance.
Center the work or add a matching spacer at the opposite end; inspect guide rods and bench mounting.
Stop and check lever position, half-nut engagement and debris using the official manual.
Inspect liner flatness, oil contamination, work support and clamp pressure.
Use the exact model documentation for setup, limits and replacement parts. These lessons, documents and model pages teach relevant techniques or help compare real variations.
These maker-owned links document relevant tools and tool brands. A product brand may use another company's factory; compare the exact model before choosing parts or accessories.
Handles, irons, saw plates, clamping pads and other replacements vary by maker and model. Use the maker's documentation before changing a component.
Compare the Woodworking Vises family →Continue through the Tools library