
Bench Dog
Turn a suitable bench hole into a low work stop, then use the right opposing force and support to hold the board without lifting it or obstructing the tool.
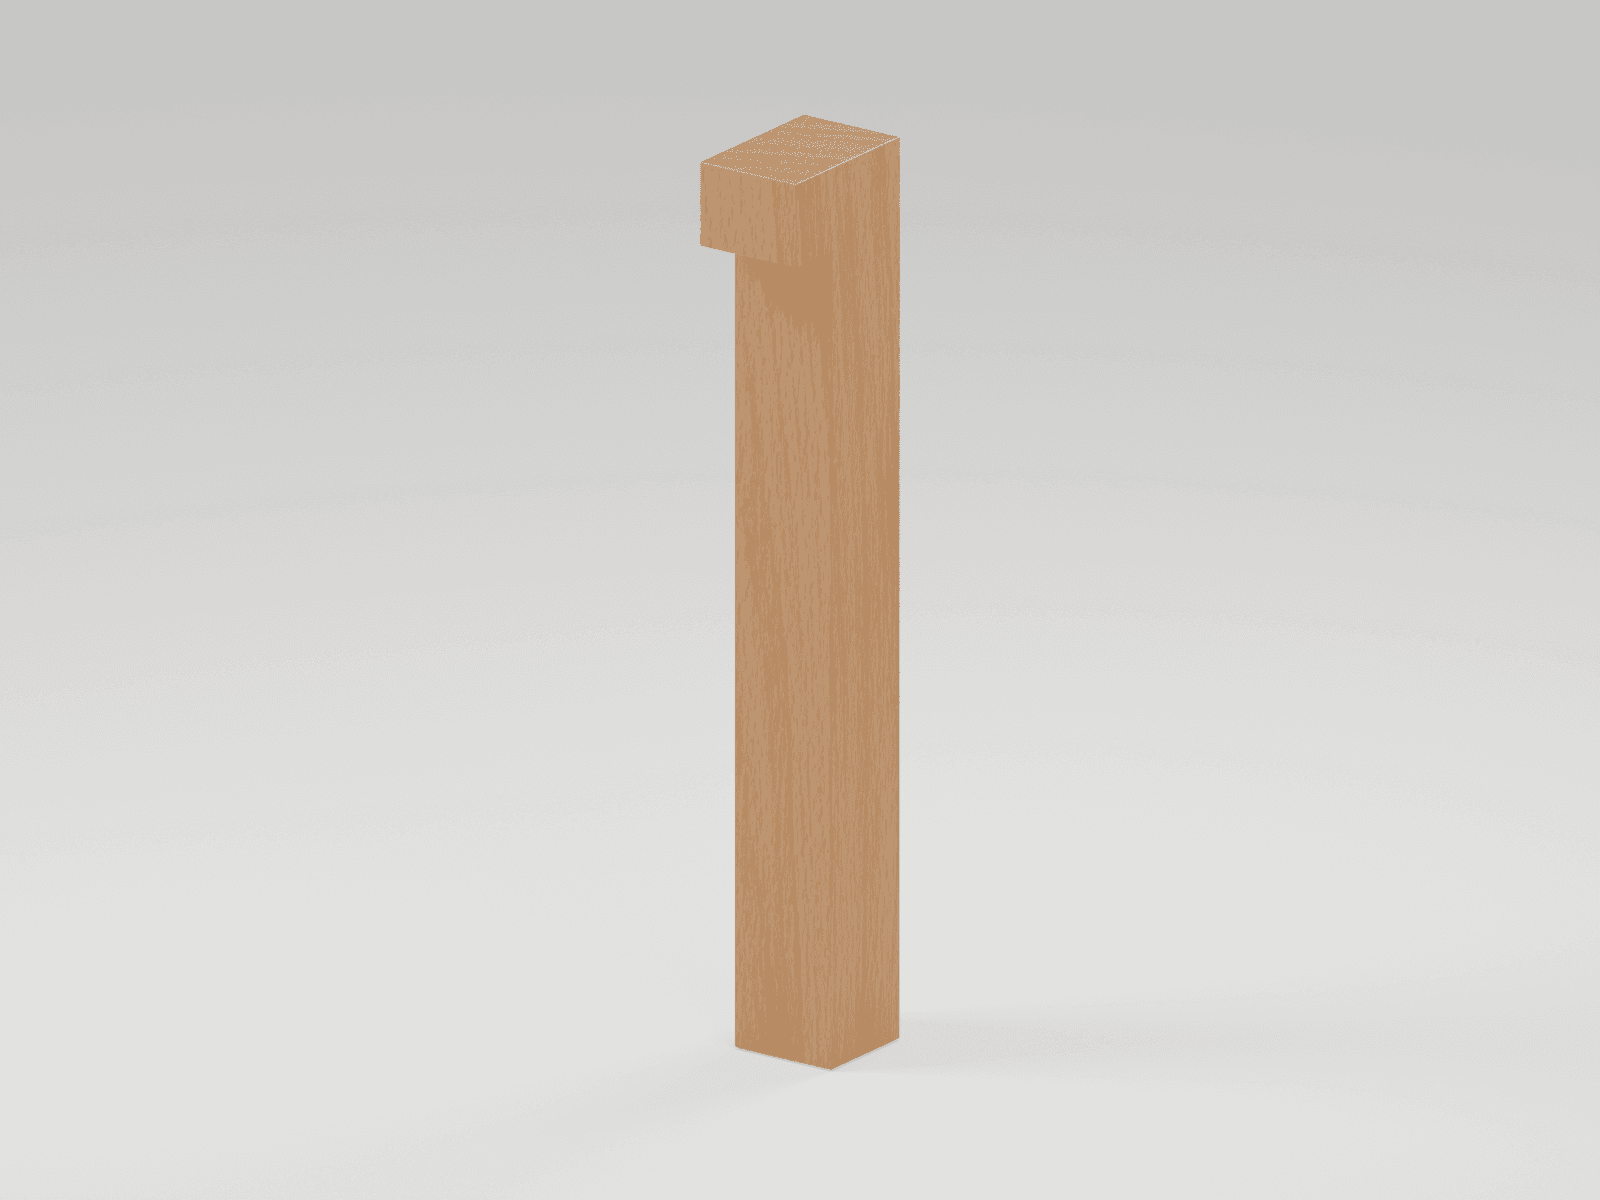
See the intact tool and its features
An original educational poster identifies 4 documented features of this tool. The numbered descriptions remain readable below the artwork on narrow screens.
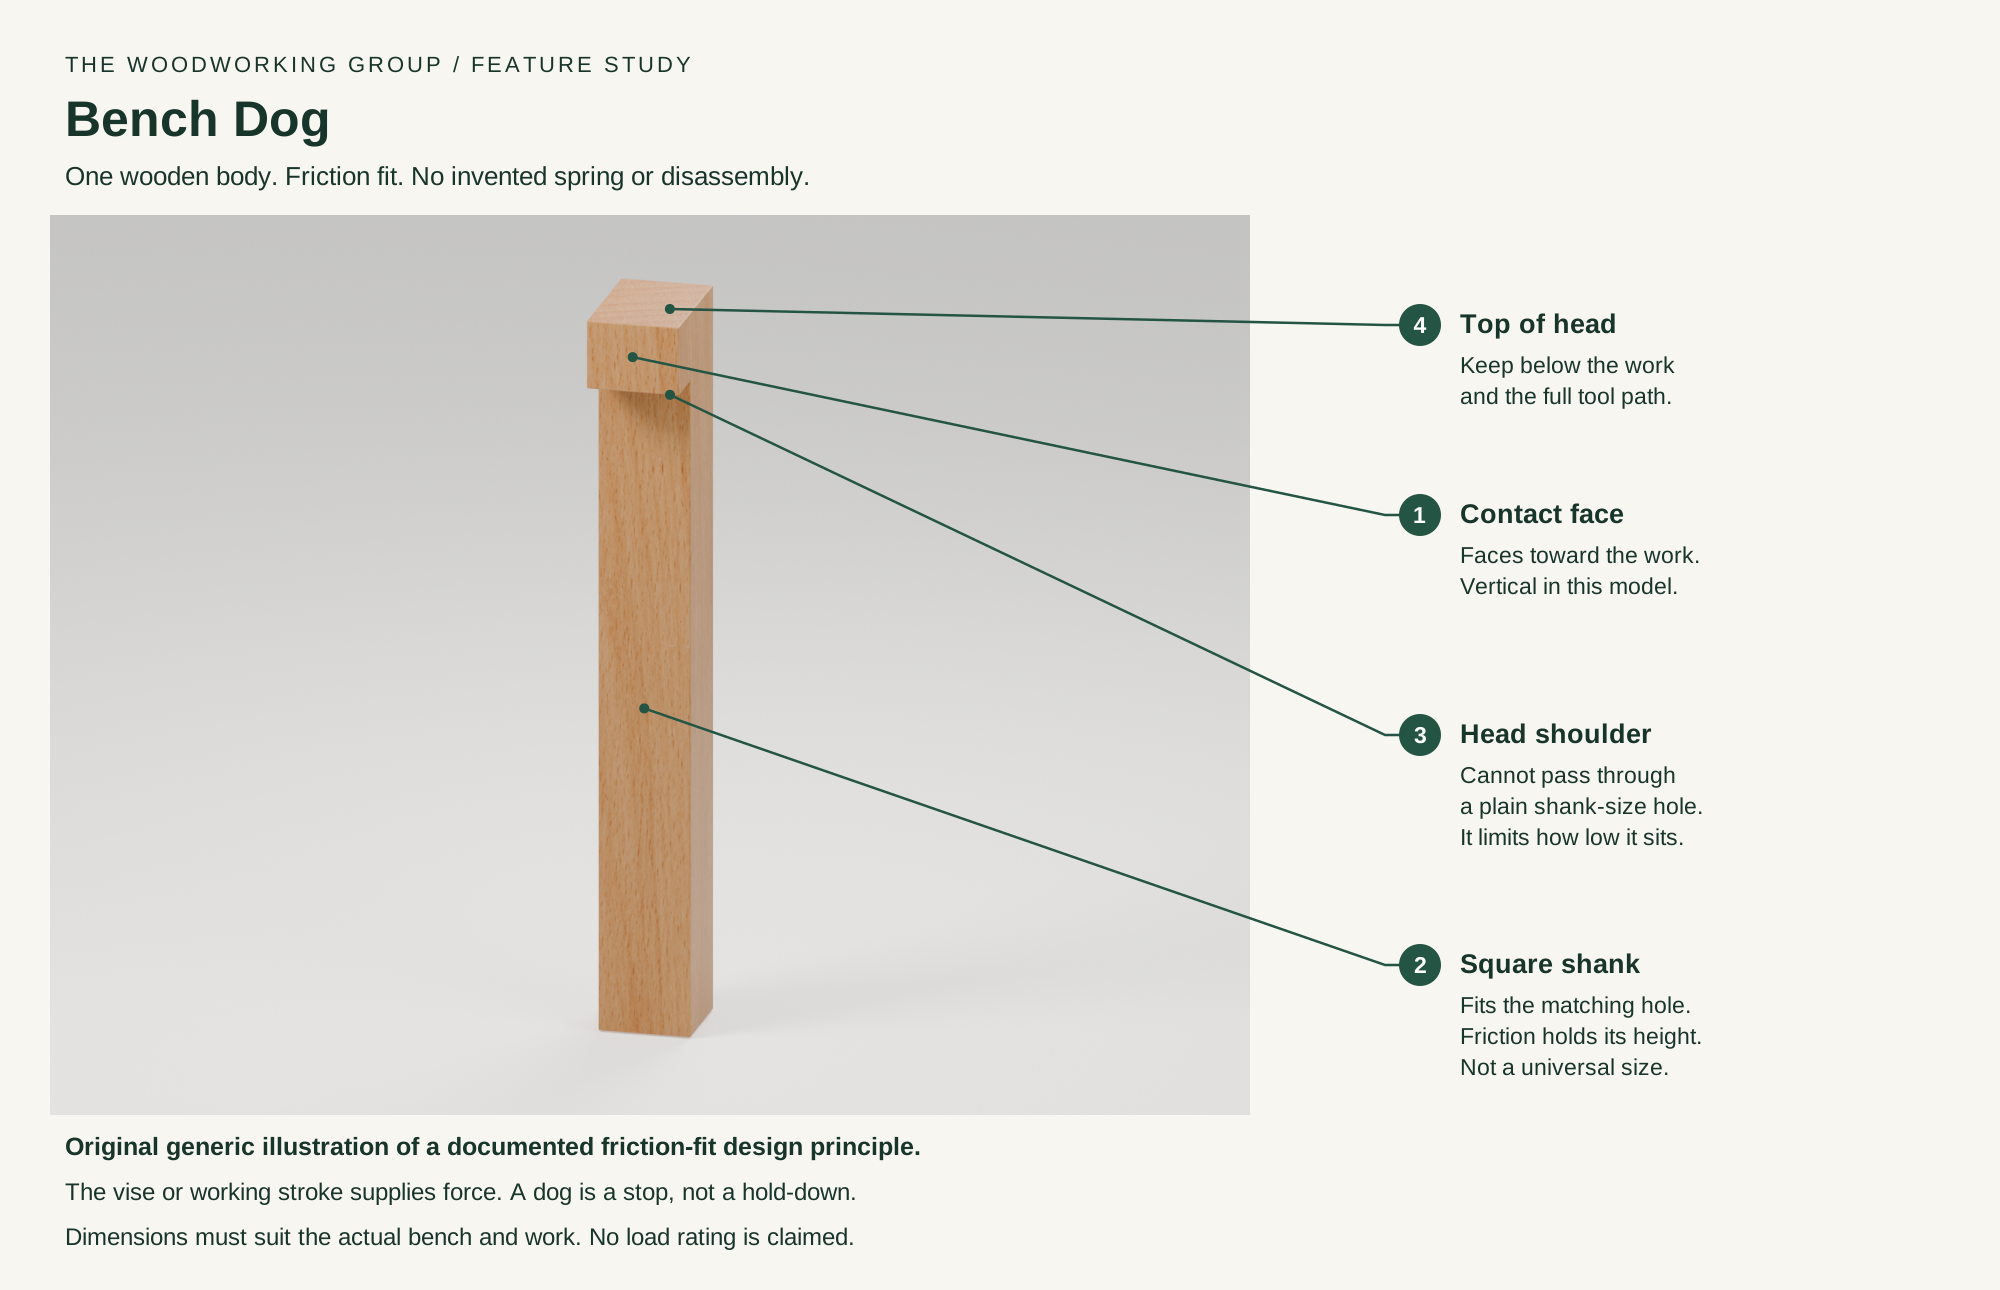
- Contact face
Bears against the work, with the face oriented toward it.
- Square shank
Transfers force into a suitable square dog hole.
- Head shoulder
Stops the wider head passing through the smaller hole.
- Top of head
Must stay below the working face and tool path.
Technical references: Lie-Nielsen workbench care and wooden dogs · Dogs for the Milkman's Workbench · Rectangular benchdogs are quick to make. The same one-piece mesh appears in both studio views. Its square shank is 1/2 by 1/2 inch and its head is 1/2 by 3/4 inch, following a documented friction-fit design principle. Overall length of 4 inches and head height of 3/8 inch are original illustration choices, not a universal fit or a build specification. The head cannot pass through a plain shank-size hole. Original educational artwork depicts the intact tool and magnified features; the additional views are not detachable parts.
What it is and what each part does
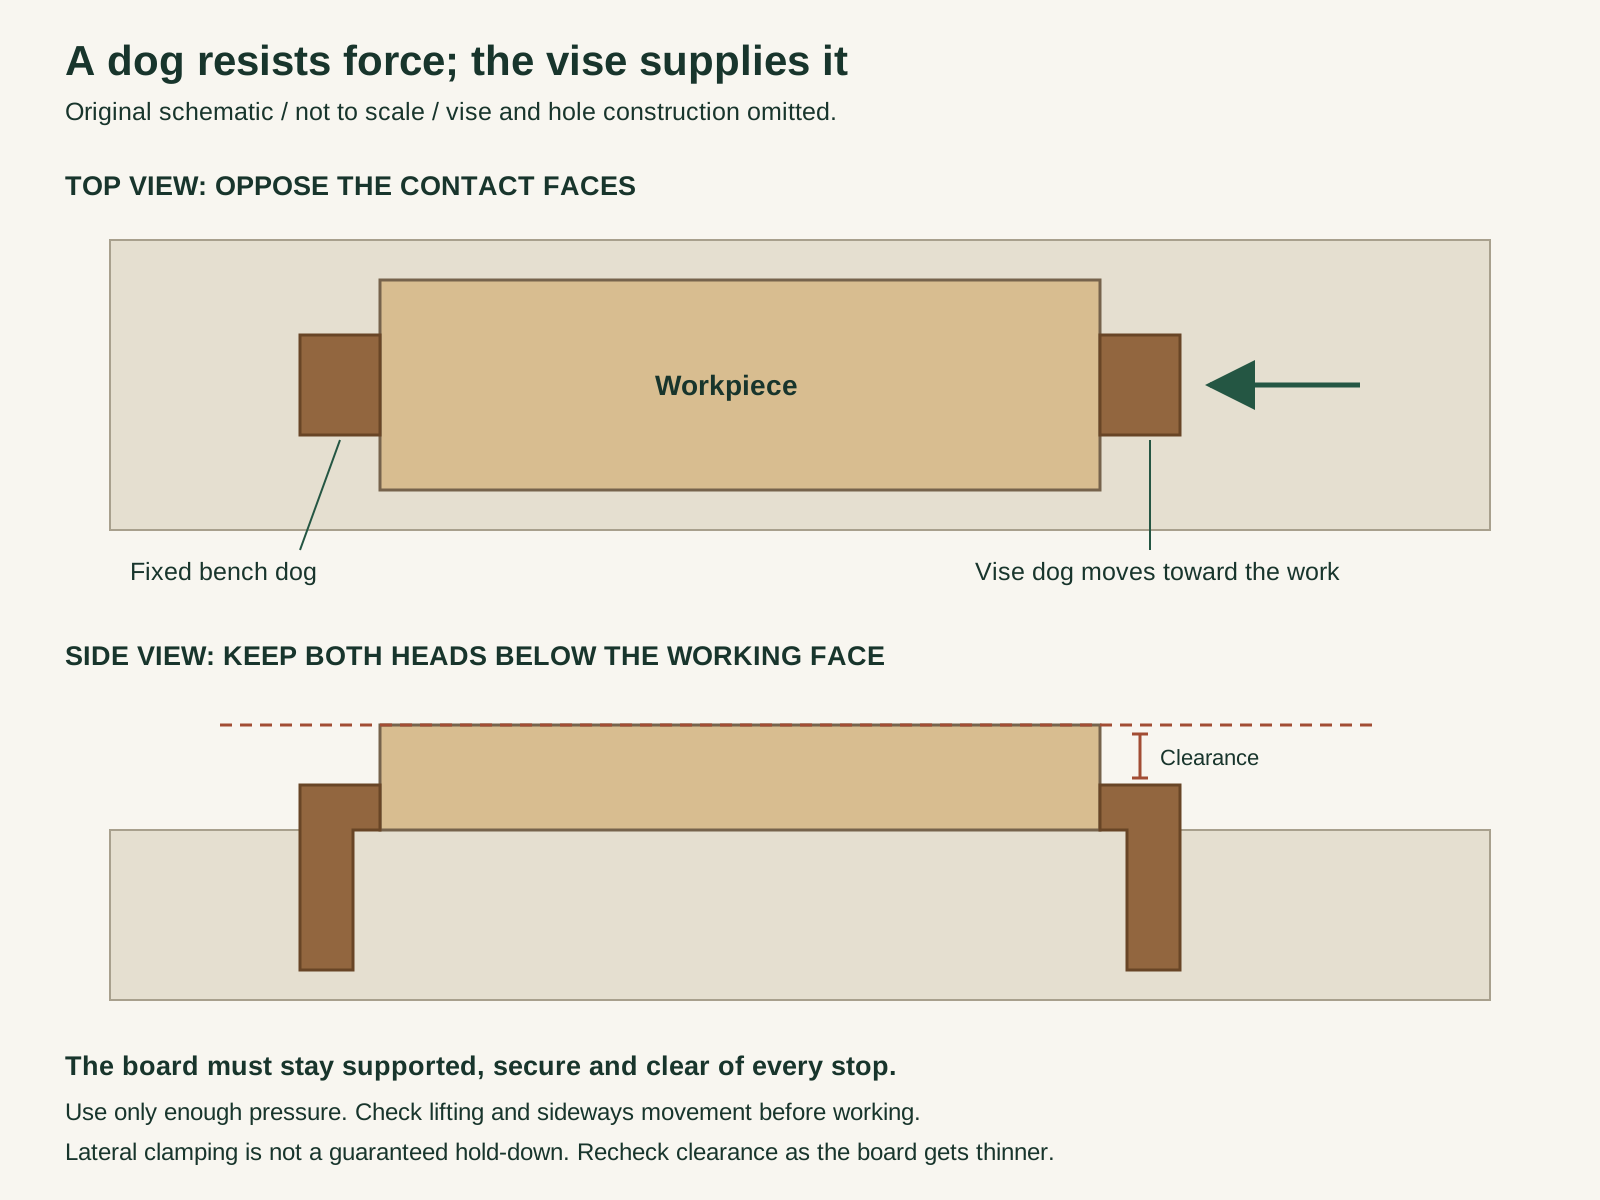
A bench dog is a stop supported by a matching bench or vise hole. It does not generate clamping force by itself. A tail or wagon vise can squeeze work between a fixed dog and a moving dog; a suitable single stop can resist a hand-planing stroke directed into it. A holdfast supplies downward restraint, which an ordinary dog does not automatically provide.
The shank transfers force from the contact face into the bench. In a vise-and-dog setup, the vise advances one stop toward the other while the board rests on the benchtop. Set both dog tops below the work surface and use only enough pressure to secure the piece. Thin stock can bow, and lateral pressure alone does not guarantee that work cannot lift or slide sideways.
1. Contact face
The flat front of this wooden head bears against the end or edge of the work. Face it toward the work, not away from it.
2. Square shank
Fits the intended square hole and resists rotation. The illustrated example relies on a snug friction fit, not a spring or a universal hole standard.
3. Head shoulder
The overhang prevents this head from dropping through the smaller shank hole. It also limits how far the head can be lowered without a matching recess.
4. Top of head
Must stay below the working face throughout the operation. Recheck clearance as planing makes the board thinner.
How the main groups connect
Set, guide and control the action
These decisions make the mechanism useful at the bench.
Match the hole and dog
Confirm shape, fit, usable insertion depth and access for removal. A 20 mm system is not interchangeable with a 3/4-inch system, and rectangular dogs have their own requirements.
Set the projection
Expose enough face to engage the work but keep every part of the dog below the cutter path. This shouldered model cannot disappear flush into a plain shank-size hole.
Support before tightening
Place the board on clean, stable support. Align the opposing faces and tighten gradually; more pressure can bow thin work instead of holding it better.
Face planing between dogs
A compatible tail or wagon vise holds the board along the bench. Check clearance, rocking, sideways movement and lifting before taking a stroke.
Directional stop work
A suitable dog can resist a hand-tool stroke aimed into its face. Change the workholding if the operation pulls the board away, sideways or upward.
Hand scraping or sanding
Secure the piece for the actual forces involved while leaving the work area clear. Add appropriate restraint when simple end pressure is not enough.
Setup, technique and finish quality
Use the steps for a first pass, then inspect the work before changing the setup.
- Inspect the dog, hole, vise and bench. Remove glue and chips; reject a cracked head, damaged hole or dog that will not hold its setting.
- Choose a compatible hole and enough shank engagement for that system. Check what is beneath the hole before inserting or removing the dog.
- Orient the contact face toward the work. Raise it only as much as needed and verify that the entire head remains below the intended tool path.
- Support the board flat on the bench and bring the opposing vise dog into contact. Tighten only enough to secure it without bowing or crushing it.
- With the cutting tool set aside, check for rocking, lifting and sideways motion. Use additional suitable restraint or a different setup if the work is not secure.
- Work in a direction the setup can resist. Stop and reset if the board moves or if changing thickness reduces clearance above a dog.
- Release vise pressure before adjusting the dog or removing the board. Keep fingers out of the closing gaps; lower or remove unused stops.
A stop is not a force source
The vise or the directed working stroke supplies force. The dog resists that force through its shank and the bench; it is not a powered clamp.
Side pressure is not a hold-down
Some commercial faces are angled to help resist lifting, but do not assume a dog positively locks the board down. This model has a vertical face and no downward-force claim.
Retention is a separate job
Friction, a side spring or a detent can hold a dog at a selected height. That feature is not the main source of clamping pressure on the work.
The shoulder imposes a limit
The illustrated head is 3/8 inch tall. Without a matching head recess, it cannot sink below that projection, so it is unsuitable for stock at or below that height or any operation lacking safe clearance.
What changes by model or material
A simple fitted wooden dog can work without a spring. Fit and wear matter; wood movement can make the same dog too tight or too loose.
Wood or metal springs hold a selected projection. Rectangular mortises and head recesses must match that design; the spring is absent from this illustration.
Round dogs can rotate to face the work and use several retention methods. Hole diameter, face geometry and insertion length are model-specific.
Short dogs, surface stops and precision locating dogs solve different problems. A locating grid or track-saw alignment accessory is not automatically a vise-clamping dog.
Choosing the tool
- Start with the actual bench-hole shape, dimensions and available depth, not a guessed standard.
- Choose a head that can sit safely below the thinnest work you intend to hold. A shoulder can prevent a dog from lowering further.
- Match face material, retention and usable projection to the task. Never plan to run an edge tool into the dog, even if it is wood or brass.
Useful accessories
- Compatible tail, wagon or other appropriate vise
- Suitable protective face pads when needed
- Additional lateral or downward restraint for the task
- Brush for clearing dog holes and contact surfaces
Care, troubleshooting and safety
Secure the work, protect sharp edges and release any stored clamping pressure before adjustment or maintenance.
Care checklist
- Keep the hole and contact face free of glue, chips and finish buildup.
- Inspect wooden dogs for cracks, crushed faces and seasonal fit changes. Follow the design or maker guidance for refitting; do not force a swollen dog into the bench.
- Check springs or detents on designs that have them. Replace damaged or unreliable parts instead of relying on extra vise pressure.
Common mistakes
- Leaving a dog high enough to meet the plane iron or other cutter.
- Assuming the shoulder can pass through a smaller shank hole.
- Over-tightening until thin work bows above the bench.
- Treating two lateral stops as sufficient restraint for every routing or sawing operation.
Safety at the operation
- Keep fingers clear of the closing space between dog, board and vise. Release pressure before repositioning.
- Check tool clearance over the full stroke, including the return path. Stop as the work becomes thinner; wood or brass contact can still harm the tool or spoil control.
- Use a stable bench and adequate support for long stock. Do not rely on a loose, cracked or barely engaged dog.
- This is a hand-workholding guide, not approval for power routing or sawing with dogs alone. Use the tool-specific secure workholding, guards and clearance procedure for any powered operation.
When the result goes wrong
Release pressure. Check flat support, opposing face alignment and the clamping force. Add suitable restraint or change the setup; do not simply tighten harder.
Check friction fit or the actual retention mechanism. Clean and inspect it; a shoulder limits travel but does not secure every raised position.
Release the vise and inspect for glue, debris or wood swelling. Follow the design-specific removal/refitting method instead of splitting the bench or striking blindly underneath.
Check its shoulder and the hole geometry. Use a suitable lower-profile design or different workholding; do not plane across the protruding head.
The contact faces may resist only one direction. Add appropriate side restraint or use a different holding method before continuing.
Manuals and educational resources
Use the exact model documentation for setup, limits and replacement parts. These lessons, documents and model pages teach relevant techniques or help compare real variations.
Manufacturer documentation
Learn and compare
Dogs for the Milkman's Workbench
Christopher Schwarz documents a simple friction-fit maple dog with a reduced square shank. Supports the illustrated design principle; our overall length and head height are illustration choices.
Rectangular benchdogs are quick to make
Garrett Hack explains a different rectangular dog with a glued wooden spring. The spring system is not part of the model here.
General hand-tool operation
CCOHS guidance for inspecting tools, securing work and maintaining a clear work area.
Manufacturers & Brands
These maker-owned links document relevant tools and tool brands. A product brand may use another company's factory; compare the exact model before choosing parts or accessories.
Choose parts for the exact model
Handles, irons, saw plates, clamping pads and other replacements vary by maker and model. Use the maker's documentation before changing a component.
Compare the Bench Workholding family →Continue through the Tools library