
Palm head and quill
The top head provides axial pressure while the crank rotates beneath a steady hand. Stanley lists the head and quill as separate repair groups.
Bore controlled, deep holes by hand with a swept brace and a properly matched auger bit.
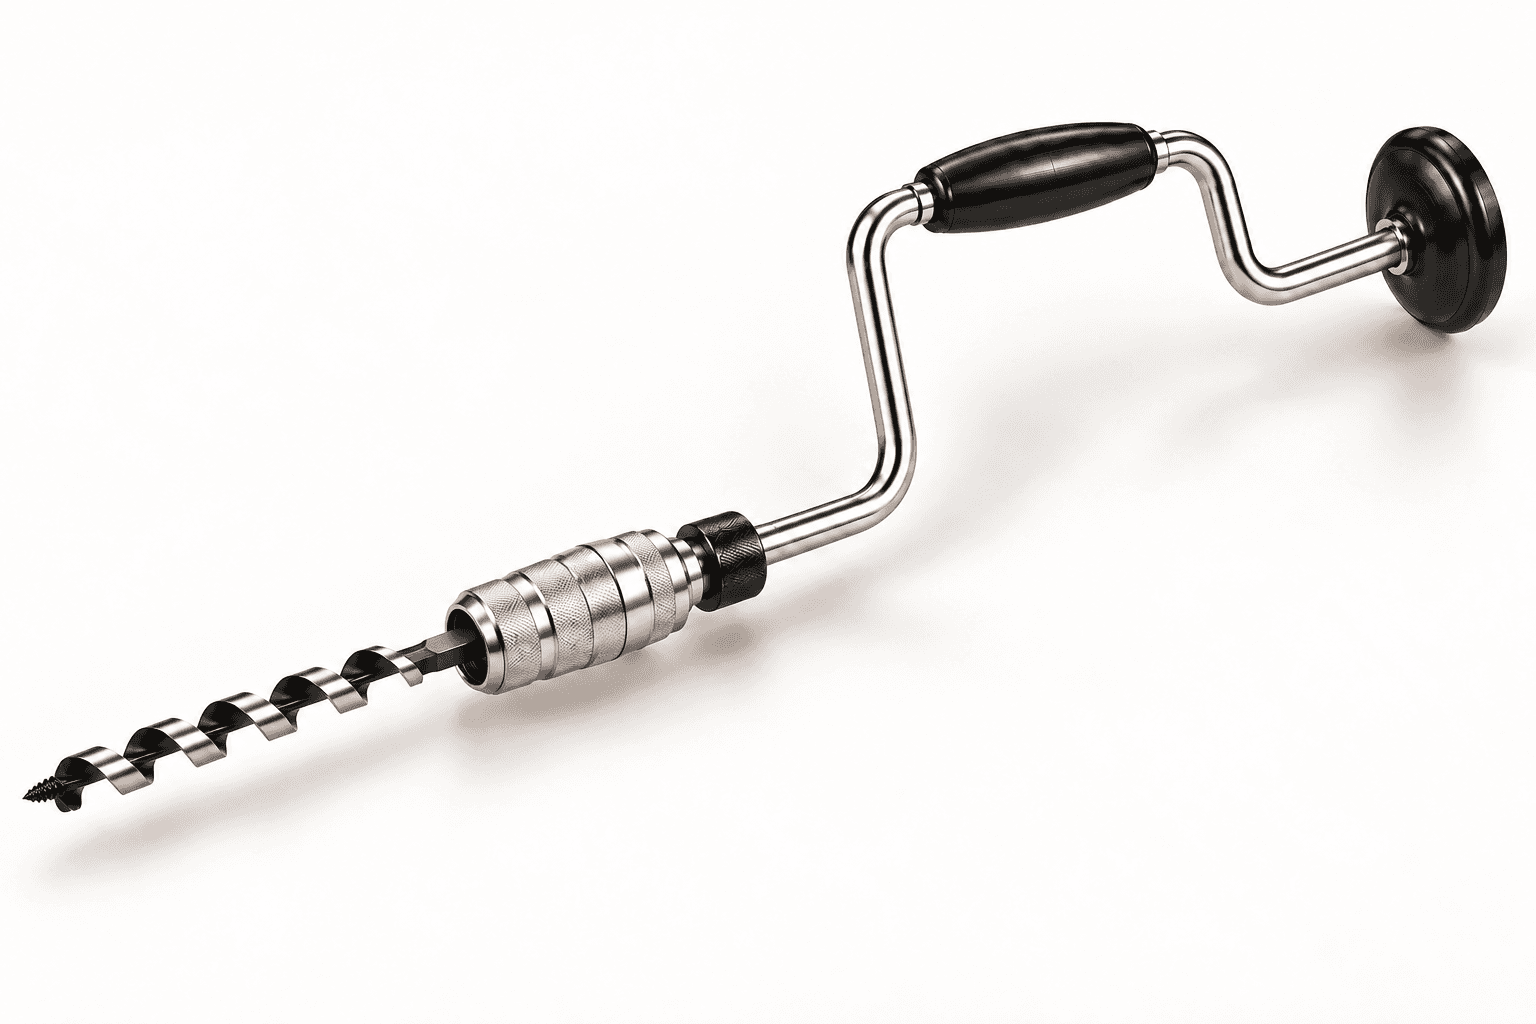
An original educational poster identifies 8 documented construction features. The numbered descriptions remain readable below the artwork on narrow screens.
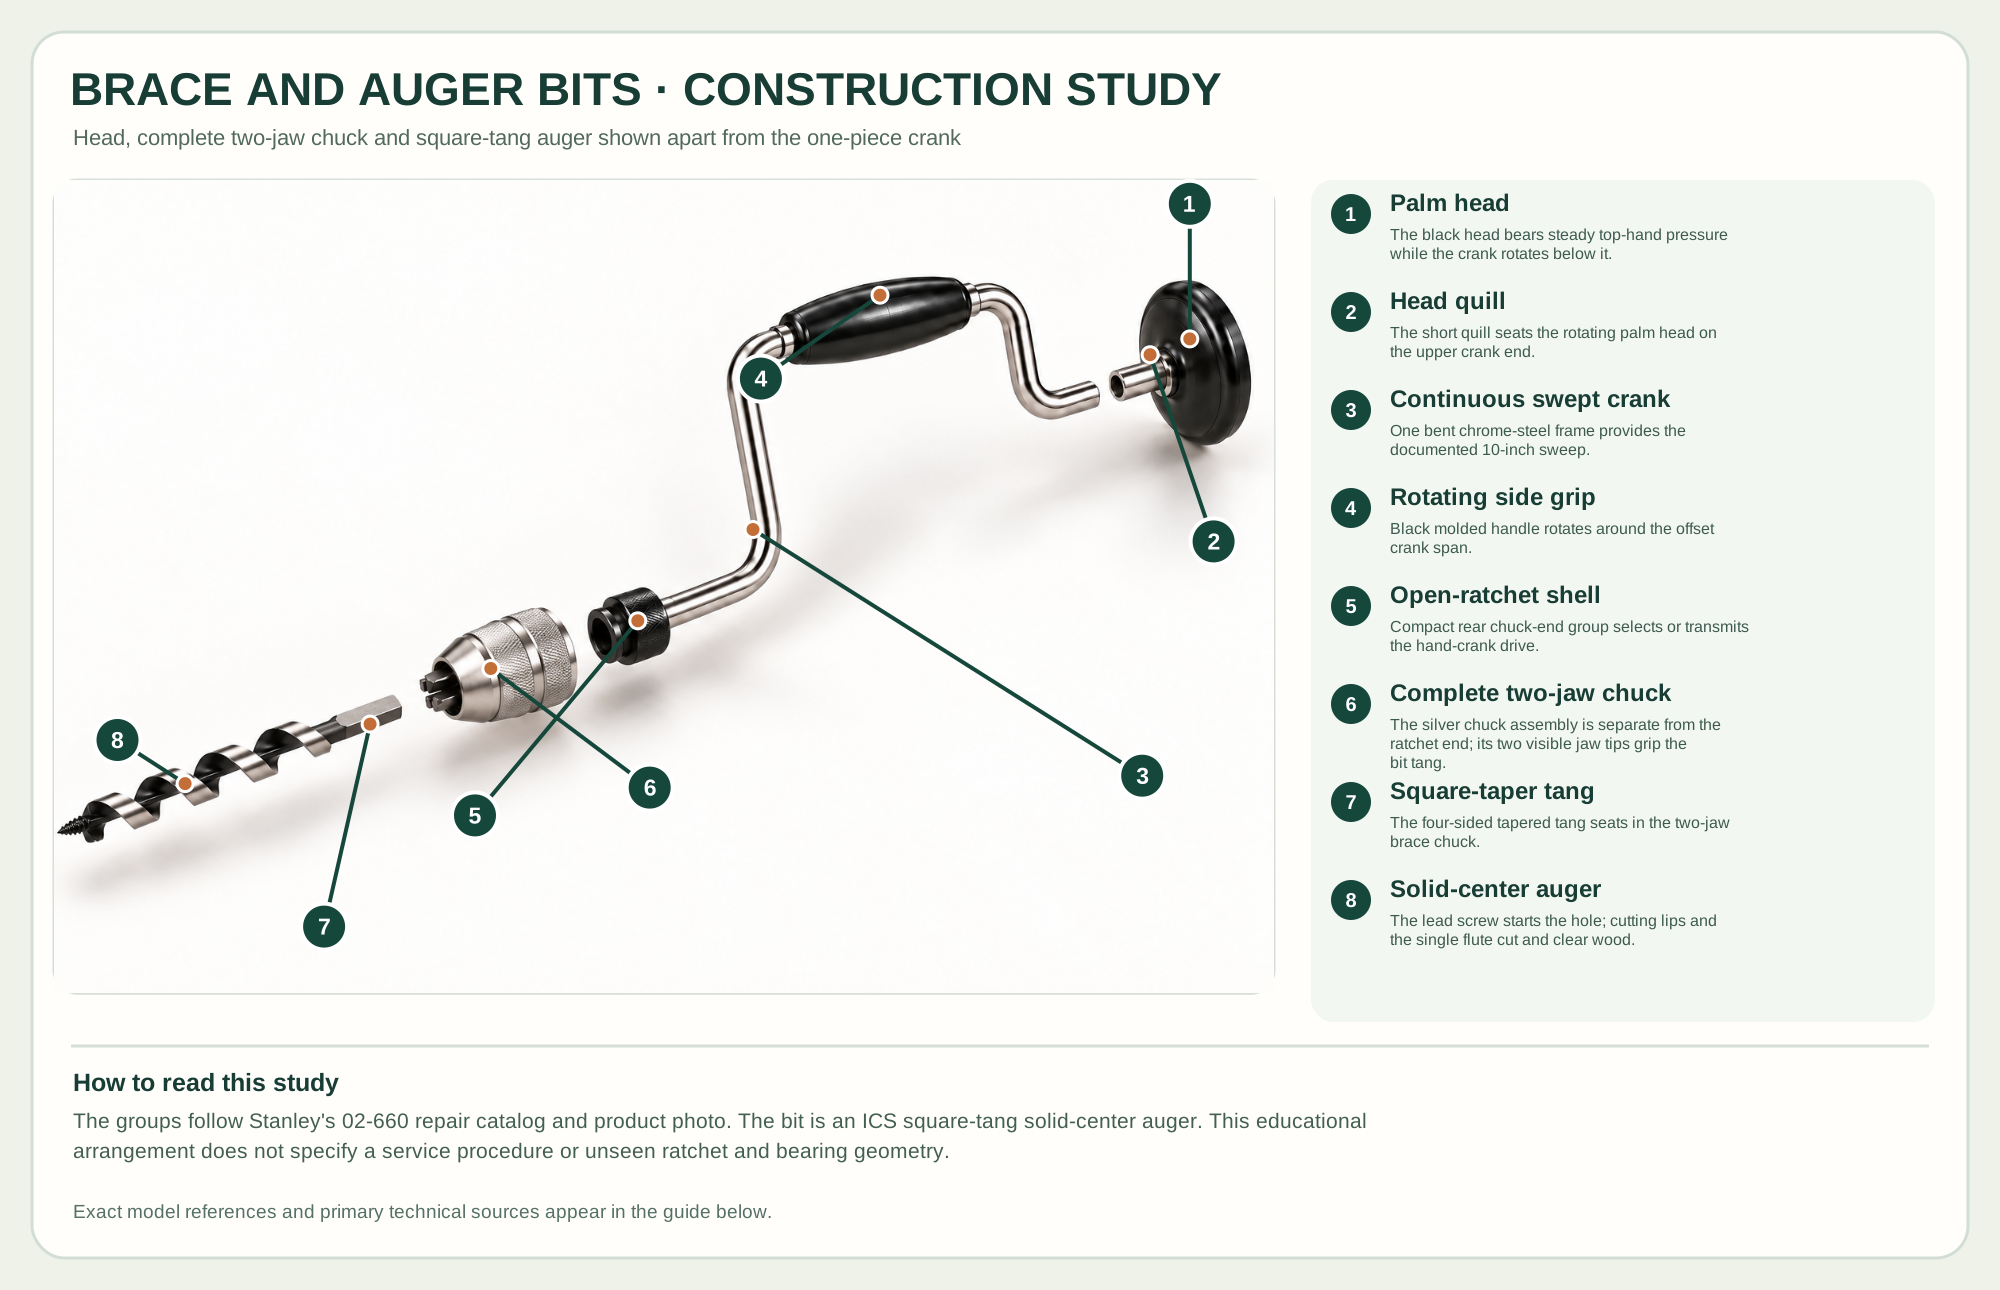
The black head bears steady top-hand pressure while the crank rotates below it.
The short quill seats the rotating palm head on the upper crank end.
One bent chrome-steel frame provides the documented 10-inch sweep.
Black molded handle rotates around the offset crank span.
Compact rear chuck-end group selects or transmits the hand-crank drive.
The silver chuck assembly is separate from the ratchet end; its two visible jaw tips grip the bit tang.
The four-sided tapered tang seats in the two-jaw brace chuck.
The lead screw starts the hole; cutting lips and the single flute cut and clear wood.
Technical references: Stanley 02-660 manufacturer product catalog · Stanley RP402 repair parts catalog, 02-660 · ICS solid-center auger catalog, AB032. The maker's repair catalog lists separate head, quill, chuck assembly, and jaws-and-spring groups. The study separates the visible head, complete chuck and auger, while keeping the one-piece crank and rotating grip together and showing the two jaw tips in the chuck mouth. Original educational artwork depicts documented component groups and their relationships; it is not a service sequence or a replacement for the exact model manual.
The archival Stanley 02-660 product catalog specifies a 10-inch sweep, molded polypropylene head and side handle, open ratchet and alligator jaws. Its repair-parts catalog separately identifies the head, quill, chuck assembly, jaws and spring, and ratchet parts. The illustrated companion is an ICS AB032 solid-center hand-brace auger with a tapered square tang, one flute, a lead screw, cutting lips and outlining spurs. Its bit shape and shank are matched to a traditional two-jaw brace; verify actual fit before use.
Pressure on the palm head holds the lead screw on the mark while the other hand rotates the one-piece swept crank through its side grip. The chuck jaws grip the square-taper tang; the lead screw feeds the bit, and cutting lips, spurs and the single flute cut and clear wood. The construction study spaces the auger, whole chuck assembly and palm-head/quill group from the continuous crank to explain their relationship. It does not claim a detailed ratchet or bearing service sequence.
The top head provides axial pressure while the crank rotates beneath a steady hand. Stanley lists the head and quill as separate repair groups.
The 10-inch sweep gives manual leverage and clearance; the rotating side grip allows continuous turning.
Opposing alligator jaws clamp a fitting square-taper tang. The compact ratchet end transmits the crank's motion; confirm secure bit seating before applying torque.
A square-taper tang, lead screw, outlining spurs, cutting lips and single open flute bore a hole and move chips upward.
These decisions make the mechanism useful at the bench.
Check the square-taper shank against the brace's alligator jaws, then seat and tighten the bit securely.
Keep the lead screw at the mark and sight the shaft square to the chosen reference face from two sides.
Withdraw periodically in deep holes. Stop if torque rises rather than forcing a jammed auger.
Drill a controlled hole for a tenon, peg or hardware layout where low speed helps placement.
Bore at a bench or site without a motor while keeping tactile feedback as the cutter enters.
A suitable long auger can reach through substantial stock if its length and diameter match the work.
Use the steps for a first pass, then inspect the work before changing the setup.
A 10-inch sweep supplies torque at slow hand speed, which helps control a large auger.
The lead screw pulls the cutter in; excessive top-hand force can split fibers or bind the bit.
Changing the bit is ordinary operation. Stanley's repair catalog also identifies separate head, quill, chuck and jaw groups; the study shows only visible group relationships, not a service order.
A smaller sweep works in tight spaces; a larger sweep offers more leverage. Compare exact brace models.
Two- and four-jaw chucks have different shank ranges; verify compatibility rather than assuming every bit fits.
Single- and double-flute designs, lead-screw pitches and spur shapes vary by manufacturer and wood.
Secure the work, protect sharp edges and release any stored clamping pressure before adjustment or maintenance.
Stop, clear the jaws and verify that the shank actually matches the chuck's capacity.
Recheck the starting mark, pressure and alignment from two directions; use a sharp lead screw and spur.
Withdraw and clear the flute more often; reduce feed in damp or resinous wood.
Use the exact model documentation for setup, limits and replacement parts. These lessons, documents and model pages teach relevant techniques or help compare real variations.
Manufacturer-authored catalog photo and specification for the 10-inch open-ratchet brace and molded head/handle.
Manufacturer-authored 02-660 exploded drawing and parts list for head, quill, chuck, jaws and ratchet groups; archival mirror.
Manufacturer catalog lists the AB032 tapered square-tang, single-flute hand-brace auger and its cutters, spurs and screw point.
These maker-owned links document relevant tools and tool brands. A product brand may use another company's factory; compare the exact model before choosing parts or accessories.
Handles, irons, saw plates, clamping pads and other replacements vary by maker and model. Use the maker's documentation before changing a component.
Compare the Manual Boring Tools family →Continue through the Tools library