
Motor head and chuck
The head carries the direct-drive motor and chuck. The selected JBM-5 uses a 1/2 HP motor; consult the exact manual for electrical and duty details.
Understand how the auger, square hollow chisel and feed mechanism cut a repeatable mortise with controlled workholding.
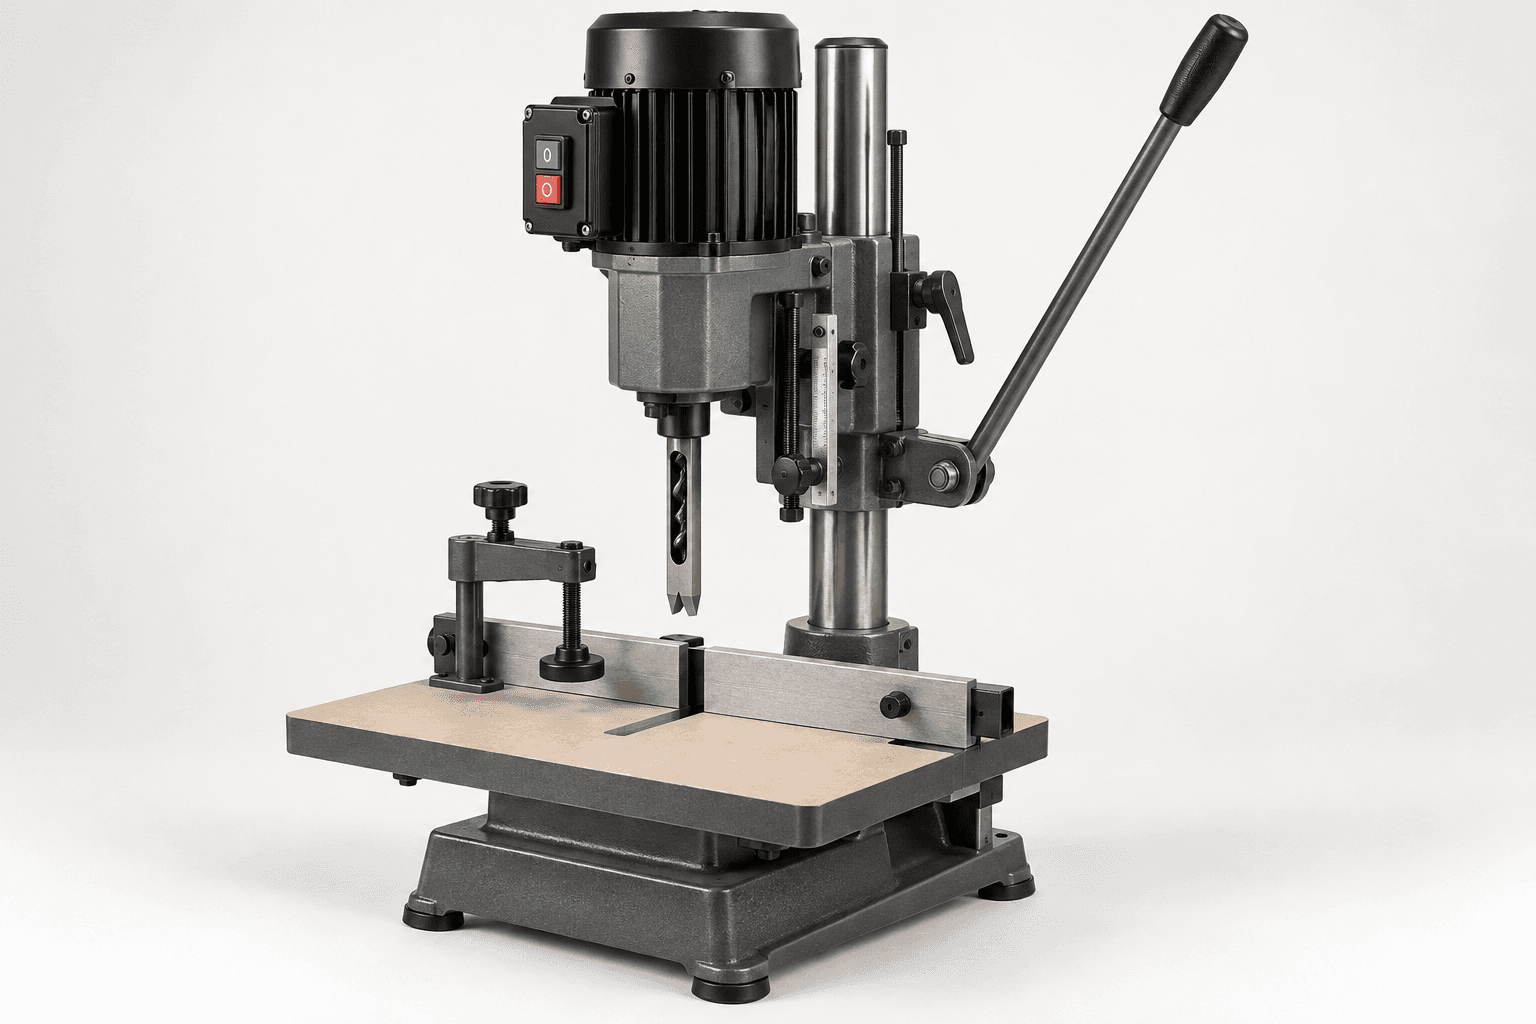
An original educational poster identifies 9 documented construction features. The numbered descriptions remain readable below the artwork on narrow screens.
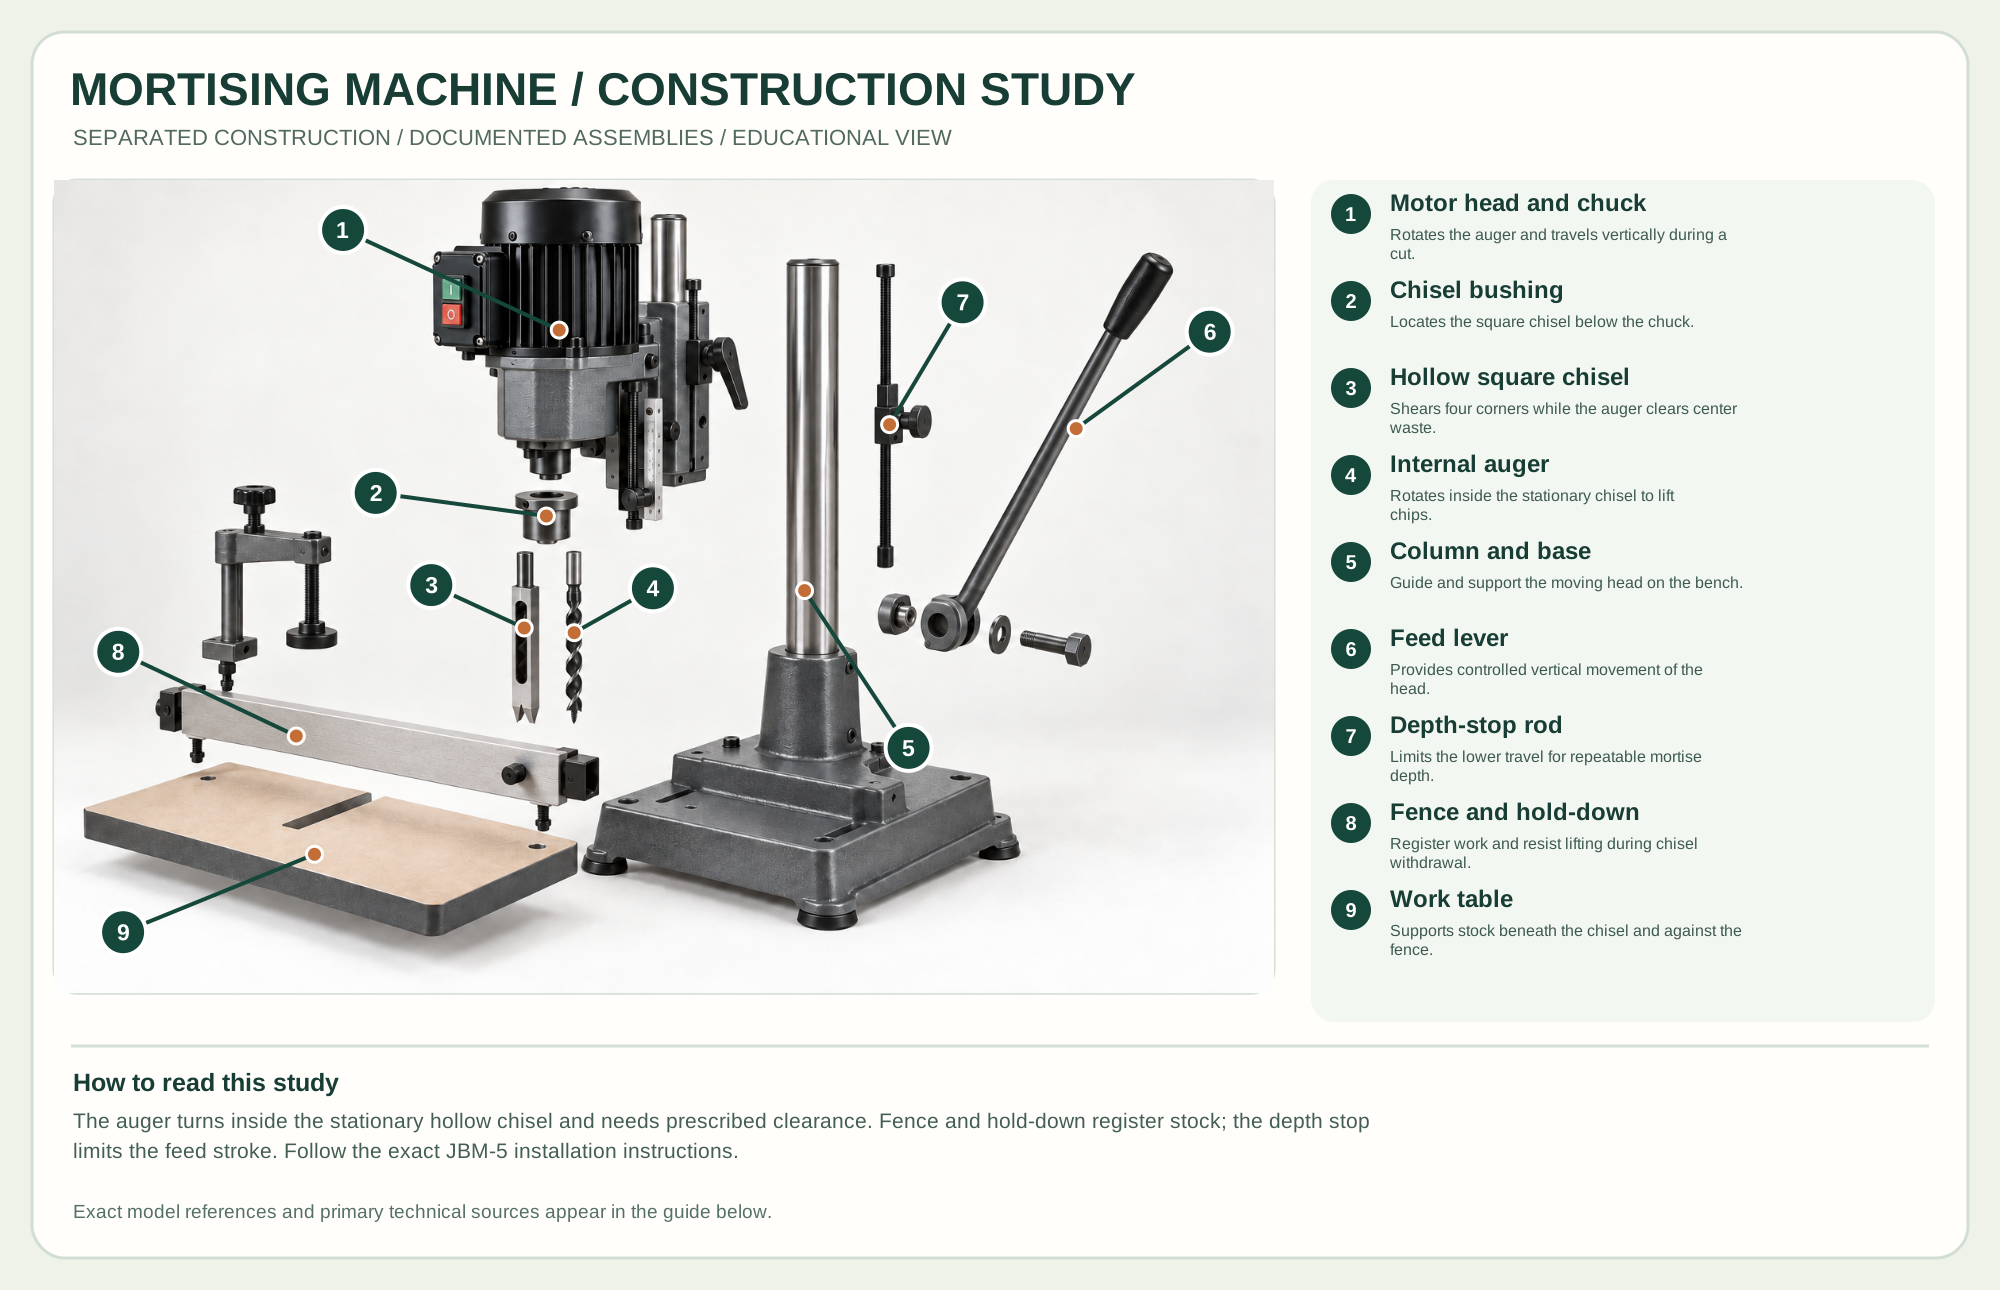
Rotates the auger and travels vertically during a cut.
Locates the square chisel below the chuck.
Shears four corners while the auger clears center waste.
Rotates inside the stationary chisel to lift chips.
Guide and support the moving head on the bench.
Provides controlled vertical movement of the head.
Limits the lower travel for repeatable mortise depth.
Register work and resist lifting during chisel withdrawal.
Supports stock beneath the chisel and against the fence.
Technical references: JET JBM-5 official operator and parts manual · JET JBM-5 product information. The JBM-5-class head, chisel/auger, feed, depth stop and workholding assemblies are spaced to show construction relationships. The housing remains closed; the image is an educational arrangement, not an exact service sequence. Original educational artwork depicts documented component groups and their relationships; it is not a service sequence or a replacement for the exact model manual.
A benchtop hollow-chisel mortiser makes square-ended mortises by boring and paring in one guided plunge. The JET JBM-5 manual documents the reference machine, including its head, column, feed lever, fence, hold-down, depth stop and chisel/auger setup. A plunge router or drill press mortising attachment has different registration and cutting behavior.
A motor rotates an auger inside a stationary square hollow chisel. The auger removes the center waste while the chisel's cutting edges shear the corners as the head descends. A lever feeds the head; a depth stop limits travel. The fence registers the work and a hold-down resists lifting on withdrawal. The auger must have the model-prescribed clearance inside the chisel.
The head carries the direct-drive motor and chuck. The selected JBM-5 uses a 1/2 HP motor; consult the exact manual for electrical and duty details.
A correctly sized bushing centers and secures the hollow chisel below the rotating auger.
The auger lifts chips from inside the four-sided chisel. They form a matched cutting set, not one solid square drill.
The column guides the head; lever travel supplies a controlled plunge. The depth stop sets the lower limit.
A straight fence registers the stock; a hold-down prevents it rising with the chisel; the table supports the work.
These decisions make the mechanism useful at the bench.
With power disconnected, install the selected chisel and auger using the JBM-5 manual's order and clearance procedure. Confirm the auger rotates freely.
Square the fence to the intended mortise line, secure the stock and set the hold-down close enough to resist lifting without binding.
Set the depth stop; make successive plunges with chip clearance rather than forcing a long slot in one stroke.
Cut rectangular mortises in frame or furniture parts, then fit a mating tenon to the actual result.
A fence and stops make matching mortise locations repeatable across multiple parts.
The square chisel leaves corners without hand-squaring a round router mortise, within the machine's capacity.
Use the steps for a first pass, then inspect the work before changing the setup.
The spinning auger removes chips, while fixed square edges pare the corners. Incorrect auger clearance can cause friction or binding.
The chisel can lift the work on the upstroke; a correctly set hold-down is essential.
A deep slot packs chips. Small overlapping plunges and full retractions help maintain cut quality.
Floor machines may have longer stroke, larger stock capacity and different hold-downs; the illustrated setup is benchtop.
Chain mortisers use a different cutting system for larger work; these components do not describe one.
Router mortises have round ends unless squared afterward; loose-tenon joiners cut matching slots rather than using a square chisel.
Stop the tool and disconnect power before investigating a fault or changing a part.
Stop and verify auger-to-chisel clearance, sharpness and chip flow.
Reset the hold-down and inspect fence registration before continuing.
Check fence lock, stock reference face, chisel alignment and head play.
Use the exact tool manual for setup, limits and replacement parts. These lessons, documents and model pages teach relevant techniques or help compare real variations.
Official capacity and machine description.
Maker demonstrations and woodworking machine resources; verify the demonstrated model before applying a setting.
Manufacturer demonstration of hollow-chisel controls on other models; use JET instructions for JBM-5 settings.
These maker-owned links document relevant tools and tool brands. A product brand may use another company's factory; compare the exact model before choosing parts or accessories.
Cutters, abrasives, guards, guides, dust fittings and service parts vary by tool. Check the model plate and manufacturer manual before ordering or changing a component.
Compare the Joinery family →Continue through the Tools library