
Solid beech head
A broad straight-grained wooden mass spreads the impact over a chisel handle or protective assembly block.
Deliver a controlled wooden blow to a chisel or joint without the concentrated impact of steel.
An original educational poster identifies 6 documented construction features. The numbered descriptions remain readable below the artwork on narrow screens.
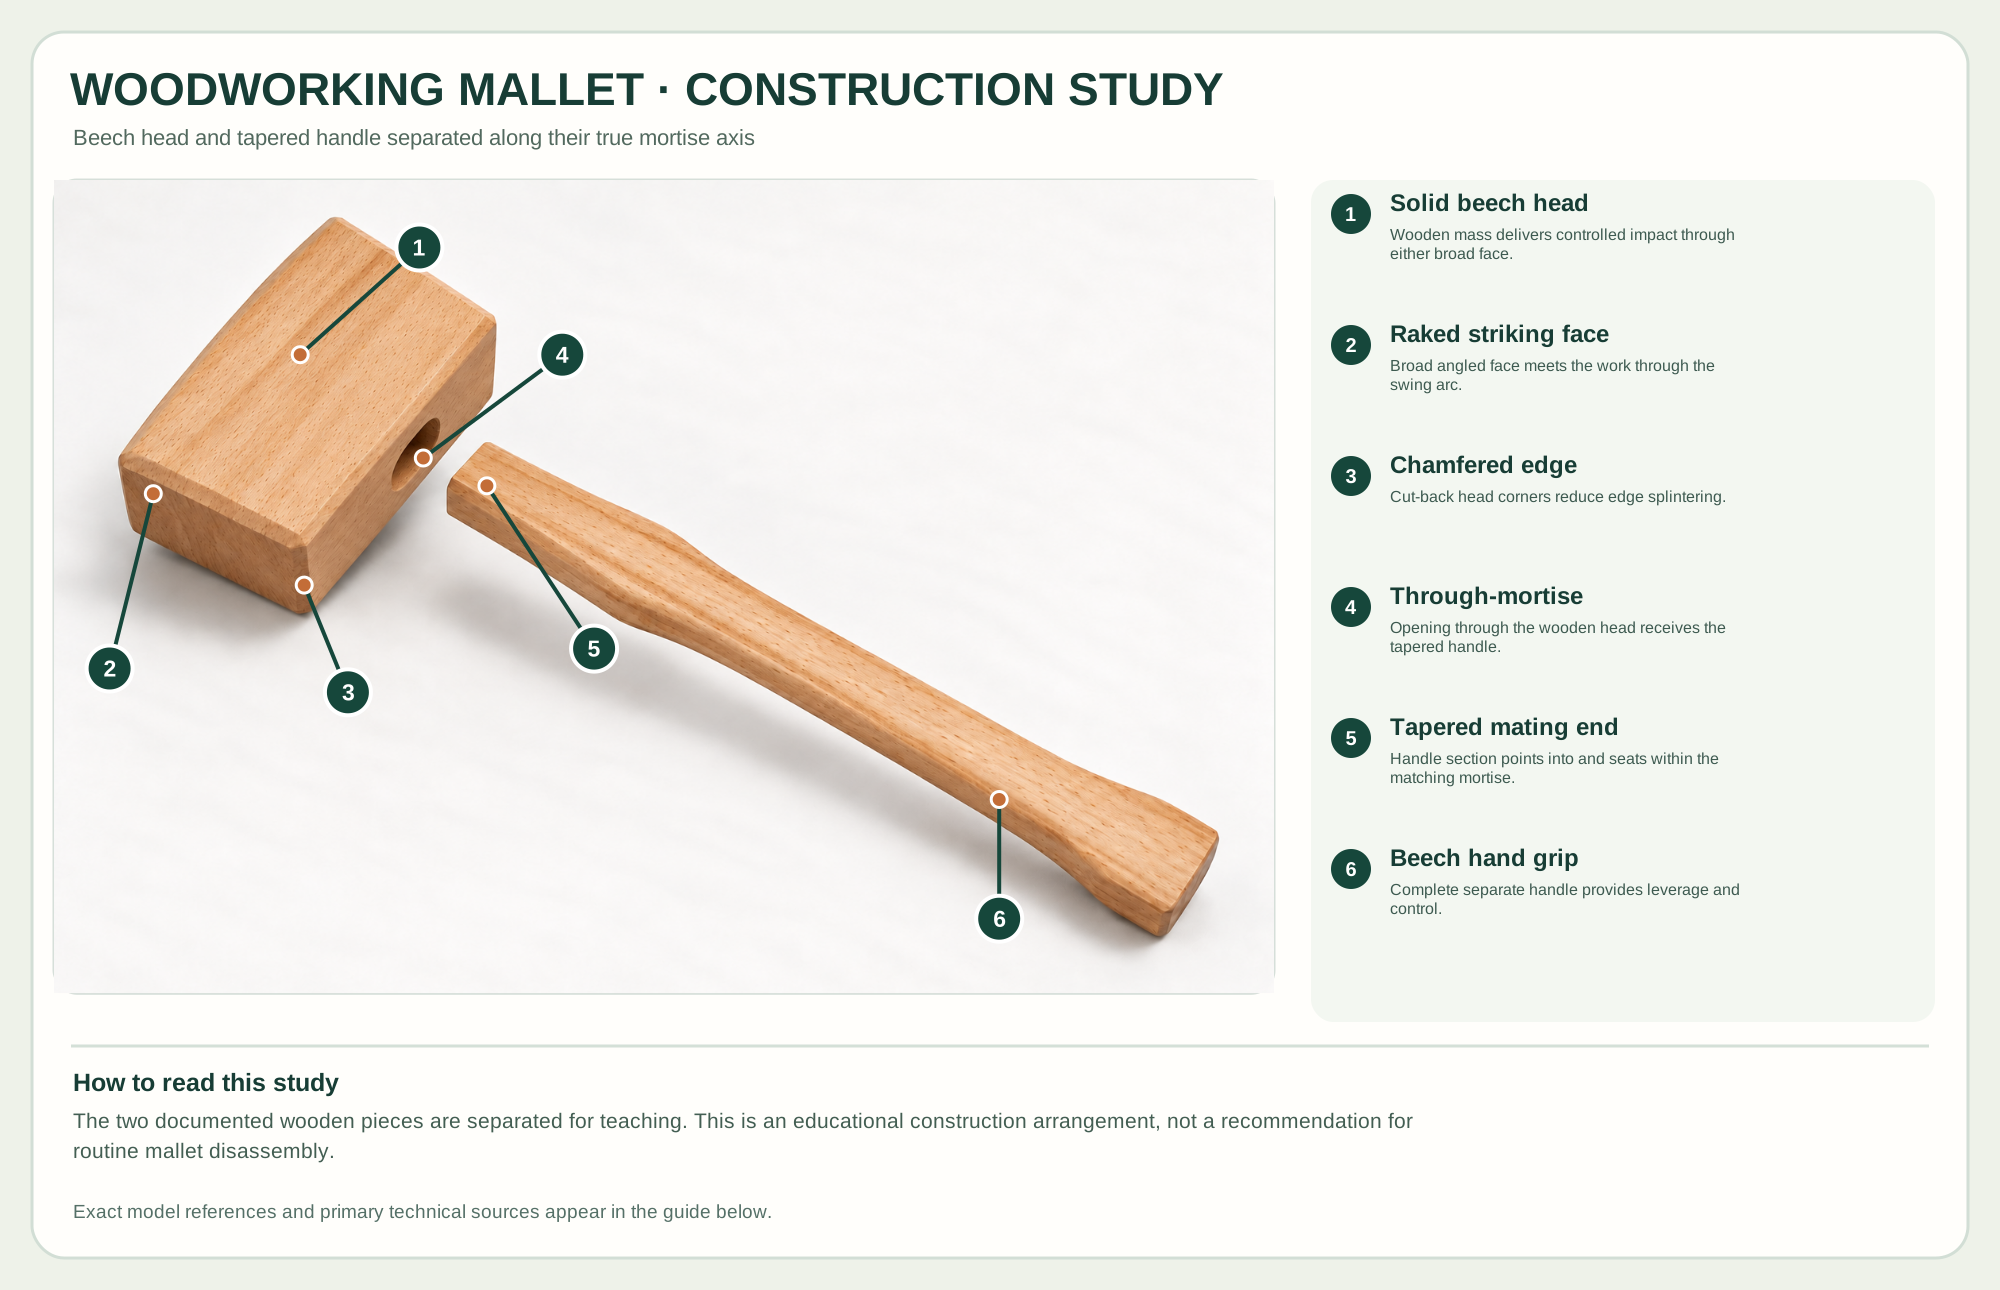
Wooden mass delivers controlled impact through either broad face.
Broad angled face meets the work through the swing arc.
Cut-back head corners reduce edge splintering.
Opening through the wooden head receives the tapered handle.
Handle section points into and seats within the matching mortise.
Complete separate handle provides leverage and control.
Technical references: Faithfull FAICM4 official specification · Lee Valley beech mallet comparison. The real wooden head and tapered handle are shown as two separate pieces. The handle seats through the mortised head; no wedge, replaceable face or extra fastener is present. Original educational artwork depicts documented component groups and their relationships; it is not a service sequence or a replacement for the exact model manual.
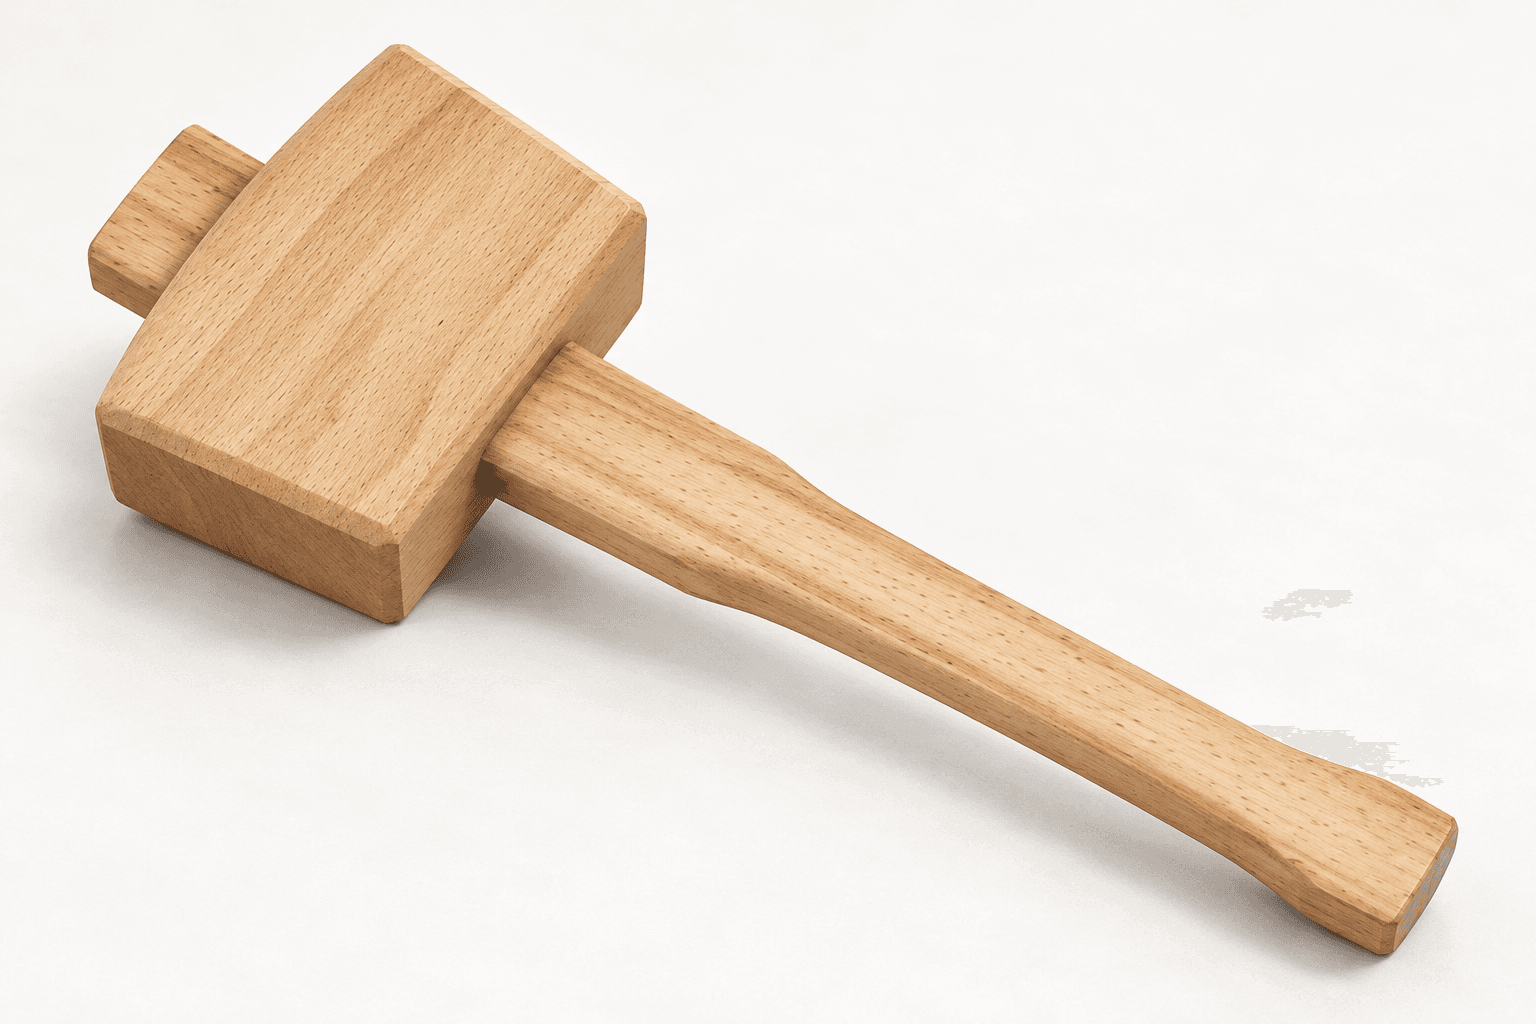
The Faithfull FAICM4 is a traditional 102 mm straight-grained beech carpenter's mallet. Its head is mortised for a tapered beech handle; the broad striking faces rake toward the user so the swing lands more squarely. It is useful for wooden-handled chisels and careful dry assembly. A metal hammer concentrates impact and can damage tool handles; a dead-blow mallet reduces rebound through a different construction.
The tapered handle bears in the mortised head and projects through it. The solid wooden head carries mass into either broad face. Its chamfered edges reduce splintering at glancing contact. The construction study separates the head from the handle along their mating axis to reveal the documented tapered mortise. No fictional wedge, detachable face or extra fastener is illustrated.
A broad straight-grained wooden mass spreads the impact over a chisel handle or protective assembly block.
The face angle is intended to meet the target squarely through the natural arc of a wrist-driven blow.
The cut-back corners limit edge damage; they are not separate pads or replaceable inserts.
A tapered wooden handle passes through the head to establish the fit and offers a secure grip at the hand end.
These decisions make the mechanism useful at the bench.
Strike a chisel handle intended for mallet use or place a protective block between the mallet and finished wood.
Grip near the handle end for reach, or choke up for delicate fitting; orient a broad face square to the target.
A loose head, cracked handle or chipped face changes the blow and needs correction before use.
Support and clamp the stock; use controlled blows to drive a properly sharpened mortise chisel.
Tap through a scrap block and test alignment before increasing force or adding glue.
A light wooden tap can adjust traditional plane irons or wedges without the mark of a steel hammer.
Use the steps for a first pass, then inspect the work before changing the setup.
A wooden face spreads force more gently than a hard steel hammer, though it can still dent bare finished wood.
The head and handle are real separate wooden pieces joined by a tapered mortise; the illustration does not imply a removable cartridge.
Good fit, sharp edges and supported stock do more for joinery than a heavier swing.
Faithfull lists 102, 114 and 127 mm head choices; select enough mass without losing control.
A cylindrical head contacts a gouge from more changing angles than a joiner's rectangular face.
Some other products have interchangeable inserts; the selected all-beech model does not.
Secure the work, protect sharp edges and release any stored clamping pressure before adjustment or maintenance.
Stop using it and inspect the tapered mortise fit; repair or replace according to the maker's guidance.
Inspect grain and striking direction; avoid edge impacts and remove a badly split head from service.
Check shoulder fit, glue squeeze-out and obstruction instead of escalating blow force.
Use the exact model documentation for setup, limits and replacement parts. These lessons, documents and model pages teach relevant techniques or help compare real variations.
These maker-owned links document relevant tools and tool brands. A product brand may use another company's factory; compare the exact model before choosing parts or accessories.
Handles, irons, saw plates, clamping pads and other replacements vary by maker and model. Use the maker's documentation before changing a component.
Compare the Woodworking Hammers and Mallets family →Continue through the Tools library