
Motor and base
The central motor turns both arbor ends; bolt the cast base to a stable bench before use.
Shape an edge on a securely guarded wheel with light passes, a close tool rest and heat awareness.
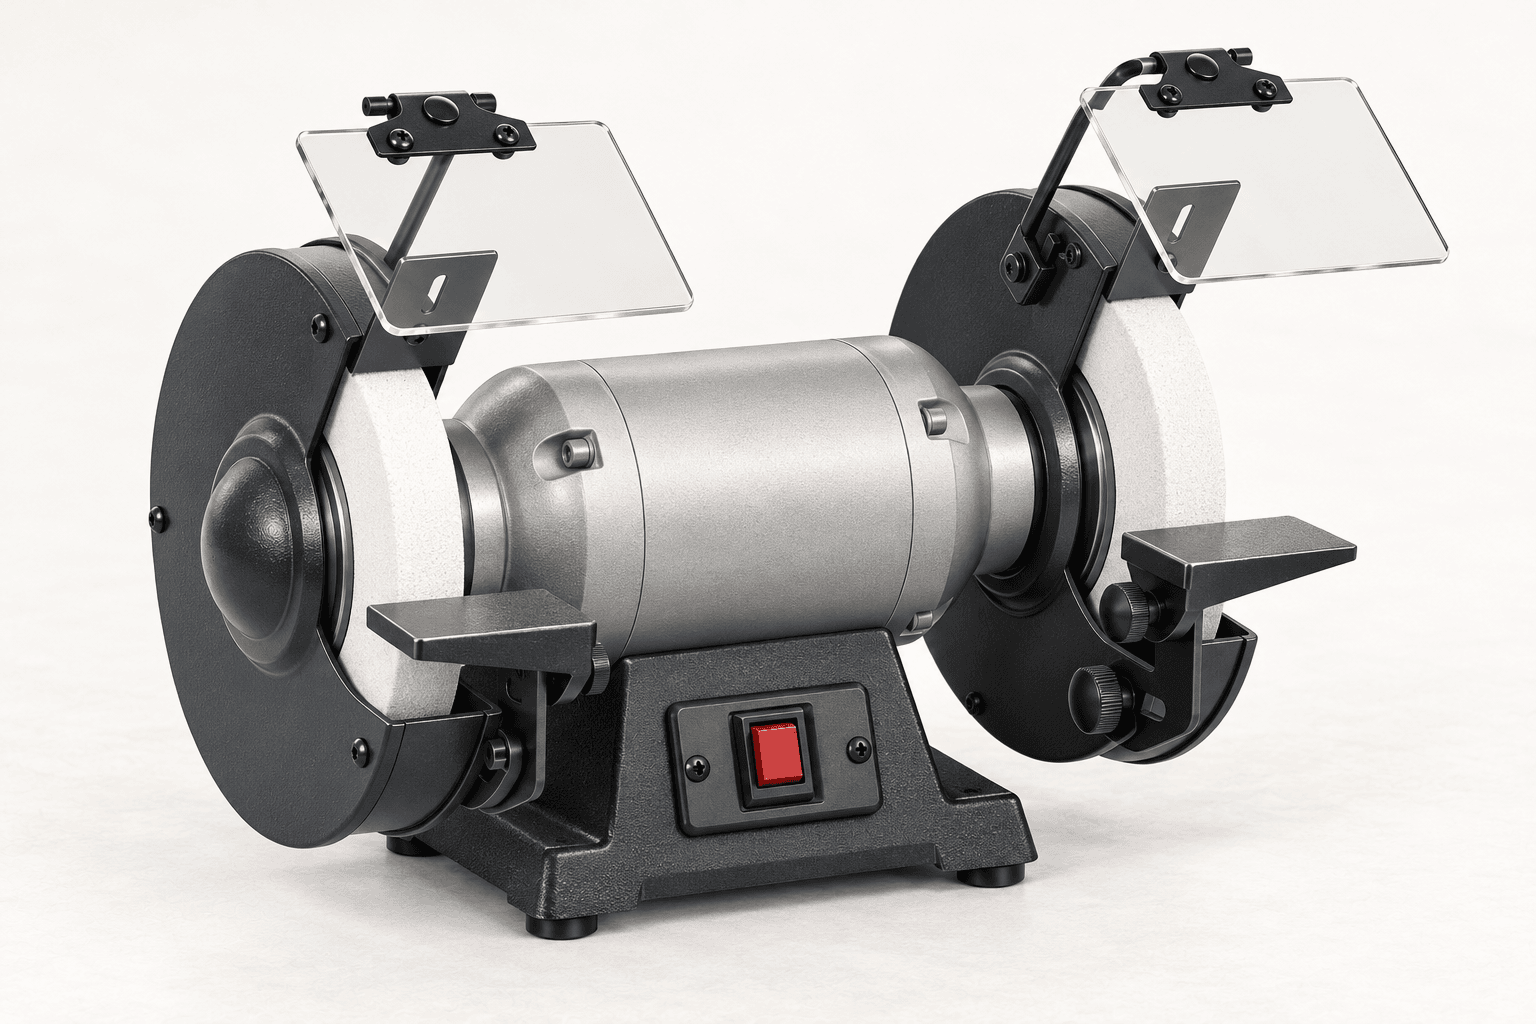
An original educational poster identifies 9 documented construction features. The numbered descriptions remain readable below the artwork on narrow screens.
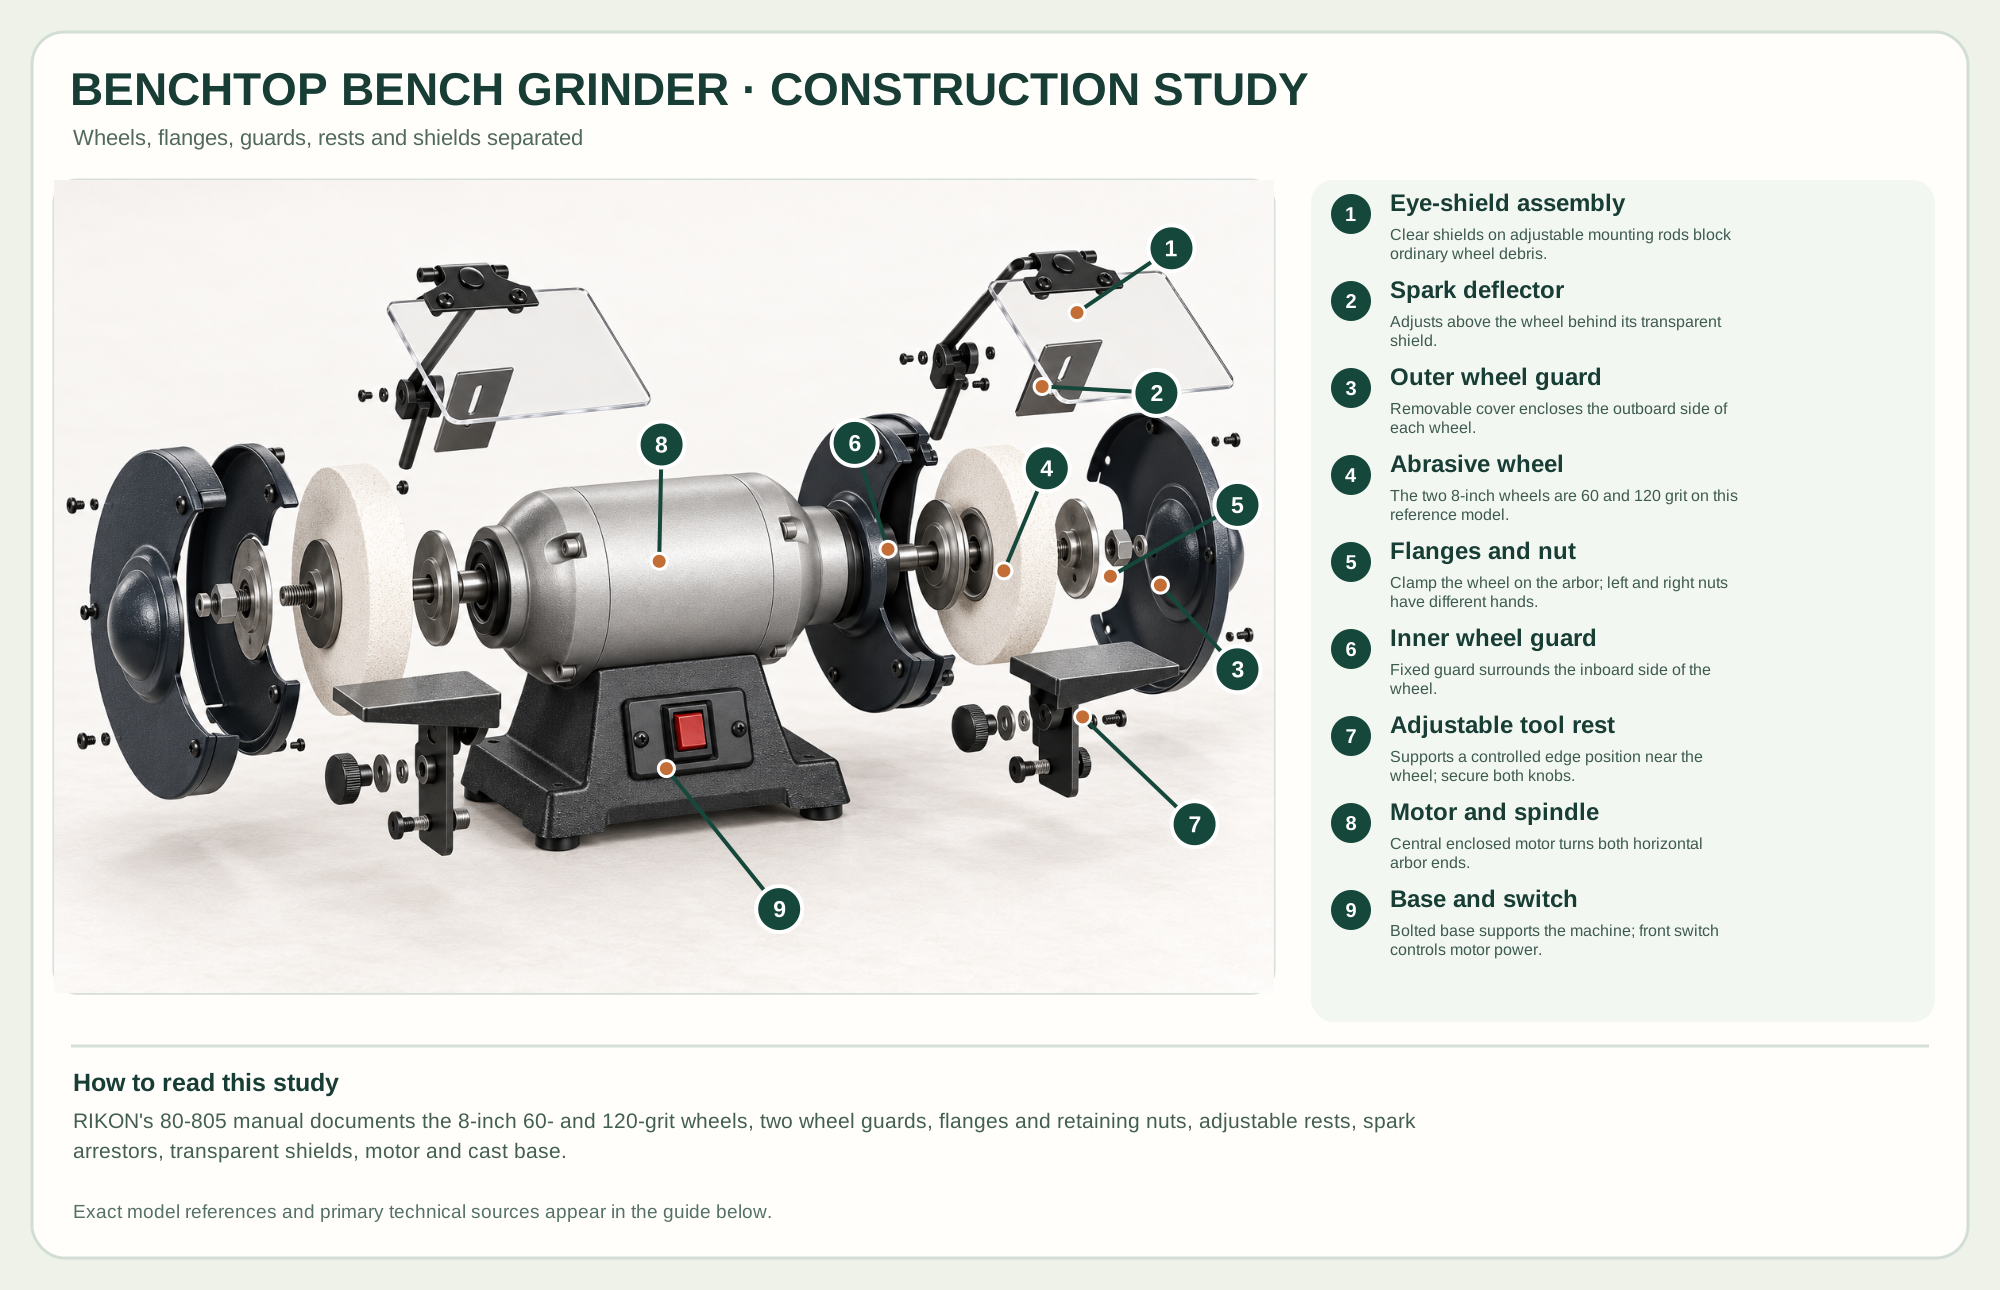
Clear shields on adjustable mounting rods block ordinary wheel debris.
Adjusts above the wheel behind its transparent shield.
Removable cover encloses the outboard side of each wheel.
The two 8-inch wheels are 60 and 120 grit on this reference model.
Clamp the wheel on the arbor; left and right nuts have different hands.
Fixed guard surrounds the inboard side of the wheel.
Supports a controlled edge position near the wheel; secure both knobs.
Central enclosed motor turns both horizontal arbor ends.
Bolted base supports the machine; front switch controls motor power.
Technical references: RIKON 80-805 product and specifications · RIKON 80-805 M5 operator manual, pages 10 and 16-17. Each abrasive wheel mounts on a motor arbor between flanges behind an outer guard cover. Adjustable rests and clear eye shields are separate mounted assemblies. The study shows documented groups spaced for teaching, not a required wheel-changing order. Original educational artwork depicts documented component groups and their relationships; it is not a service sequence or a replacement for the exact model manual.
RIKON's 80-805 is a 1/2-horsepower, 1,750-rpm grinder supplied with 8-by-1-inch 60- and 120-grit wheels on 5/8-inch arbors. Its guarded double-ended layout, adjustable rests and shields suit bevel repair and shaping. Final fine honing usually happens on a separate stone or strop. The original rendering follows the manual's wheel and guard arrangement without copying its branding.
The enclosed motor turns a horizontal spindle out of both sides. A wheel is clamped between inner and outer flanges with the side-specific retaining nut, inside fixed and removable guard halves. A tool rest supports the edge close to each wheel; a spark deflector and clear shield sit above. The exploded study separates only these documented groups for anatomy, not a wheel-change sequence.
The central motor turns both arbor ends; bolt the cast base to a stable bench before use.
Two specified 8-inch wheels mount between flanges; left and right retaining threads differ. Match wheel speed rating and fit.
Guard halves surround each wheel and must be fitted before operation.
Set these per the exact manual and inspect their clearance as a wheel wears.
These decisions make the mechanism useful at the bench.
Use the manual's wheel inspection and mounting method; check guards, rests, shields and clearance with the plug out.
Hold suitable work on the tool rest and use light, controlled contact on the wheel face, never an unsupported side grind.
Move the edge across the wheel and pause or cool as appropriate to avoid temper damage.
Remove only enough metal to re-form the bevel; finish the edge on stones or another honing system.
Use a suitable rest or approved jig to maintain profile and avoid overheating.
Grind square with light contact, then hone and burnish by the scraper method.
Use the steps for a first pass, then inspect the work before changing the setup.
Wheel wear increases distance to rest and spark arrestor; reset clearances as the manual specifies.
Correct flange and blotter arrangements support the wheel. Never improvise washers or arbor adapters.
A wheel establishes shape and removes damage; a finer edge generally needs further sharpening.
Coarse and fine wheels remove material at different rates; the reference ships with 60- and 120-grit wheels.
A lower nominal speed can help control heat, but technique and wheel condition still matter.
Water-cooled systems favor slower material removal and jig-guided repeatability.
Stop the tool and disconnect power before investigating a fault or changing a part.
Stop, unplug and inspect mount, wheel damage, seating and flange fit; do not operate a suspect wheel.
Reduce pressure, move the tool across the face, dress a glazed wheel and manage cooling.
Stop and set the specified rest clearance; replace a damaged rest or wheel.
Use the exact tool manual for setup, limits and replacement parts. These lessons, documents and model pages teach relevant techniques or help compare real variations.
These maker-owned links document relevant tools and tool brands. A product brand may use another company's factory; compare the exact model before choosing parts or accessories.
Cutters, abrasives, guards, guides, dust fittings and service parts vary by tool. Check the model plate and manufacturer manual before ordering or changing a component.
Compare the Powered Sharpening Systems family →Continue through the Tools library