
Tapered anti-static cyclone
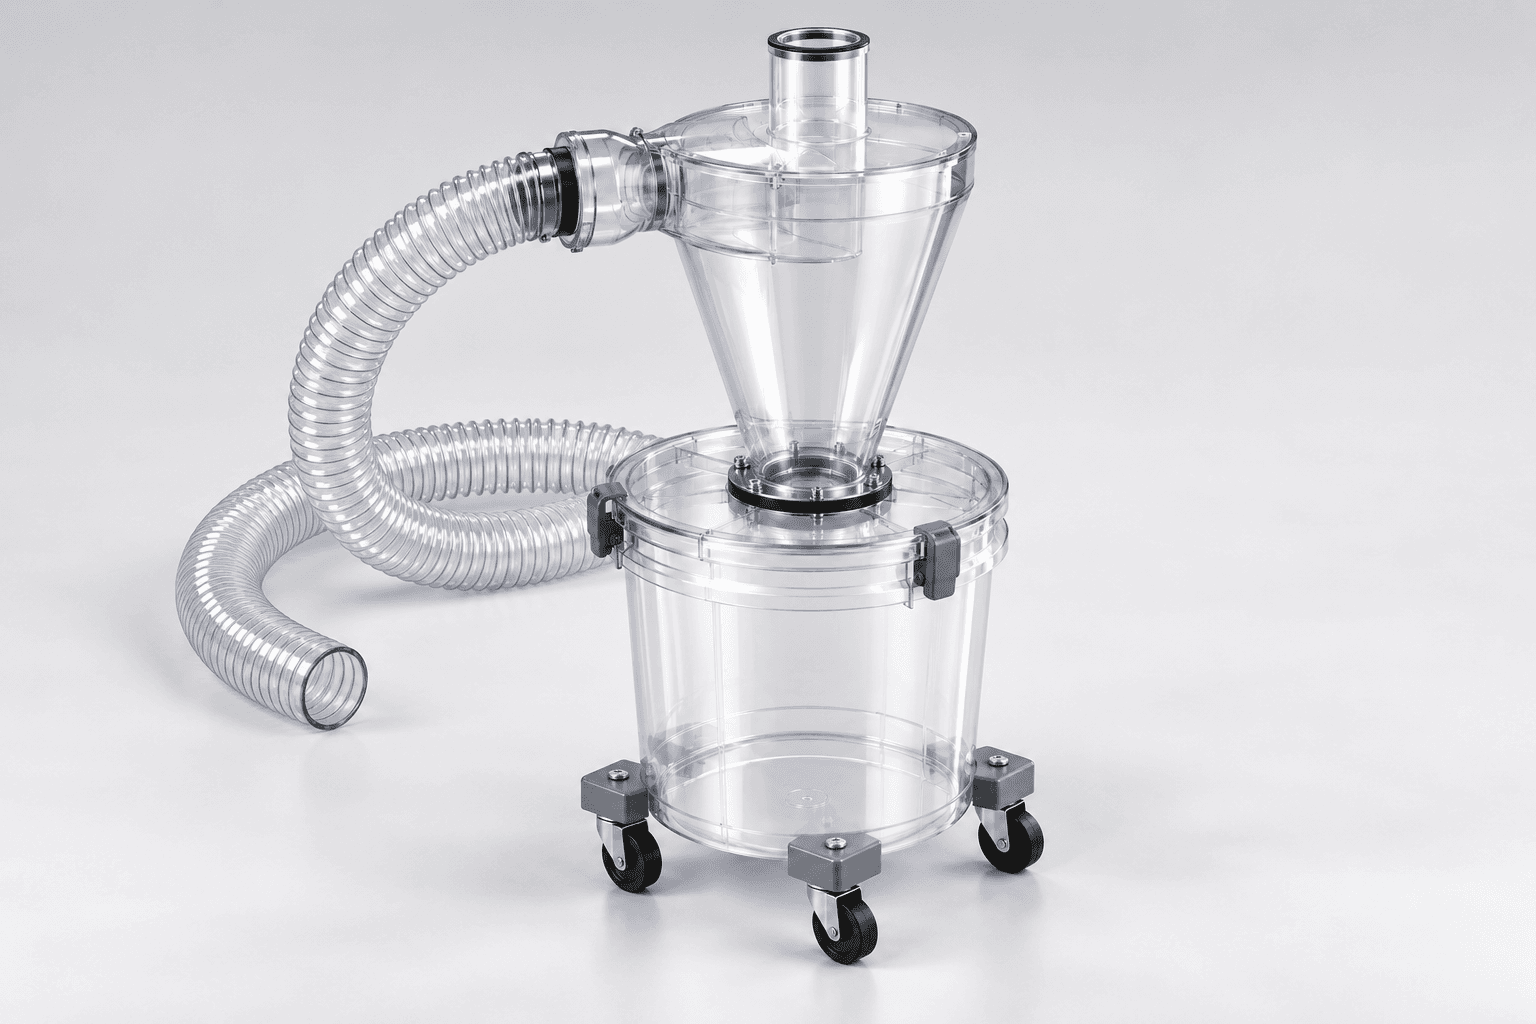
A side inlet feeds the broad upper chamber; a top outlet carries air onward to the vacuum, and the narrow bottom discharges chips.
Separate chips from a shop vacuum's airstream before debris reaches its filter.
An original educational poster identifies 9 documented construction features. The numbered descriptions remain readable below the artwork on narrow screens.
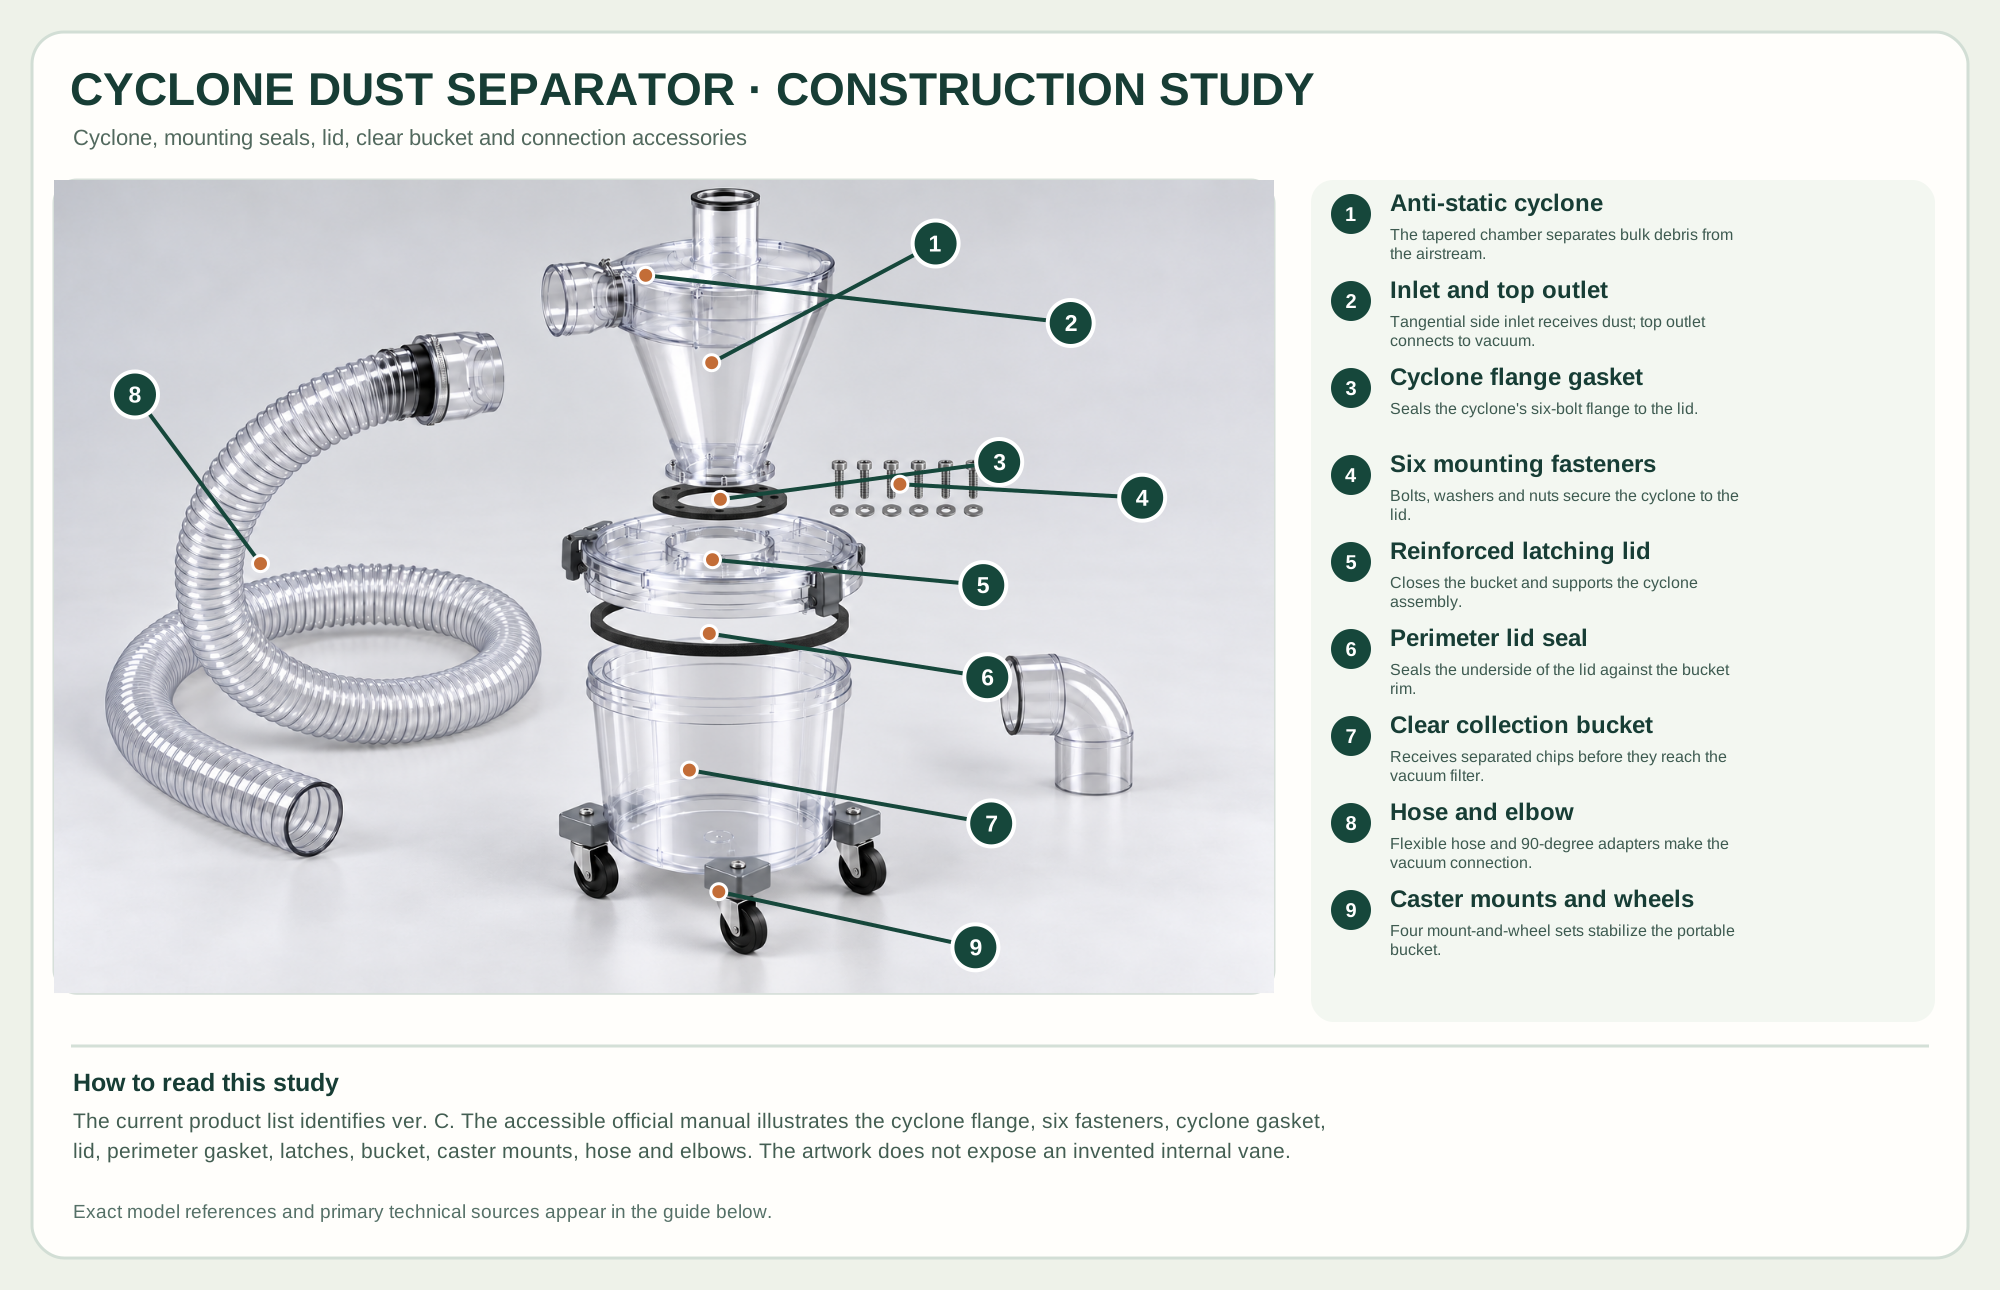
The tapered chamber separates bulk debris from the airstream.
Tangential side inlet receives dust; top outlet connects to vacuum.
Seals the cyclone's six-bolt flange to the lid.
Bolts, washers and nuts secure the cyclone to the lid.
Closes the bucket and supports the cyclone assembly.
Seals the underside of the lid against the bucket rim.
Receives separated chips before they reach the vacuum filter.
Flexible hose and 90-degree adapters make the vacuum connection.
Four mount-and-wheel sets stabilize the portable bucket.
Technical references: Oneida Dust Deputy Deluxe current kit / ver. C · Oneida Dust Deputy Deluxe official owner manual. Dirty air enters tangentially at the cyclone's broad upper chamber; separated chips fall into the sealed bucket while cleaner air leaves the vertical top outlet toward the vacuum. The study separates only the maker-documented kit groups and seals. Original educational artwork depicts documented component groups and their relationships; it is not a service sequence or a replacement for the exact model manual.
Oneida Air Systems lists its current Dust Deputy Deluxe all-clear kit as version C, SKU AXD000004C. It combines an anti-static cyclone, clear five-gallon collection bucket, reinforced latching lid, caster mounts and wheels, hose, elbows, clamp, gasket and hardware. This separator is passive: a compatible shop vacuum supplies the suction. The original TWG render omits branding but preserves the transparent form and documented kit groups.
Dust-laden air enters the cyclone's wide upper chamber tangentially. The swirling path encourages heavier chips to descend through the narrow discharge into a sealed bucket, while remaining air rises through the vertical top outlet toward the vacuum. Both the cyclone-to-lid gasket and the perimeter bucket-lid seal matter; a leak reduces separation and suction. The construction study separates documented kit parts and shows six mounting fasteners, without claiming an invented internal vane or service sequence.
A side inlet feeds the broad upper chamber; a top outlet carries air onward to the vacuum, and the narrow bottom discharges chips.
The cyclone's mounting flange seals against the lid through a gasket held by six documented bolt/washer/nut sets.
Quick-release latches secure the lid. A perimeter gasket closes the rim of the clear bucket.
The five-gallon container receives debris; four caster mounts and wheels support movement. A transparent hose and elbows connect compatible ports.
These decisions make the mechanism useful at the bench.
Connect the dusty tool hose to the side inlet and the vacuum hose to the top outlet; reversing them defeats the separation path.
Seat the cyclone gasket and bucket-lid seal evenly, tighten mounting hardware, then fully latch the lid.
Watch debris level through the clear bucket. Stop, disconnect the vacuum and empty before chips rise into the cone discharge.
Connect a suitable hood through the separator to a compatible vacuum; keep the hose clear of cutter travel.
Collect dry chips and debris while checking the bucket and vacuum filter as the maker instructs.
Position the rolling bucket where hoses do not pull it into a tool or trip path.
Use the steps for a first pass, then inspect the work before changing the setup.
The Deluxe kit does not contain a motor; it operates only with a compatible suction source.
A small gap at the cyclone flange or bucket rim can let air bypass the intended flow path.
A cyclone protects the vacuum filter from much debris, but fine dust still requires the vacuum's suitable filter and safe capture method.
The product page lists AXD000004C; older manual imagery may show a prior kit revision, so verify the parts in the current box.
The kit accommodates a range of shop-vac fittings; actual tool ports may need compatible adapters.
Caster mounts suit portability; secure the container if hose tension or the work area could move it unexpectedly.
Stop the tool and disconnect power before investigating a fault or changing a part.
Inspect both gaskets, latches, hose connections, bucket fill, blockages and the vacuum filter.
Check air-direction routing, overfill, cyclone obstruction and bucket seal.
Reposition hoses, check caster mounts and reduce pull on the upper cyclone.
Use the exact tool manual for setup, limits and replacement parts. These lessons, documents and model pages teach relevant techniques or help compare real variations.
These maker-owned links document relevant tools and tool brands. A product brand may use another company's factory; compare the exact model before choosing parts or accessories.
Cutters, abrasives, guards, guides, dust fittings and service parts vary by tool. Check the model plate and manufacturer manual before ordering or changing a component.
Compare the Dust Collection & Air Filtration family →Continue through the Tools library