
Hose and inlet
A correctly fitted antistatic hose carries dust from a compatible tool shroud to the front port.
Capture portable-tool dust at its source with the right hose, sealed filter path and task-appropriate bag.
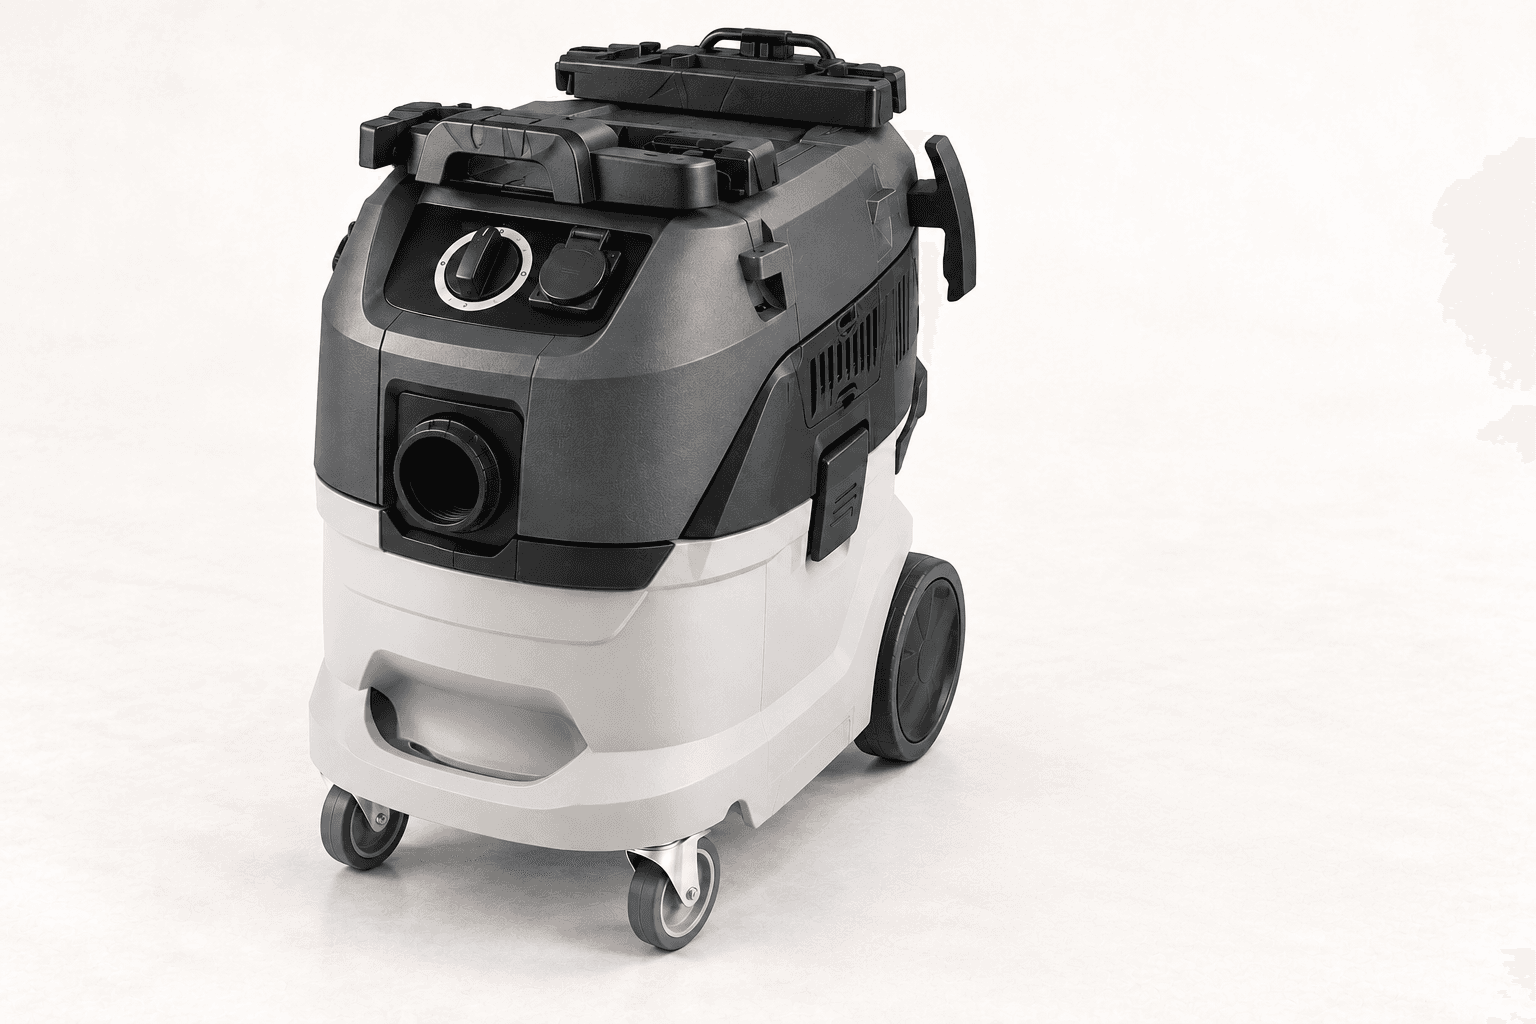
An original educational poster identifies 9 documented construction features. The numbered descriptions remain readable below the artwork on narrow screens.
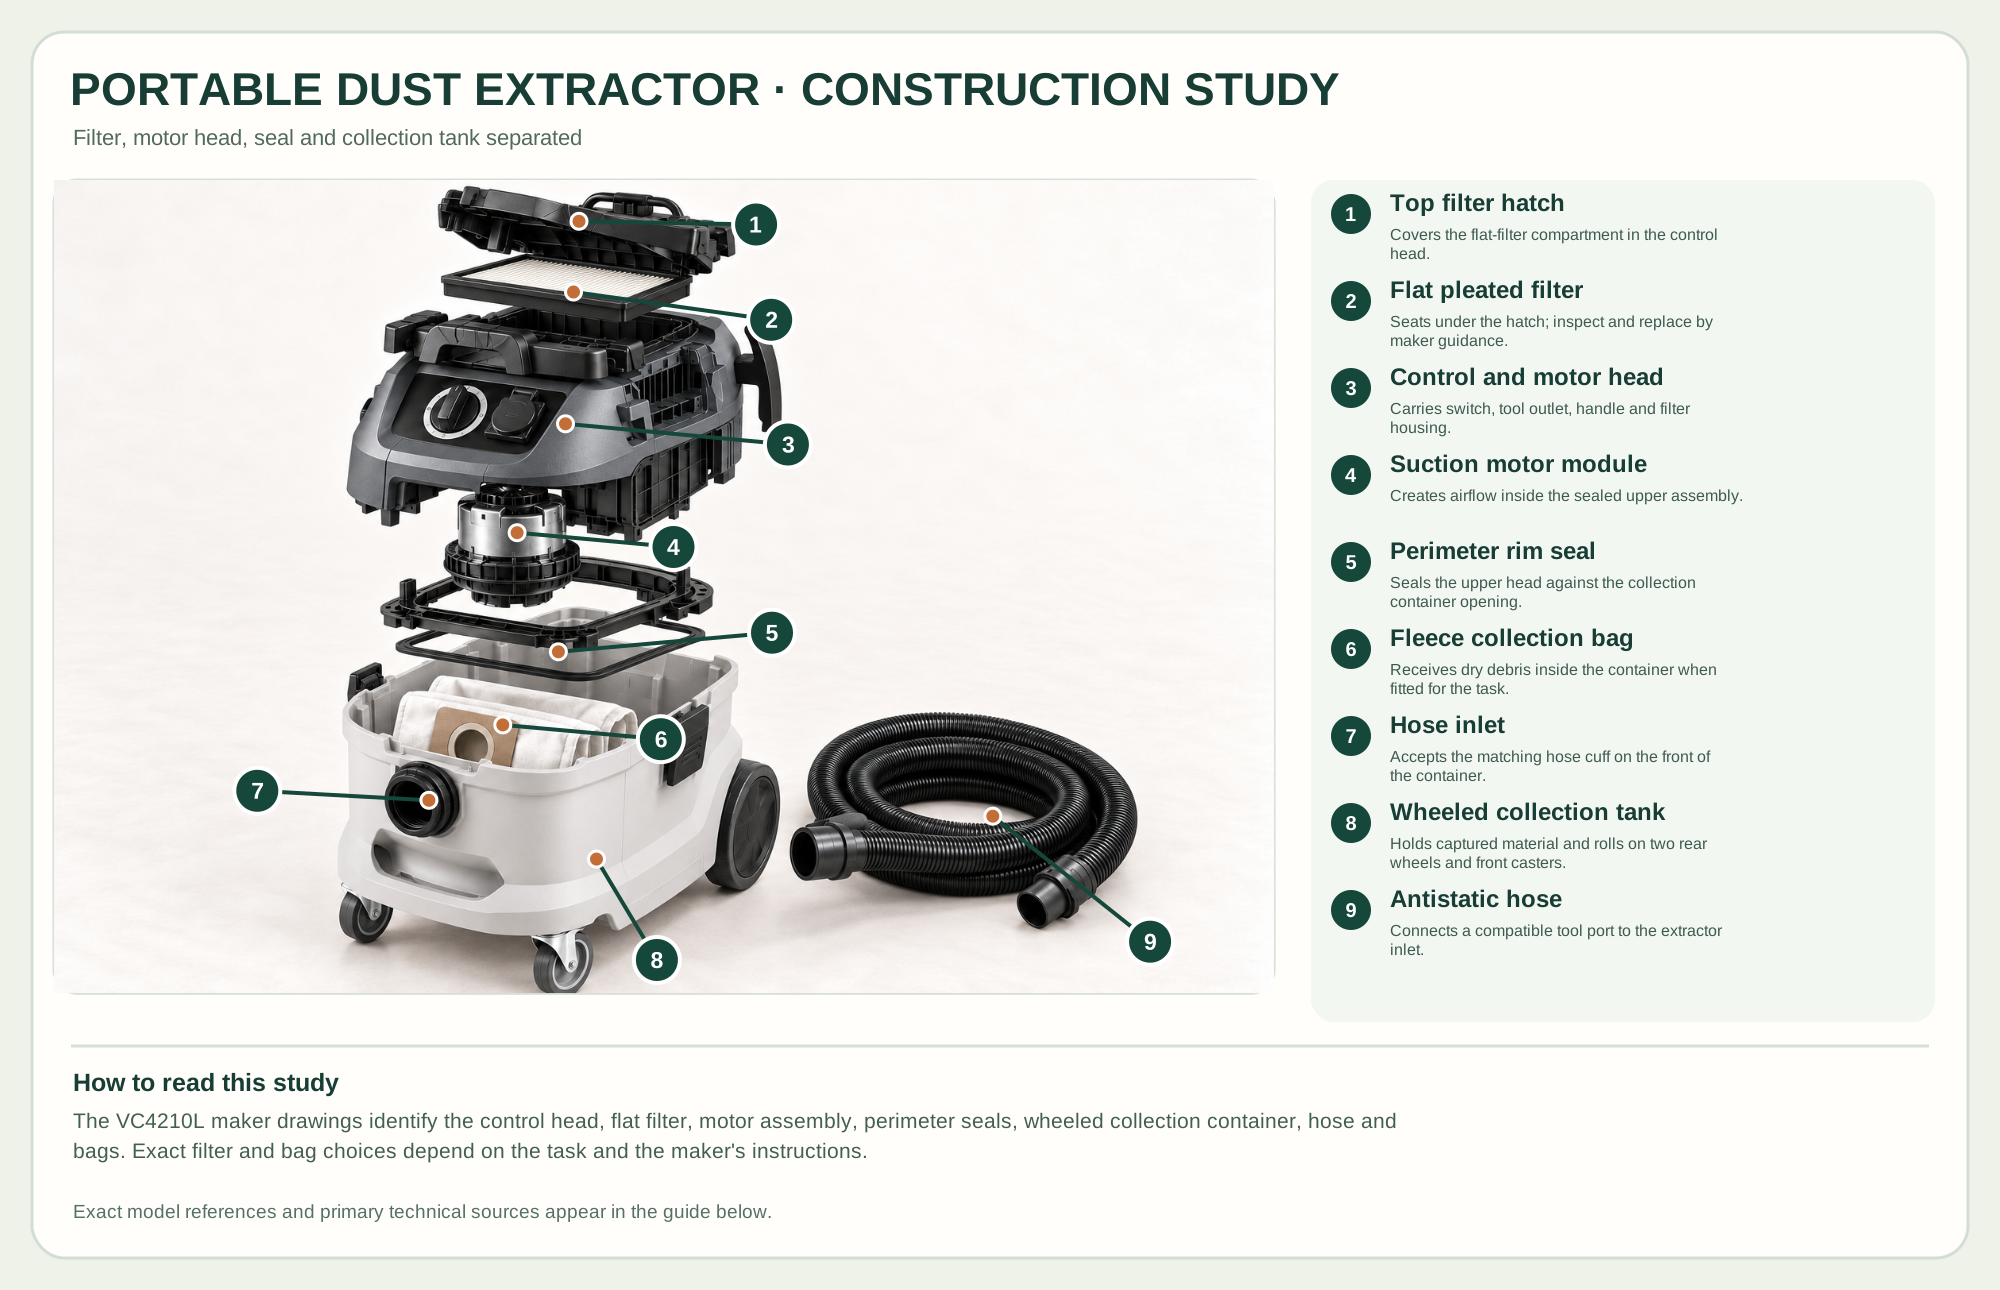
Covers the flat-filter compartment in the control head.
Seats under the hatch; inspect and replace by maker guidance.
Carries switch, tool outlet, handle and filter housing.
Creates airflow inside the sealed upper assembly.
Seals the upper head against the collection container opening.
Receives dry debris inside the container when fitted for the task.
Accepts the matching hose cuff on the front of the container.
Holds captured material and rolls on two rear wheels and front casters.
Connects a compatible tool port to the extractor inlet.
Technical references: Makita VC4210L product and included equipment · Makita VC4210L instruction manual · Makita VC4210L parts breakdown. The filter hatch opens above the removable flat filter; the suction motor is in the upper head. A seal and retainer meet the lower collection container, where a fitted fleece bag receives debris. One hose connects at the inlet. The spacing is educational, not a service sequence. Original educational artwork depicts documented component groups and their relationships; it is not a service sequence or a replacement for the exact model manual.
Makita's VC4210L is an 11-gallon gross portable extractor with a stated 9-gallon wet capacity, 148 CFM airflow, 92-inch water lift and automatic filter cleaning. A tool-activation outlet and antistatic hose support portable sanders, saws and routers with compatible ports. It is not a substitute for a high-volume collector at large stationary machine hoods; capture also depends on the actual tool enclosure, hose length and filter condition.
Air enters the front hose inlet, carrying debris into a fitted bag or tank. A sealed upper head houses the suction motor; a flat pleated filter beneath its top hatch protects the air path. The perimeter seal joins head and wheeled container. The construction study lifts these documented groups into view; it does not prescribe internal motor disassembly.
A correctly fitted antistatic hose carries dust from a compatible tool shroud to the front port.
A fitted fleece bag contains dry debris when appropriate; wet collection needs the manual's correct setup and limits.
The flat filter seats in the upper head beneath a hatch. The automatic cleaning system helps maintain airflow.
The removable head carries controls and suction motor; its perimeter seal must seat against the lower container.
These decisions make the mechanism useful at the bench.
Read the dust hazard and maker instructions; fit a compatible filter and bag for dry work, and configure wet pickup separately.
Seat the head, connect the hose without leaks, and keep the tool shroud close to dust generation.
Connect only loads within the documented outlet rating and verify the extractor starts and runs on after the tool stops.
Use a matching hose and perforated abrasive pattern; check actual dust at the surface.
Connect to a suitable shroud and supplement with general ventilation when dust escapes the cut.
Use the correct nozzle and bag/filter configuration; do not collect hot embers or incompatible materials.
Use the steps for a first pass, then inspect the work before changing the setup.
Capture depends on seals, bag, filter, hose and the source tool; a single filter rating does not guarantee room-air safety.
Bag and filter configuration must follow the manual for wet pickup; never assume a dry setup is safe for liquid.
Periodic filter cleaning cannot fix a torn filter, leaking gasket, clogged hose or overfilled container.
Tool activation, antistatic hose and filter cleaning are common extractor features but vary by model.
Choose capacity for mobility and actual debris volume; a large tank adds weight when full.
Check the exact machine's rated configuration and permitted materials before switching modes.
Stop the tool and disconnect power before investigating a fault or changing a part.
Check tool shroud, hose, bag fill, filter, seal seating and leaks with power disconnected.
Stop use and inspect the correct filter, seals and bag installation before restarting.
Confirm switch mode, compatible tool draw and outlet limits; do not bypass protection.
Use the exact tool manual for setup, limits and replacement parts. These lessons, documents and model pages teach relevant techniques or help compare real variations.
These maker-owned links document relevant tools and tool brands. A product brand may use another company's factory; compare the exact model before choosing parts or accessories.
Cutters, abrasives, guards, guides, dust fittings and service parts vary by tool. Check the model plate and manufacturer manual before ordering or changing a component.
Compare the Dust Collection & Air Filtration family →Continue through the Tools library