
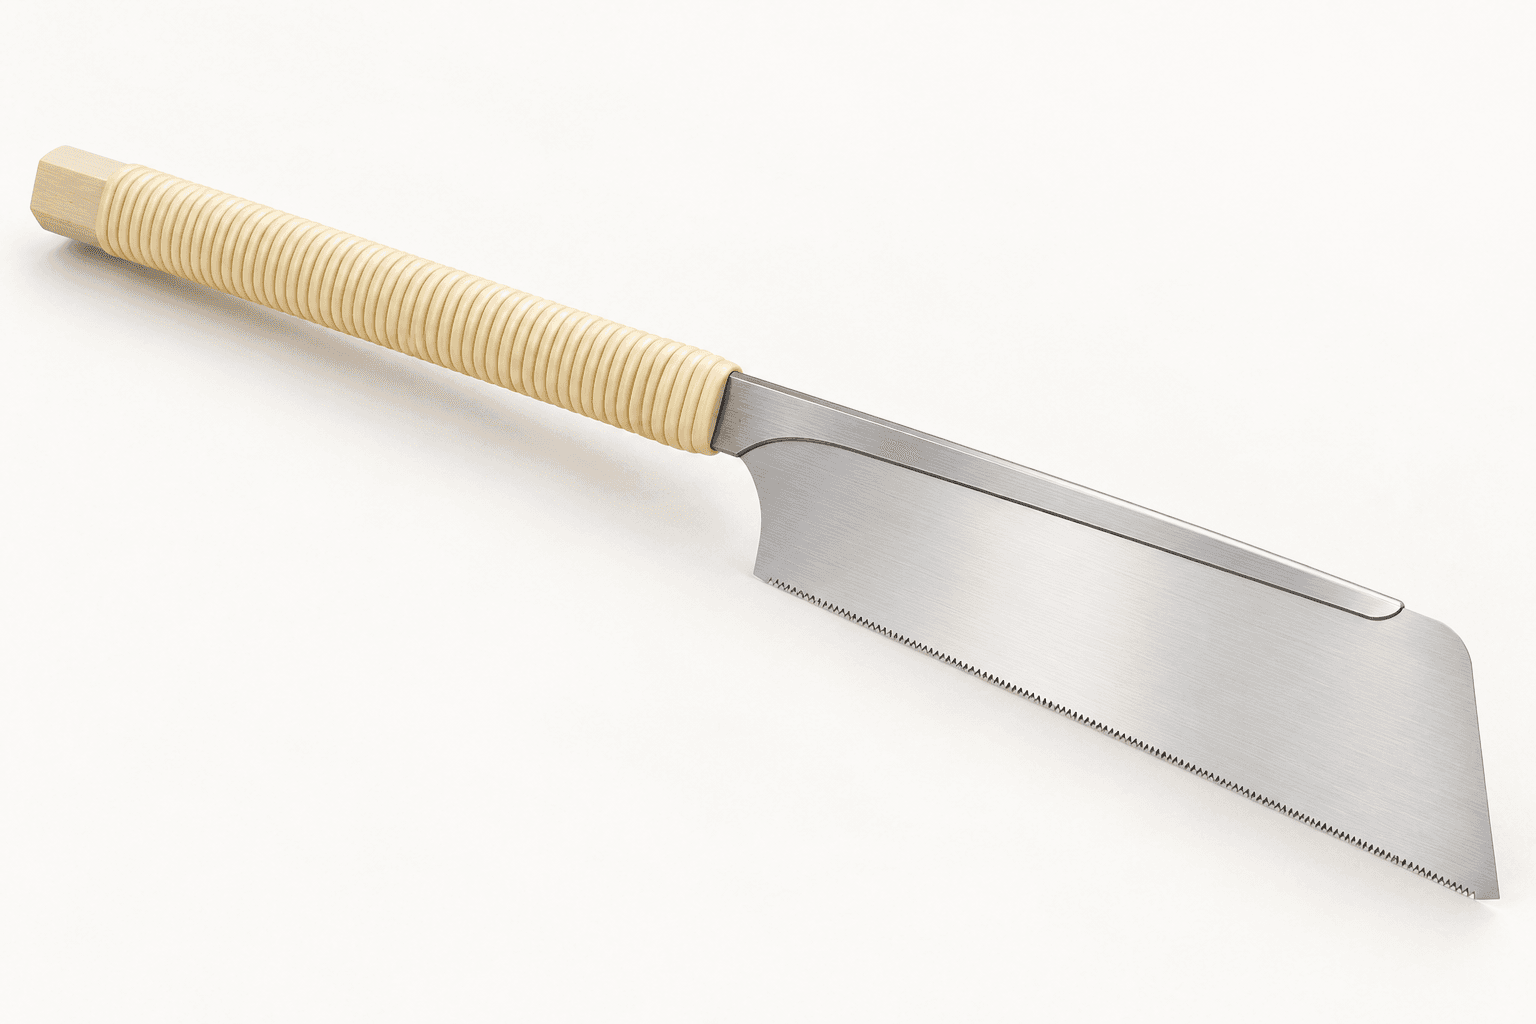
Wrapped wooden handle
The long grip supports a two-handed or extended hand position for a straight pull. The wrap provides traction.
Start with a light pull, keep the thin blade straight, and let fine crosscut teeth define accurate joinery shoulders.
An original educational poster identifies 7 documented construction features. The numbered descriptions remain readable below the artwork on narrow screens.
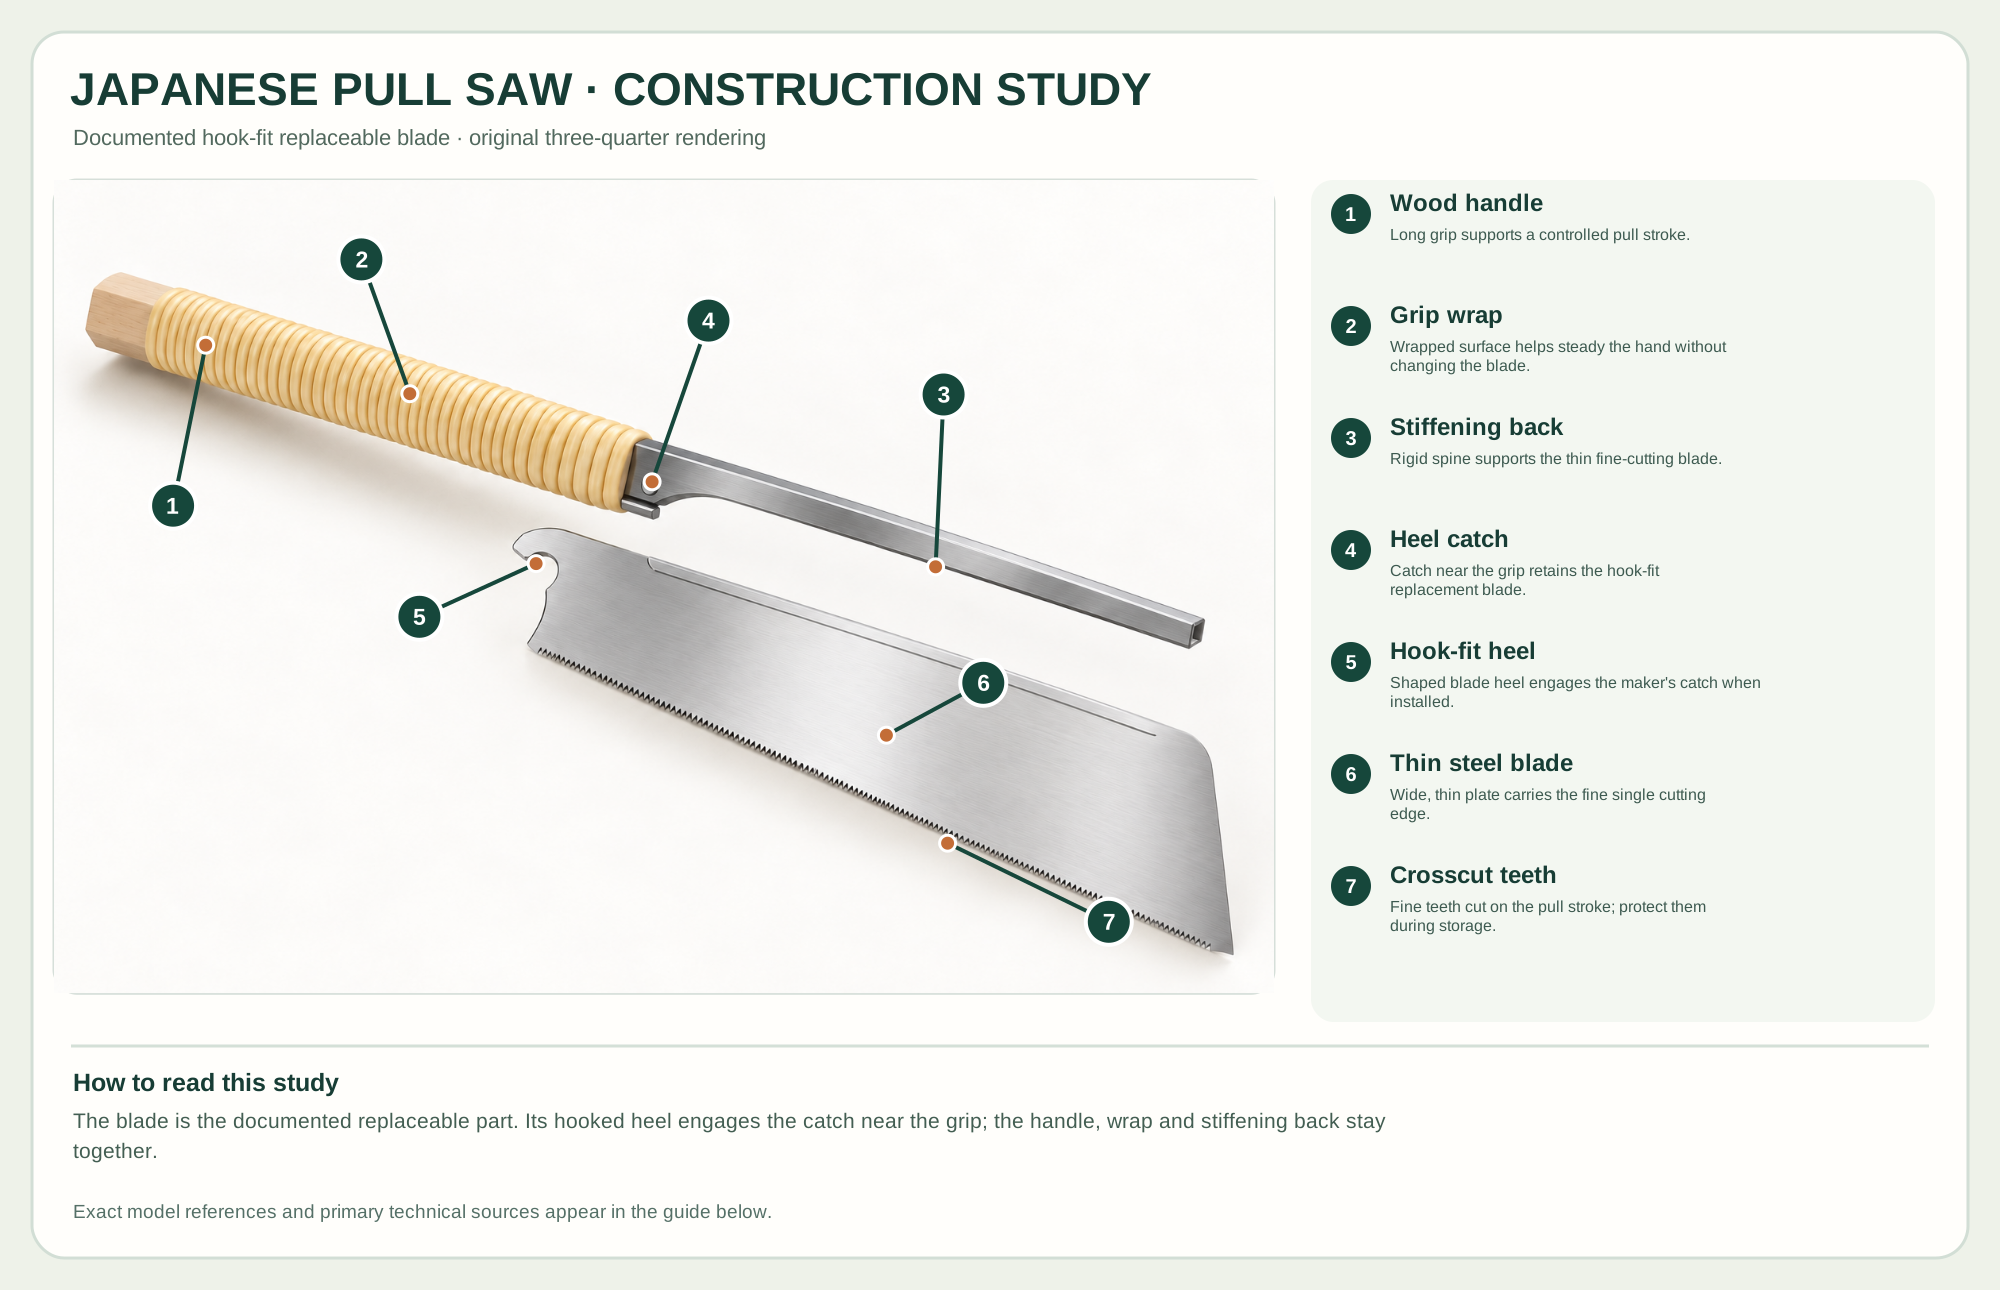
Long grip supports a controlled pull stroke.
Wrapped surface helps steady the hand without changing the blade.
Rigid spine supports the thin fine-cutting blade.
Catch near the grip retains the hook-fit replacement blade.
Shaped blade heel engages the maker's catch when installed.
Wide, thin plate carries the fine single cutting edge.
Fine teeth cut on the pull stroke; protect them during storage.
Technical references: Z-Saw Dozuki WIDE H-240 official product · Z-Saw official blade replacement directions. The maker's replacement directions support withdrawing the hook-fit blade from its back and latch near the grip. The intact handle and back are not shown dismantled. Original educational artwork depicts documented component groups and their relationships; it is not a service sequence or a replacement for the exact model manual.
The Z-Saw Dozuki WIDE H-240 (07031) is a backed Japanese pull saw with a 240 mm replaceable crosscut blade. The maker lists a 1.00 mm pitch, 0.30 mm blade and 0.40 mm kerf. The back stiffens the thin plate for fine, shallow joinery cuts and limits depth. A ryoba lacks that backing and has two tooth edges; it is a different saw, not a hidden mode of this model.
Fine teeth cut as the operator draws the handle toward the body. The blade's hooked heel engages the manufacturer's catch near the grip in the stiffening back. The blade is the documented removable group; the wood handle, wrap and back remain together in the educational study. A light start and straight pull reduce buckling or binding.
The long grip supports a two-handed or extended hand position for a straight pull. The wrap provides traction.
The rigid spine supports the thin blade, trading maximum cut depth for precision.
The removable blade's shaped heel engages the latch near the grip. Follow the maker's replacement sequence and use the exact compatible blade.
The wide plate carries one fine crosscut edge. The thin kerf reduces waste but is vulnerable to twisting.
These decisions make the mechanism useful at the bench.
Clamp stock so the waste can separate without pinching the thin plate.
Use the near teeth and several short, light pulls against a visible layout line.
Use long smooth draw strokes after a kerf is established; ease the return without forcing the blade sideways.
The backed fine blade defines shoulders for small tenons and other controlled crosscuts.
Use a layout line and an appropriate grain orientation; check that this crosscut tooth pattern suits the exact cut.
Make small corrective cuts in supported stock without forcing the blade into a deep cut beyond its back.
Use the steps for a first pass, then inspect the work before changing the setup.
The cutting stroke draws the blade taut. Side pressure and forced pushes can still bend it.
Choose a different unbacked saw when the cut is deeper than the usable blade below the spine.
The hooked heel and catch make this blade replaceable. The poster does not imply the handle wrap or back are routine removable parts.
A dozuki's back aids fine straight work; a two-edge unbacked ryoba suits other crosscut and rip tasks.
Crosscut, rip and hybrid patterns differ; choose by grain direction and maker instructions.
Many modern impulse-hardened replacement blades are replaced rather than hand-filed; follow the exact maker guidance.
Secure the work, protect sharp edges and release any stored clamping pressure before adjustment or maintenance.
Restart with a lighter short pull; check layout, stock support, blade straightness and side pressure.
Check whether the waste is pinching, the blade is twisted or the back has reached the surface.
Stop and inspect the hook-fit heel and catch; reinstall per the official directions or replace damaged parts.
Use the exact model documentation for setup, limits and replacement parts. These lessons, documents and model pages teach relevant techniques or help compare real variations.
These maker-owned links document relevant tools and tool brands. A product brand may use another company's factory; compare the exact model before choosing parts or accessories.
Handles, irons, saw plates, clamping pads and other replacements vary by maker and model. Use the maker's documentation before changing a component.
Compare the Hand Saws family →Continue through the Tools library